This cute card comes together fairly quickly, with just a few items that you can grab from the craft section at your local Walmart the next time you go to the store. (And you can even stock up on Glue Dots®! )
Made by: Amanda Tibbitts
Time: 40 Minutes
Level: Quick and Easy
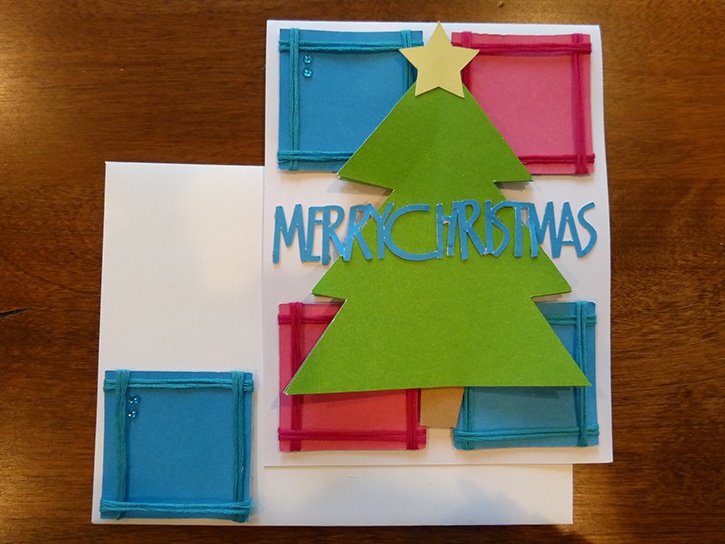
Size: 4.25” x 5.50” Card with envelope

Supplies:
- Glue Lines
- Mini Dots
- Micro Dots
- Permanent GlueTape
- Colorbök Brights Smooth Cardstock Stack
- Colorbök Neutral Smooth Cardstock Stack
- 5 die cut tree (4 green with no trunk, one brown with trunk) 3.25” wide
- 5 die cut squares 1.75” in colors for card base and envelope.
- 1” die cut star
- Die cut “Merry Christmas” sentiment at 4” wide
- Envelope
- Embroidery floss in coordinating colors to the Brights Stack
- Self-adhesive gems
- Scissors
- Paper trimmer
- Bone folder
- Craft mat
Directions:
Choose which color you’d like for the card base from the Colorbök Neutral cardstock stack. Use the paper trimmer to cut the cardstock down to 8.5” x 11” then to 4.25” x 11”. Set aside the scraps for another project. Use the bone folder to help crease the card base in half, to make it lie flat. 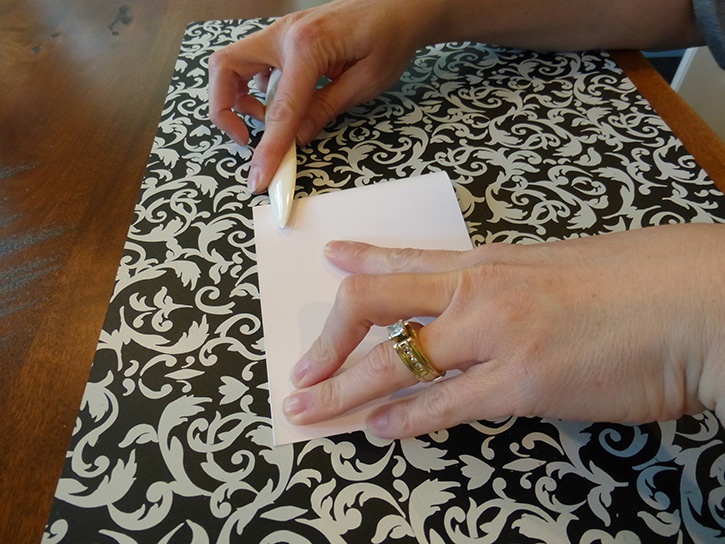
Add a tiny bit of the Glue Dots® Permanent Tape to one corner of a 1.75” square.
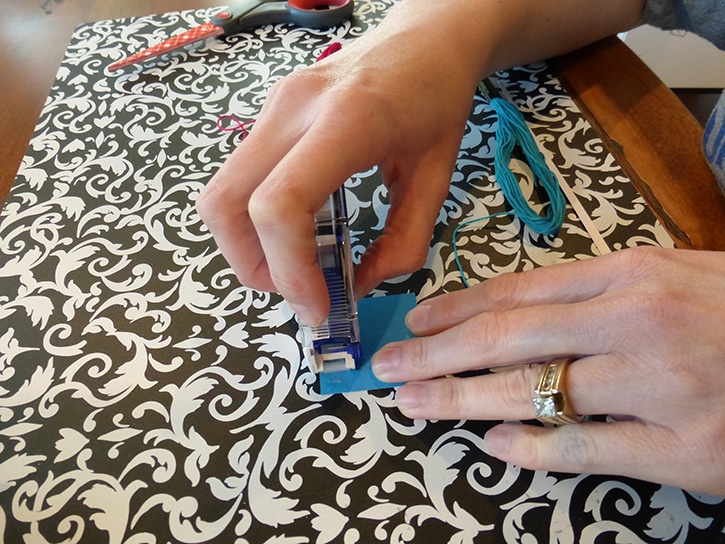
With coordinating floss, stick one end into the GlueTape and wrap it around the square 2 times, plus a bit more to meet at the rest of the Glue Dots® adhesives on the back. Press the end in and use the scissor to cut the excess. 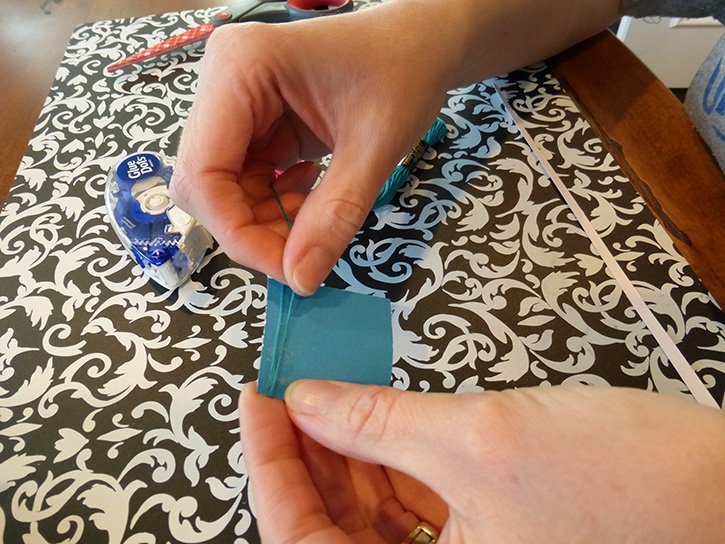 Follow these steps, wrapping the floss around the other sides of the square. Do this to the other squares as well, using a coordinating floss for each square.
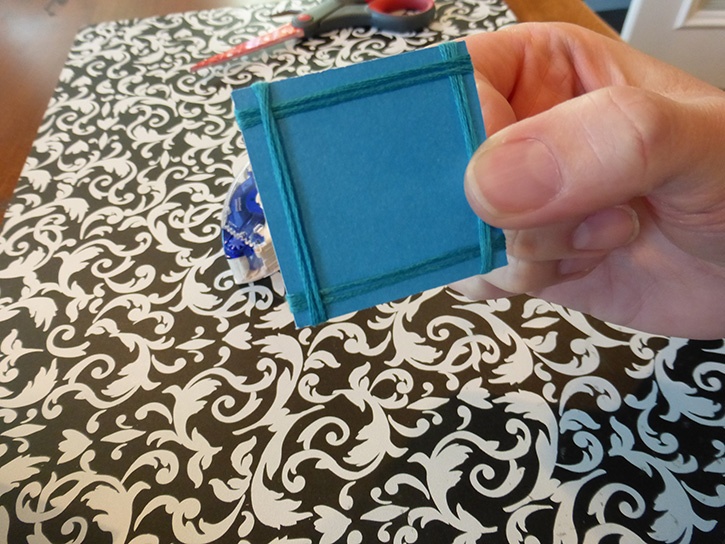
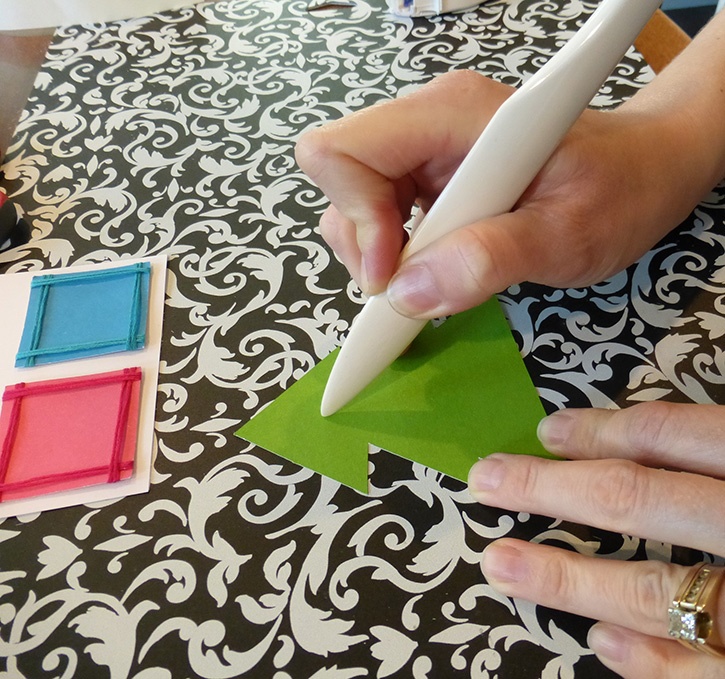
Next, lightly press the bone folder down the middle of 3 of the 4 green trees. This will make a score line to add a bit of dimension. Fold up one side slowly so you don’t wrinkle the tree. Once all the trees are scored and folded, you can cover the back of the fourth non-folded one with the tape runner and glue it to the brown tree (that has a trunk). Line it up so the folded ones will trees line up with the base.
Using Glue Lines, add one line to either side of the score line all the way down on the back of the tree. The Glue Lines are very strong so you may only need three lines for each tree. Glue all of the layers of the trees to the one on the brown tree.
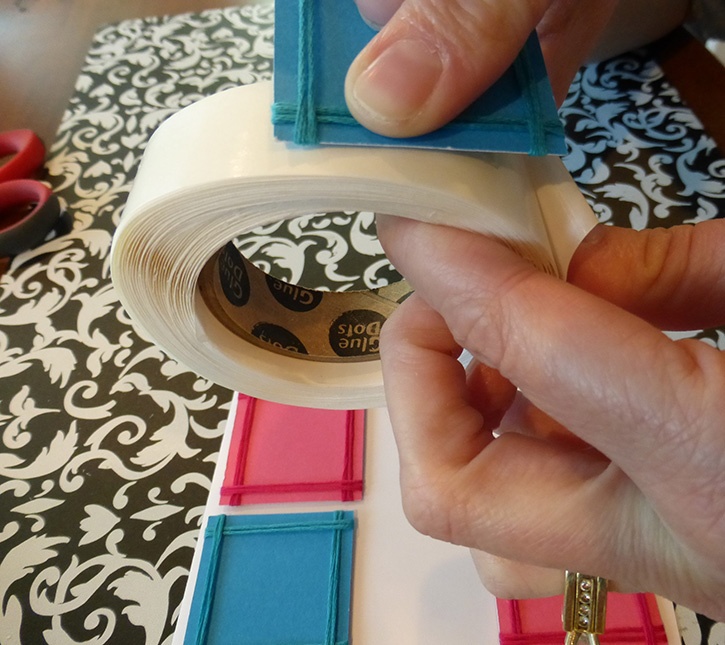
With the Permanent GlueTape run adhesive down the middle of the back of each square. Use the Glue Lines to add adhesive to the floss. Stick four of the squares to the card base, being careful to line them up as straight as possible, with equal space between each one. Then attach the last one to your envelope. I placed mine in the bottom left corner on the front.
Cover the back of the assembled tree with gluetape and place it in the center of the squares.
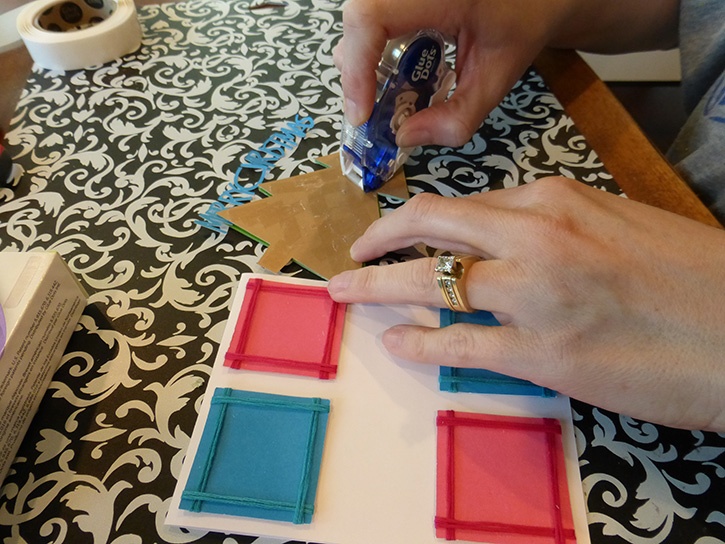
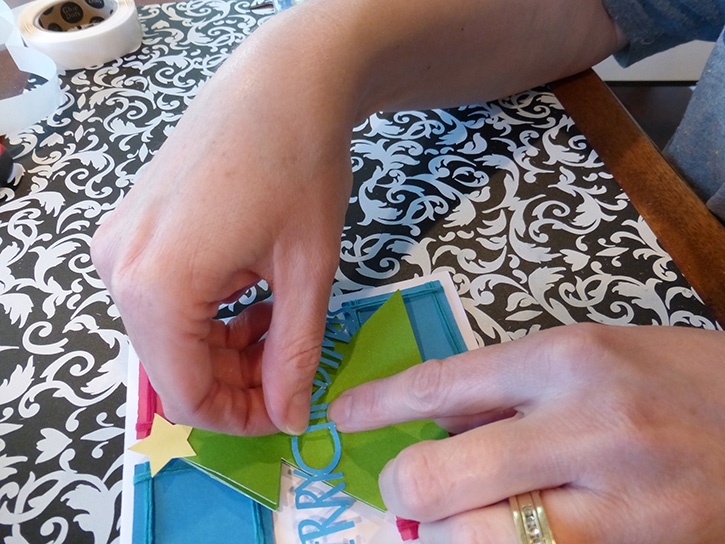
With the tape runner, run a few lines across the bottom part of the die cut star and place on the top of the folded tree.
Use Micro Dots to cover the entire back of the “Merry Christmas” sentiment. 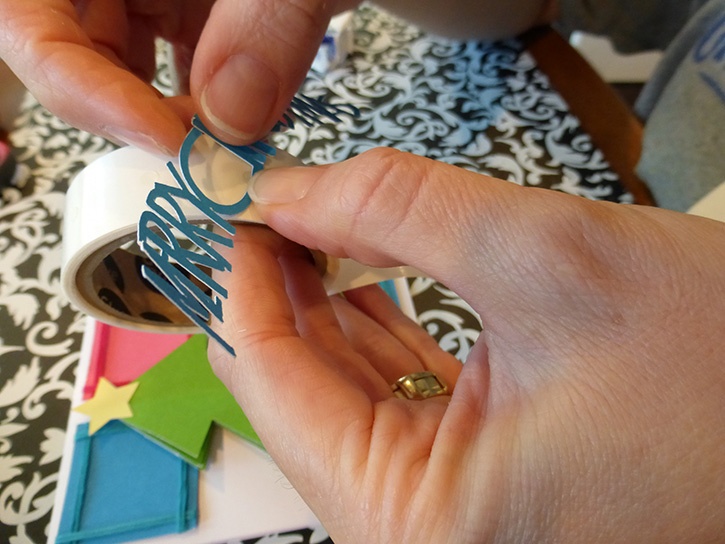 Place this across the front of your now mounted Christmas tree. If you start with the middle of the sentiment going across you should be able to glue it a bit easier.
Add two coordinating self-adhesive gems to the top left corner of one of the squares. Then, add two more to the envelope square the same way.

This card has so many possible color combos with all the amazing papers, floss and gems you can find at your local Walmart. Don’t forget to get some amazing Glue Dots® while you’re there!
~ Amanda

I began crafting in 1996 and simply fell in love with making my own cards. Long live snail mail! Crafting isn’t just a hobby for me, but a way of life… Teacher gifts, posters, scrapbooks, wood crafts? Yes, please! I have been married to my cute husband for 16 years and he definitely inspires me to try new things and enjoy the little things. As a stay home Mom, my time is spent raising my two girls, and raising the bar for my gift giving!


