We love wood projects for the holidays and Easter is no exception! Designer Donna shows you how to make an Easter bunny with wood panels and Glue Dots.
Designed by: Donna Budzynski
Time: 15 Minutes (not including dry time)
Level: Beginner
Here's what you need:
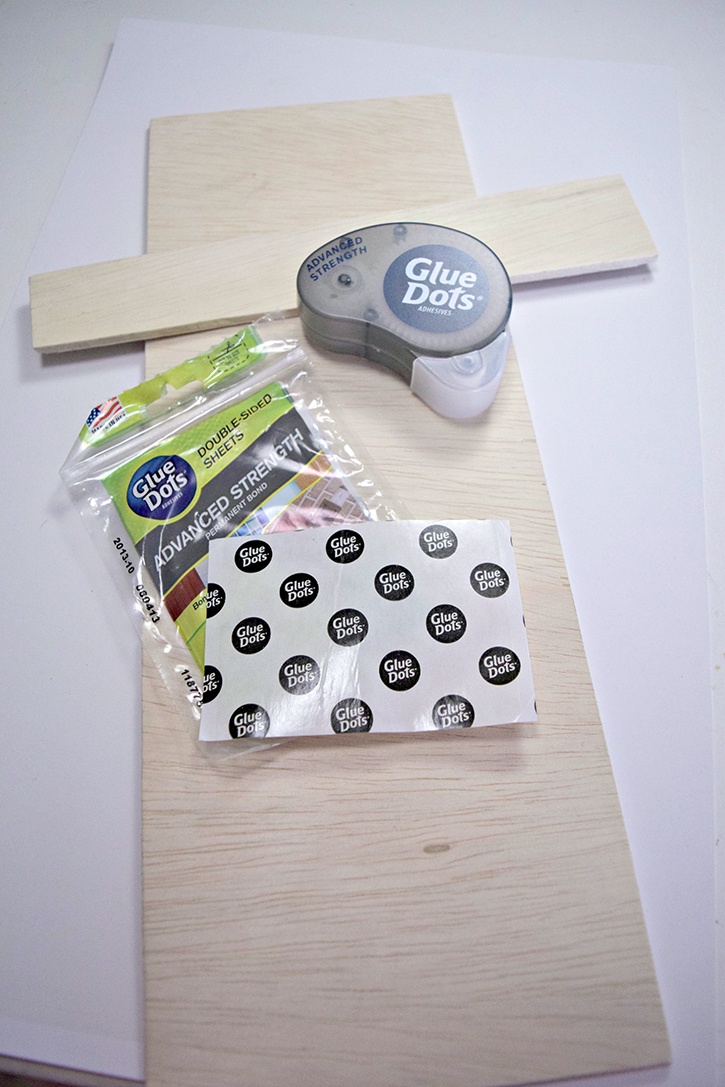
- Glue Dots® Advanced Strength Dispenser
- Glue Dots® Advanced Strength Double-Sided Sheets
- Wood Panel – Mine is 5 ½” X 15 ½” (you can purchase already cut panels at Michael’s or Hobby Lobby or have them cut to size at your local hardware store)
- Wood for Brim
- Paint – I used Deco Art Americana – Citron Green, Poodleskirt Pink, Buttermilk and White
- 2 Black buttons
- 1 - 8 ½” X 11” cardstock – Cream (ears)
- Wood Shapes – 2 Circles and 1 Flower Petal
- Black Marker
- Scissors
- Pencil
- Distress Ink and sponge (optional)
Here's what you do:
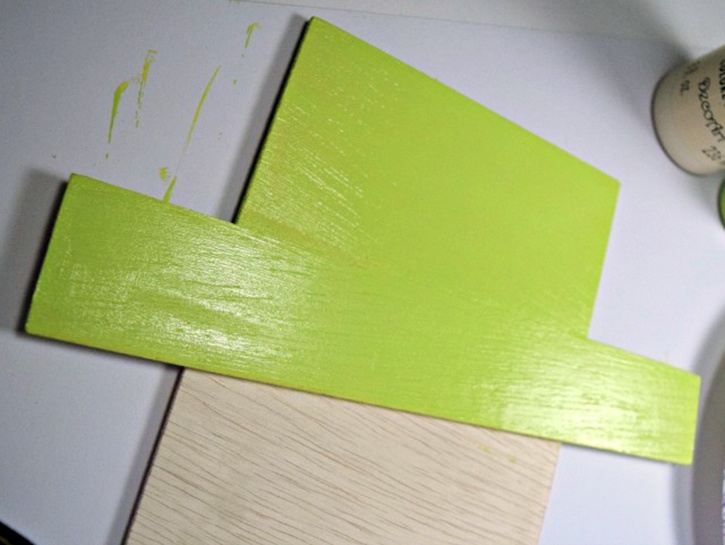
Paint hat and brim using color of choice, I used Citron Green. Paint nose using Poodleskirt Pink and set both pieces aside to dry.
Paint bunny and two circles using Buttermilk. Once the two circles are dry, add a bit of distress ink around the outside edges.

Using an 8 ½” X 11” piece of cream cardstock fold in half, so it should be 4 ¼” X 11”. Draw ears or freehand cut ears out. Adhere ears at the brim line using the Advanced Strength dispenser.
Cut the Advanced Strength Double-Sided sheets to fit the brim and adhere over the ears for the brim of the hat. Press the brim of the hat firmly over the ears on the head of the bunny.

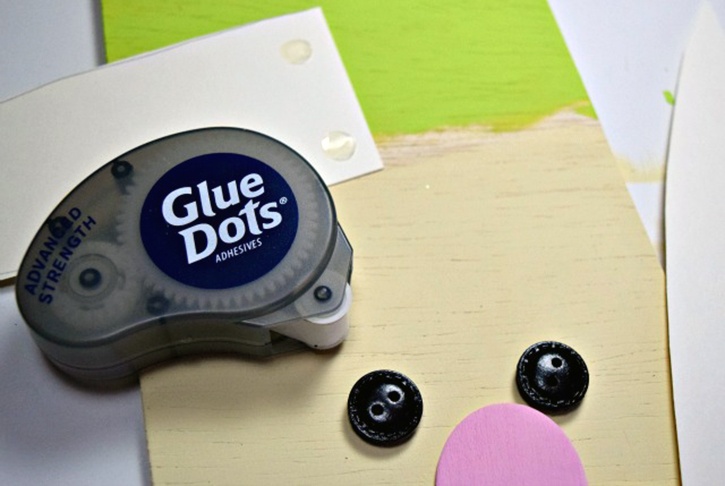
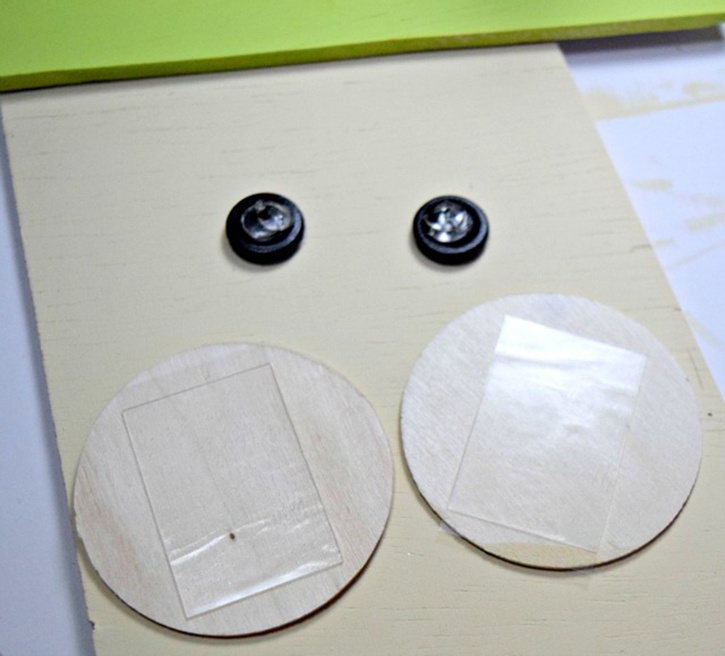
Also use the Advanced Strength dispenser to adhere the buttons (bunny's eyes) on to its face. Press each button firmly in place for a strong secure hold.
Cut the Advanced Strength Double-Sided sheets to size for the circles. Press the adhesive firmly on to the adhesive, then press the circles firmly in place on bunny's face.
Adhere nose using the Advanced Strength dispenser. Sketch out eye brows, mouth and teeth with a pencil and then go over with marker once satisfied.
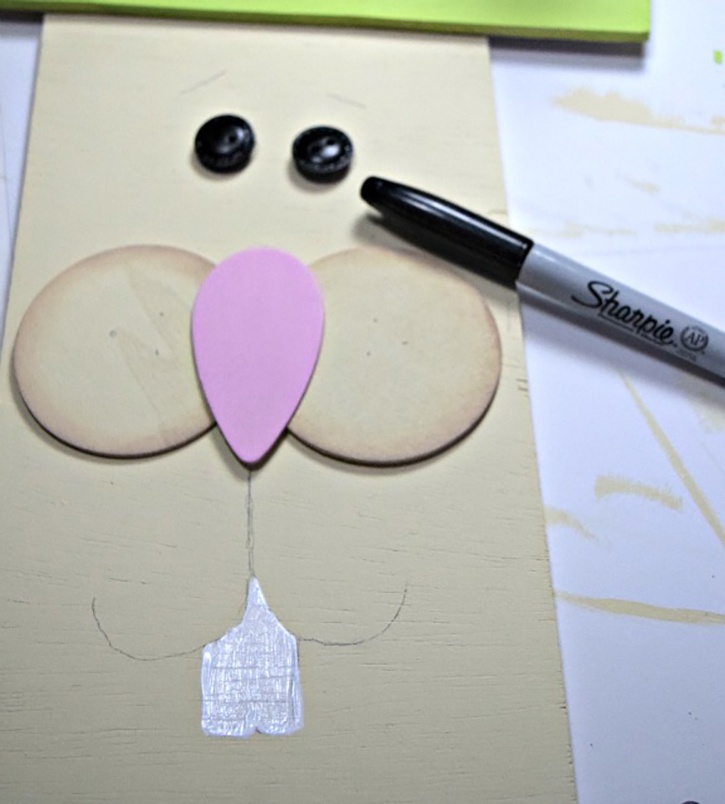
Paint teeth white and let dry.
**Options to make it your own. You can use material for the ears. Add flowers to the hat. Paint the hat plaid. You can add a hanger to the back or just let it sit on a shelf. Use an old pallet piece for the body to stand outside your front door. So many ways to make this your own.
Enjoy!


Hello! I am Donna and I am the lady behind Memes Art Place. My passion is Art! I love every media of art. I never lost my first love, crayons! I have been lucky enough to have been published in a variety of magazines and have even been a featured artist! Stampington and Company has published my art on more than one occasion. I paint, draw, mixed media, sculpt….let’s just say I do a bit of everything! I am currently on 3 design teams and I am in my third term for Glue Dots. I am very lucky to have nature’s beauty surround me every day, as I live in the Rocky Mountains in a small valley. I live between Aspen and Vail. I live here with my husband and my tiny Yorkie Tina. I have two grown daughters and 3 grandchildren.


