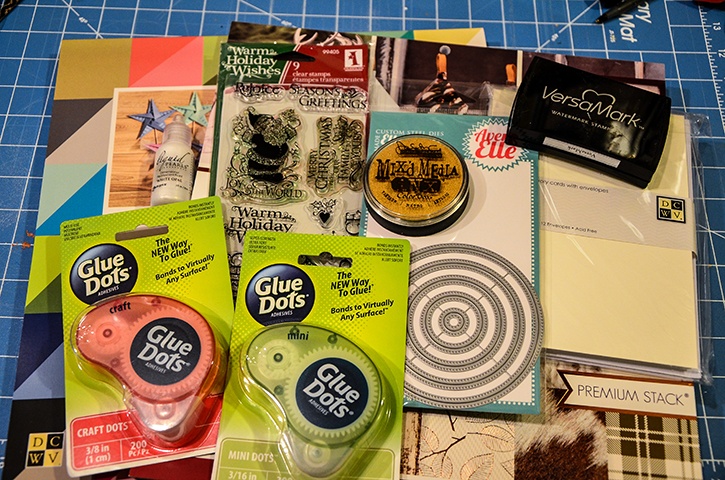
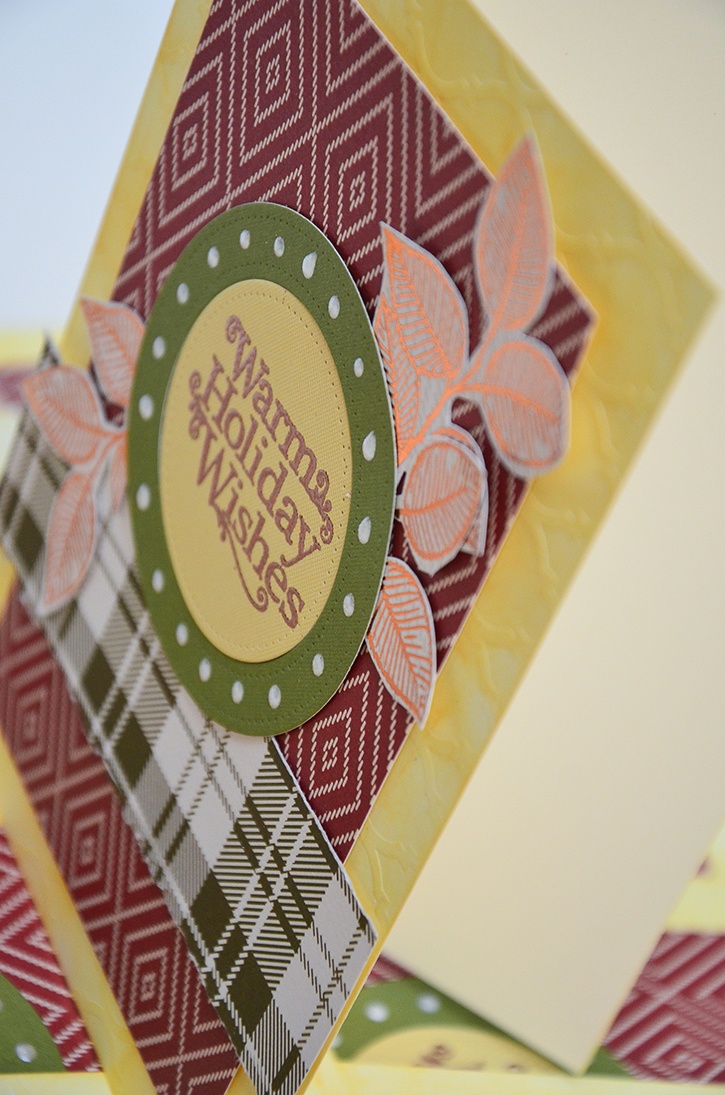
I find handmade Christmas cards to be the best way to pass on some holiday cheer to family and friends. Getting them done in advance makes it easy for me to fully enjoy the season. And my favorite trick to get this checked off my list is mass producing one design. The card set from Die Cuts With A View is a great starting point because it already comes with envelopes.
Made by: Grace Tolman
Time: Approximately 1 hour (to make 12 cards)
Size: Each Card is 4" x 6"
Here's what you need:
- Glue Dots® Mini Dots™
- Glue Dots® Craft Dots™
- Card- A7 Embossed Ivory Cards with envelopes, Die Cuts with a View
- Pattern papers- Luxe Lodge, Die Cuts with a View
- Cardstock- (Flipside, Jewel Toned Textured) Die Cuts With a View
- Stamps- Holiday Expressions, Inkadinkado
- Ink- Vintage, Mix’d Media Inx, ColorBox
- Liquid Pearls- White Opal, Ranger
- Copper Embossing Powder
- Die cut- Double Pierced Circle Die, Avery Elle
- Scissors
Here's what you do:
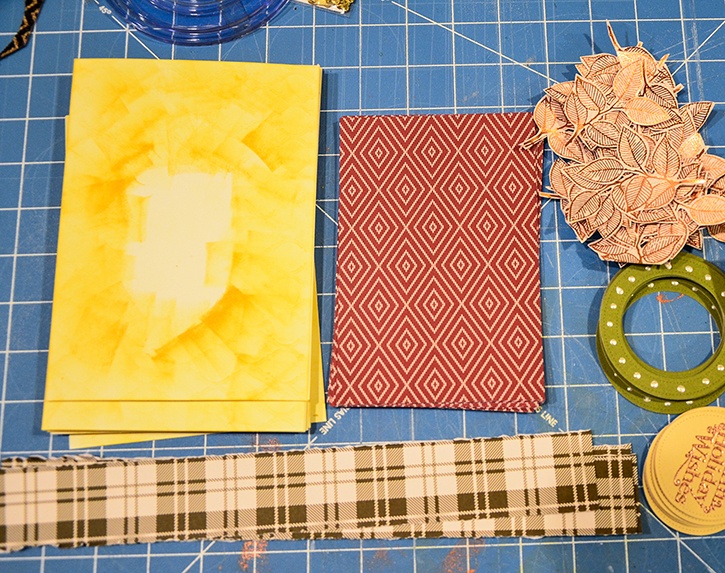
Cut the maroon pattern paper into 4" x 6" panels. (You will need 2 sheets of 12" x 12" to complete all 12 cards) Set aside.
With the circle die cut, create the green round frame that goes around the sentiment piece. Cut about 13 and set aside. I like to cut one or two more extras in case I make a mistake during the assembly line.
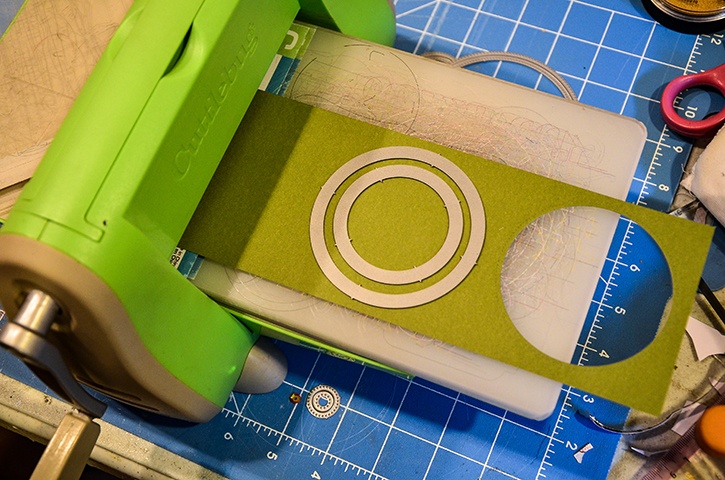
With the die cut machine and dies still on your table, cut out the circle piece for the sentiment. Make at least 13 and set aside.
Cut 6 1 ½" x 12" strips from green plaid paper. Tear the corners for a subtle effect. Set aside
Lay the green round frames onto a mat or movable surface. Add some liquid pearls on all of the frames. Move the mat out of your way to let the liquid pearls dry.

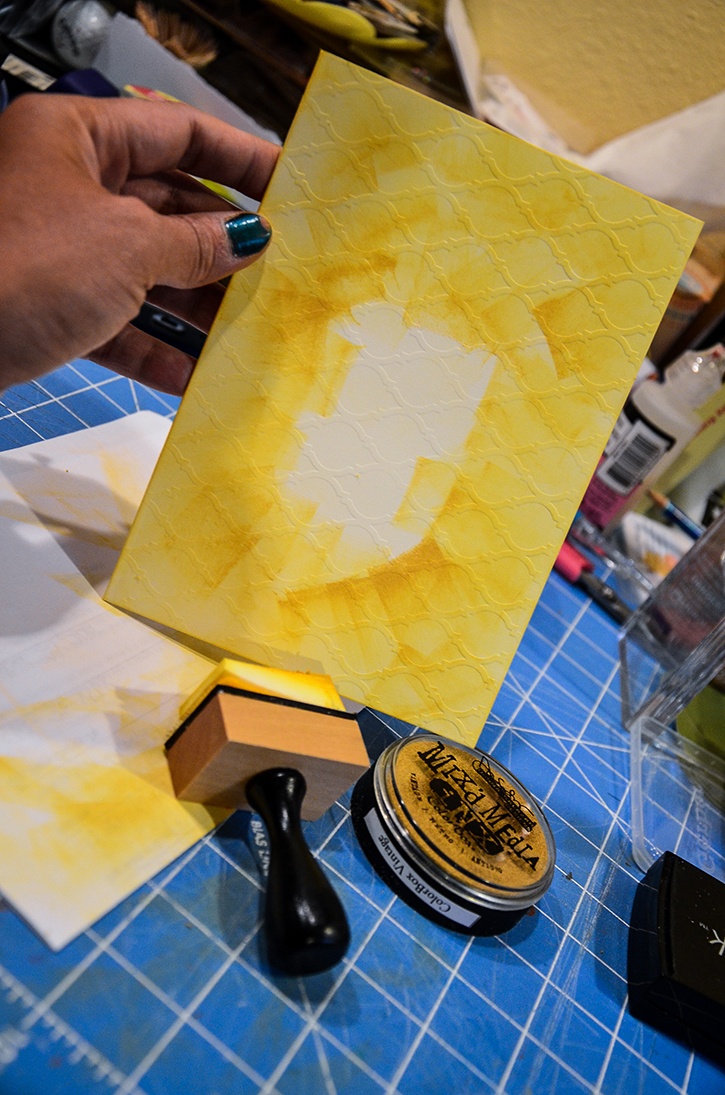
Heat emboss the sentiment onto the yellow round piece. Set aside.
Add some yellow tint over the embossed front panel of the cards with ink pad and a blending tool.
Hand cut some leaves from pattern paper and set aside.
Once your liquid pearls are dry, you can now assemble the cards.
Adhere the maroon panel onto the center of the card using Craft Dots.
Add the strip of green plaid paper on the bottom, again with more Craft Dots. Trim off excess.
Add the round green frame onto the center of the card using Mini Dots adhesive.
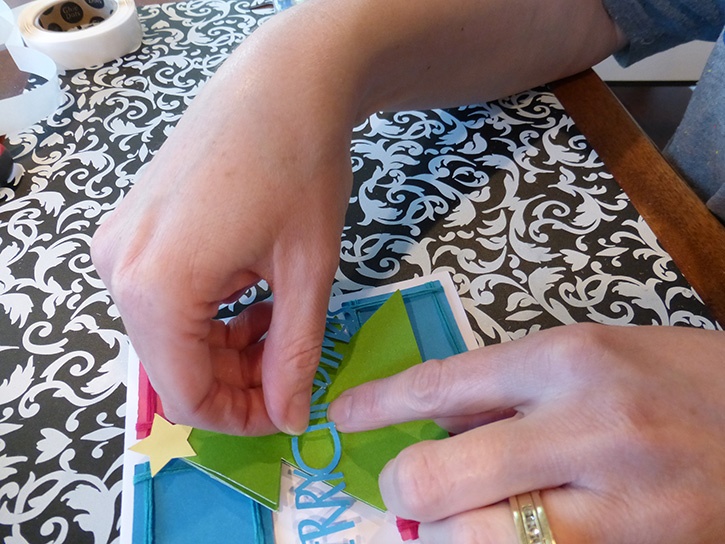
Place Craft Dots on the back of the sentiment panel and adhere it to the center of the green frame.
Add the hand cut leaves on the top right and bottom left of the green frame with Mini Dots.
~Grace

I’m a mom to a 10 year old boy and an 8 year old girl. Therefore my life is usually filled with learning, new discovery, bribery and driving to and from all of our activities. I have a loving and very supportive husband of 11 years. When the kids have gone to bed at night, my time is spent crafting while catching up on my favorite shows and movies. I also enjoy reading, window shopping, knitting and perusing blogs for inspirations. Three years ago we moved to Colorado from California and we are enjoying our new environment. I feel very inspired with my new home, my new scrapbook space and the mountain views. Although I’ve been doing some type of scrapbooking since grade school, I only started to scrapbook seriously after my son was born. When he was born I knew I would be staying at home with him but coming from a fast paced sales job I was afraid I would ran out of things to do during the day. Little did I know that with newborns you won’t have any time to do anything else. Anyways, after going through a basic scrapbooking class I was hooked and haven’t stopped scrapping since.


