No matter the season, there’s always a birthday or two to celebrate. Give your next birthday gift a trendy new look with these honeycomb birthday tags! All it takes is a little honeycomb paper and some Glue Dots® All-Purpose Dots to make the next birthday in your life, extra special.
MADE BY: SAMANTHA TAYLOR | TIME: 20 MINS
LEVEL: INTERMEDIATE | SIZE: 3” x 6 1/4”

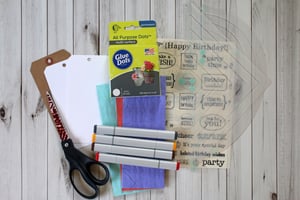
Supplies:
- Glue Dots® All-Purpose Dots
- Scissors
- Markers
- Honeycomb paper
- Tags - store bought or cut from card stock
- Templates for cutting honeycomb paper - store bought or printed off the internet
- ‘Happy Birthday’ stickers or stamps
Directions:
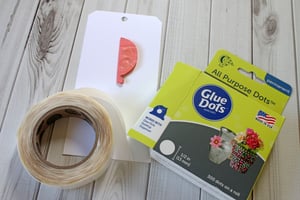
- Use templates to trace images on honeycomb paper. Make sure to line the template up with the glued edge of the honeycomb paper.

- Cut out images from honeycomb paper & use Glue Dots® All-Purpose Dots to attach fanned out honeycomb images to the tags.
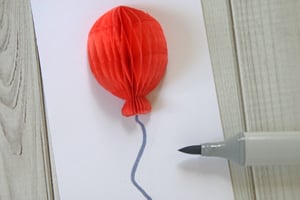
- Gather tags. The tags used here are 3” x 6 ¼”. Use markers to add extra details to the tags—for the balloon, add a string.
- For the gemstone, add shine lines.

- For the ice cream cone, add a cone and cherry on top.
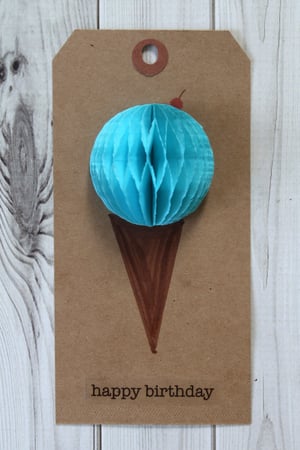
- Add a birthday greeting with a stamp or sticker.

To customize the tags, use colors that coordinate with the party or colors that are the recipient’s favorite. For a party decoration instead of a gift tag, make multiples of the tags and string them on some baker’s twine for a unique birthday banner. Enjoy!


My name is Samantha Taylor and I have a passion for combining crafting and creativity to beautify life. I live in a small town in rural Iowa with my husband and 2 boys (all 3 of whom you’ll see featured in my projects). I’m a paper crafting fanatic who also loves photography. I enjoy making lay outs, cards, mini albums and home decor items, party decorations, and crafting with my kids. My favorite thing about crafting is getting to connect with so many people all over the world who also love creating pretty things and preserving memories. You can find more from me at www.taylorstamped.blogspot.com. I am so excited to share with you my love for the many uses of Glue Dots®!


