One of my favorite things about the Holiday season is sharing some handmade greeting to family and friends. Over the years there are three things that makes mass producing handmade cards successful for me...
They are:
- Using a set amount of products for all the cards. By limiting the items I use, I can whip up these cards in no time.
- Using tools like die cuts and stamps. By repeating certain elements with my tools, I am able to create the same item over and over again with minimal cost.
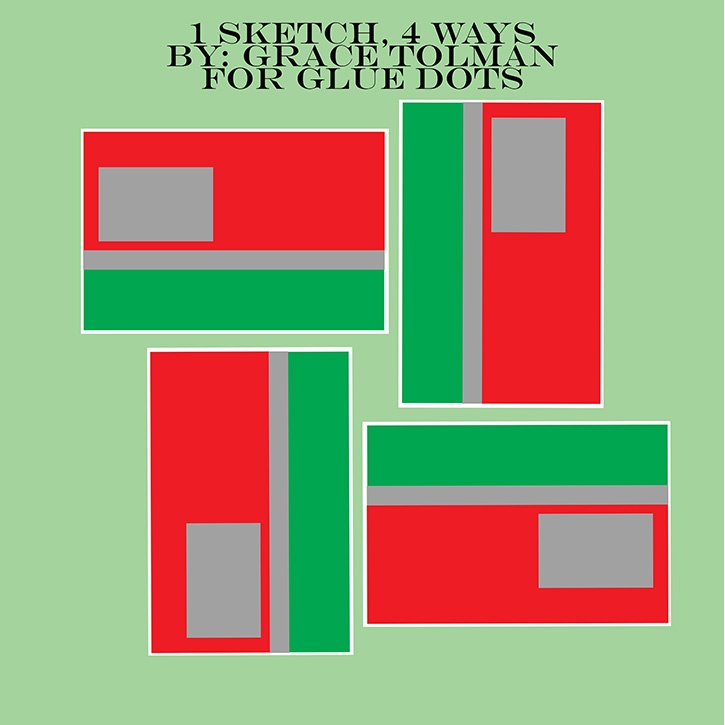
- Have a sketch or plan in place. I have a sketch (my free card design is below) that I used for all the cards. If you don’t like using ONE sketch for all the cards, flip the sketch 3 more different ways to get 4 different looks from the same sketch.
One more note, the paper pack that I used not only had pattern papers but it also included specialty papers like foil lined and glitter. By using a multi pack like this, I was able to add some interest to my cards without having to pull more products from my stash.
Made by: Grace Tolman
Time: Approximately 2 hours for 15 cards
Level: Beginner
Size: 4 ½” x 5 ½” each card
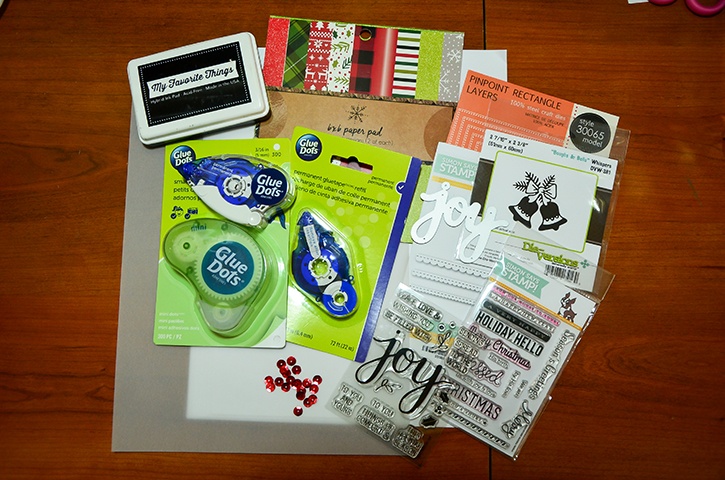
Here's what you need:
- Glue Dots® Permanent GlueTape™
- Glue Dots® Permanent GlueTape™ Refill
- Glue Dots® Mini Dots™
- Cardstock- (white) Solar White, Neenah
- Vellum- WorldWin Cardstock
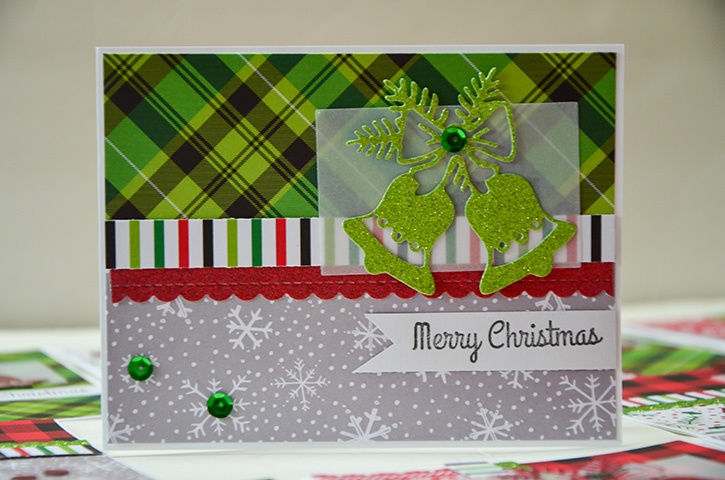
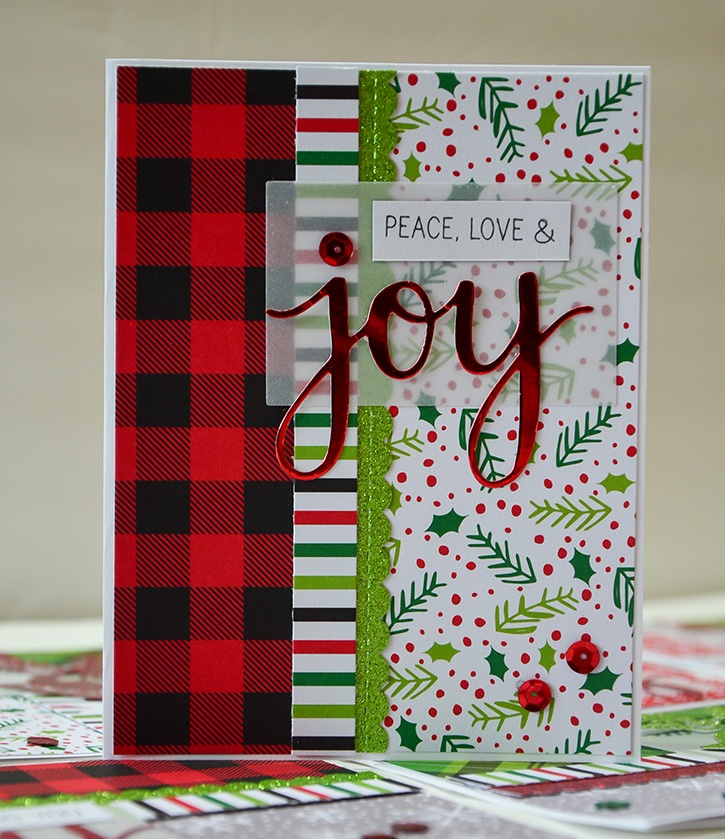
- Other papers- 6" x 6" Holiday pack (376676), American Crafts
- Sequins- Source Unknown
- Stamp- (Joy) Hero Arts; (Holiday Hello) SSS 101365, Simon Says Stamp
- Die cuts- (Joy) Hero Arts; (Christmas Bells) Die Version; (Rectangle) Pinpoint rectangle layers, Memory Box; (Scallop stitches) SSS 111612, Simon Says Stamp
- Inks- (Black) Hybrid, My Favorite Things
Here's what you do:
Create all the card bases you need using white cardstock. All of my cards bases are cut to make A2 cards (4 ¼" x 5 ½").
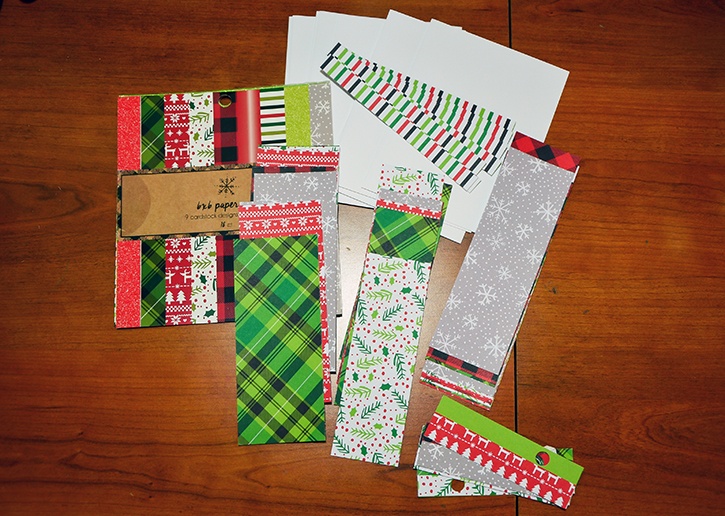
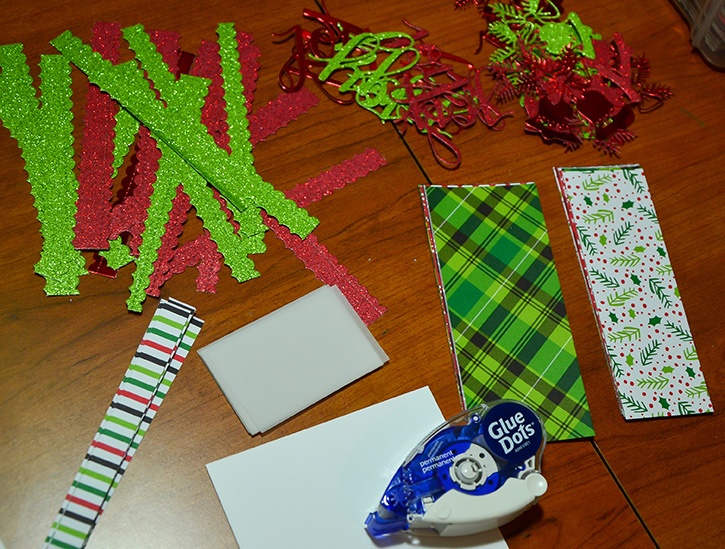
Work on cutting all the papers first. Assembly line style of putting these cards would make your process efficient and enjoyable. I had cut all of the patterns papers into 2" x 5 ¼". For the striped paper, I cut them into ½" x 5 ¼" pieces. I saved all of the extras to use for sentiment stamping later.
I also worked on die cutting all of my elements all at once. I cut the word "joy", bells and scallop edges from the specialty papers.
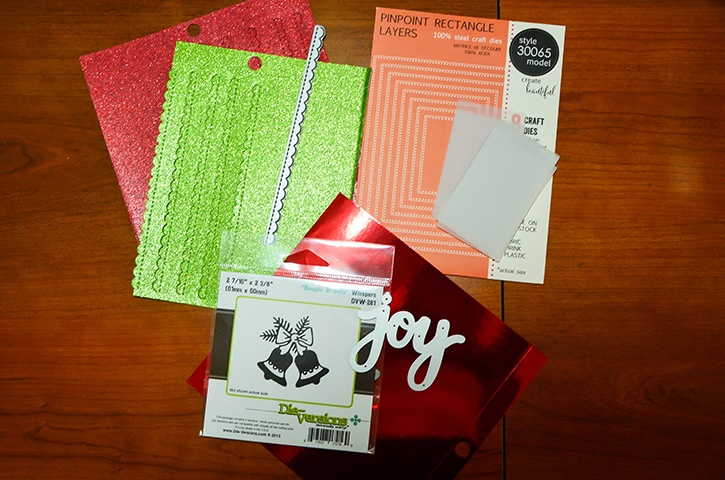
The stitched rectangle pieces were cut from the Memory Box rectangle die using vellum paper.
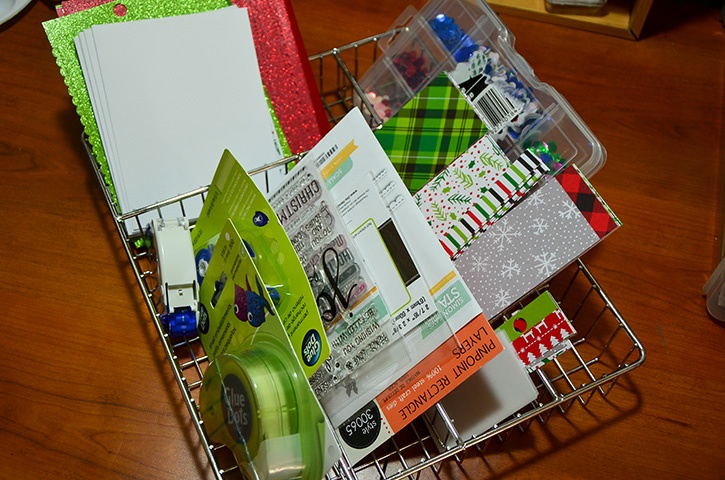
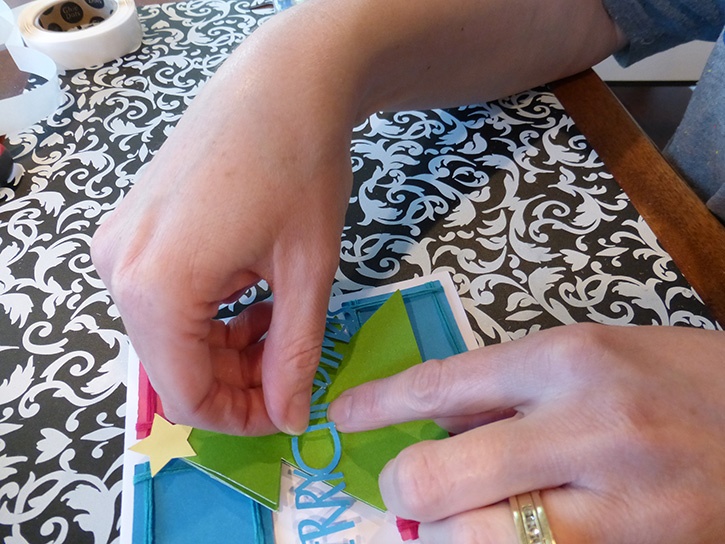
After I got everything organized in a container with various compartments, I went to work putting my cards together.
The first thing I did was adhere the pattern paper backgrounds onto the card bases with Permanent GlueTape.
I then adhered a striped paper along with one scallop edge piece in between the seams of the two pattern paper using Permanent GlueTape.
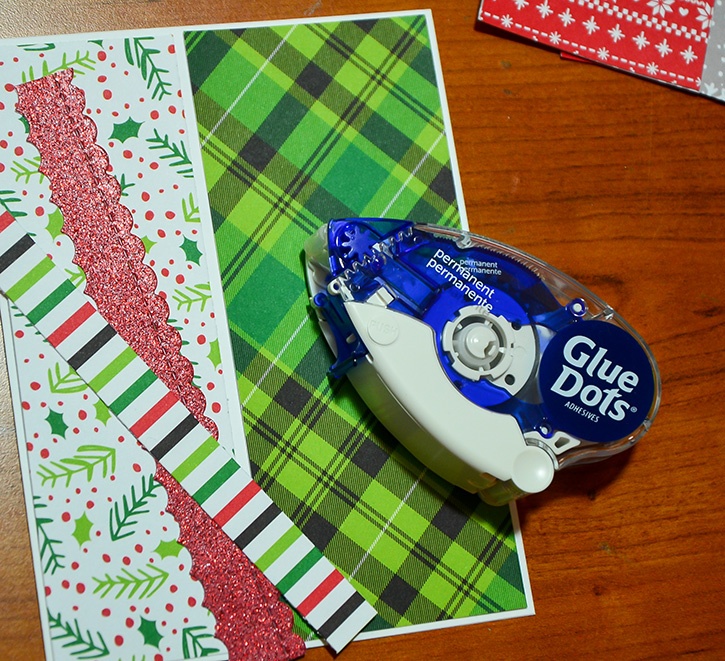
Next, I added the vellum rectangle piece on the designated spot of my card according to my sketch. More Permanent GlueTape was used to add them to the cards.
Then I figured which die cut elements I wanted to add to the card and adhered them with Mini Glue Dots.
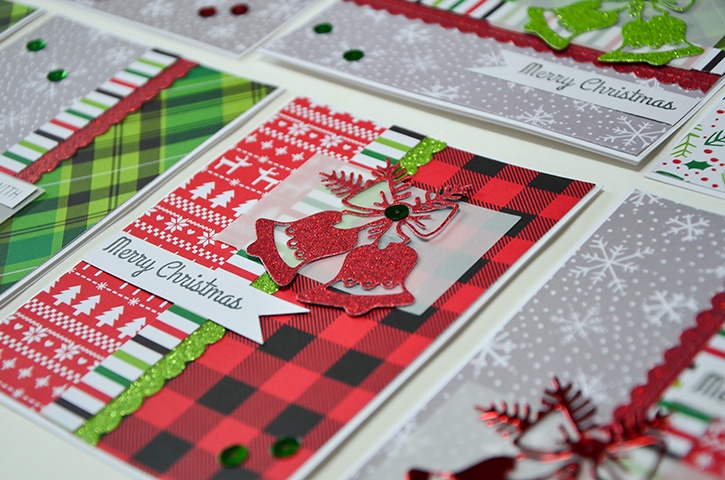
I then stamped my sentiment on the back side (white side) of the pattern paper scraps, trimmed them and then added them to my card with more Mini Glue Dots.
I finished each card with a sprinkling of sequins adhered with Mini Glue Dots.
Card making made easy! Check out my other mass produced holiday cards here.
~Grace

I’m a mom to a 10 year old boy and an 8 year old girl. Therefore my life is usually filled with learning, new discovery, bribery and driving to and from all of our activities. I have a loving and very supportive husband of 11 years. When the kids have gone to bed at night, my time is spent crafting while catching up on my favorite shows and movies. I also enjoy reading, window shopping, knitting and perusing blogs for inspirations. Three years ago we moved to Colorado from California and we are enjoying our new environment. I feel very inspired with my new home, my new scrapbook space and the mountain views. Although I’ve been doing some type of scrapbooking since grade school, I only started to scrapbook seriously after my son was born. When he was born I knew I would be staying at home with him but coming from a fast paced sales job I was afraid I would ran out of things to do during the day. Little did I know that with newborns you won’t have any time to do anything else. Anyways, after going through a basic scrapbooking class I was hooked and haven’t stopped scrapping since.


