Made by: Amanda Tibbitts
Time: 30-45 Minutes
Level: Intermediate
Size: A2 Card
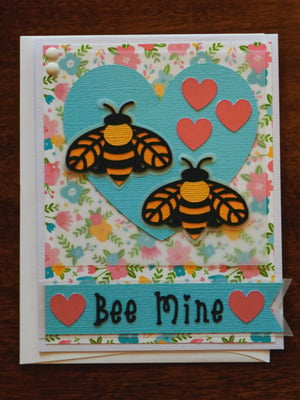
This cute card comes together fairly quick with some die cuts and the amazing Glue Dots® Adhesive Sheets for dies and vellum. Won’t you Bee Mine?
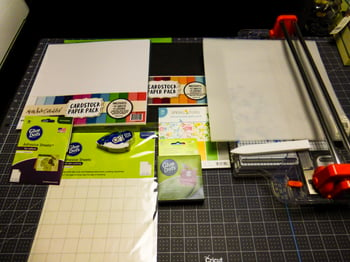
SUPPLY LIST:
Adhesive:
Glue Dots® Adhesive Sheets for Die Cuts
Glue Dots® Adhesive Sheets for Vellum
Glue Dots® Permanent Tape Runner
Glue Dots® Mini Dots
Materials:
Lawn Fawn Spring Fling 6”x6” Cardstock stack
Miss Kate Cuttables “Pirates Life” Cardstock stack
Miss Kate Cuttables “Oceans of Fun” Cardstock stack
Recollections Vellum Paper
Envelope
Tools:
Cricut Maker (or other die cut machine)
Bone Folder
Paper Trimmer
Scissors
DIRECTIONS:
Step 1:
Using Cricut Design Space, get your images ready to cut:
BEE (2): 2” wide
SMALL HEARTS: 0.65” wide
BIG HEART: 3.45” wide
VELLUM: 3.75” square
LETTERS: 2.15” wide
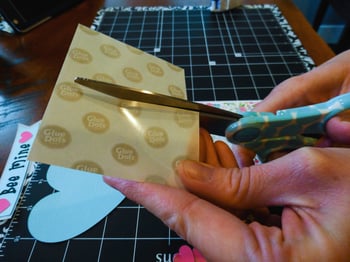
Prior to cutting, trim some Glue Dots® Adhesive Sheets for Die Cuts to fit on the colors of paper you’re using. This project is great for scraps you may have. Once you add the adhesive sheet to the back of the cardstock, begin cutting your layers with your die cut machine.
Step 2:
While your papers are getting cut, trim a card base from one of the Miss Kate’s papers to measure 4.25” x 8.5” and then fold in half. Use the bone folder to really crease the fold. Also, cut a mat at 4” x 5.25” with the Lawn Fawn Spring Fling paper.
Step 3:
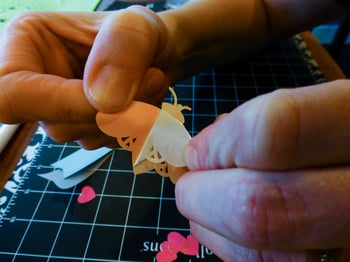
Begin layering your die cuts. With the Glue Dots® Adhesive sheets on the back, they go together so quick! Remove the backing from the die cut and you are left with adhesive to stick your layers together.
Step 4:
Once your dies are put together, use the Glue Dots® Tape Runner to add the Lawn Fawn Mat to your card base. With the Glue Dots® Adhesive Sheets for Vellum, cut one in half and place it on the top side of your 3.75” vellum square. Remove the backing and gently rub the shiny sheet to get the adhesive transferred. Stick this to the top side of your Lawn Fawn Mat.
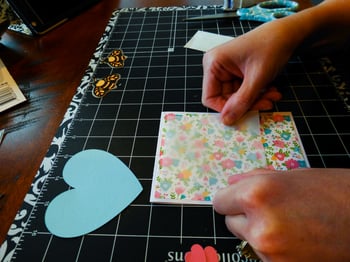
Step 5:
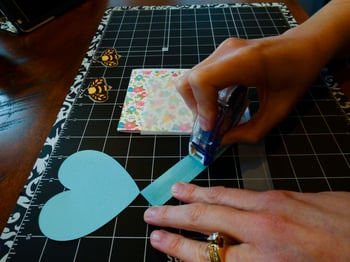
Begin assembling the rest of your elements. Use the Glue Dots® Mini Dots for the smaller pieces of the bee, and the Glue Dots® Tape runner for the heart and banner pieces.
Step 6:
Add the small hearts to the sentiment, and then to the large heart.
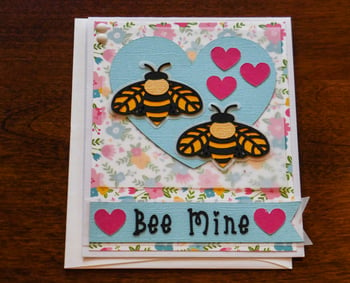
This card is so cute, and with the new Glue Dots® Adhesive Sheets, gluing layers together has never been easier!
Happy Valentine’s Day!

I began crafting in 1996 and simply fell in love with making my own cards. Long live snail mail! Crafting isn’t just a hobby for me, but a way of life… Teacher gifts, posters, scrapbooks, wood crafts? Yes, please! I have been married to my cute husband for 16 years and he definitely inspires me to try new things and enjoy the little things. As a stay home Mom, my time is spent raising my two girls, and raising the bar for my gift giving!


