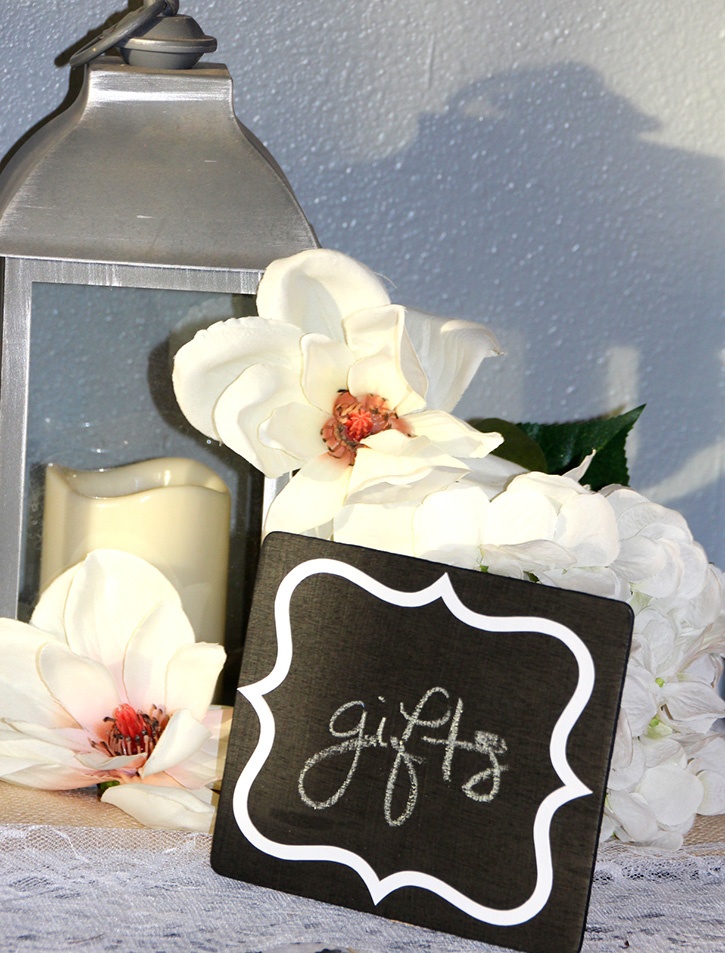
I love all of the fun wedding decorations that you can create on your own, and today I have another one for you. Mini chalkboard signs! I adore the fun little chalkboard signs that you can use for table numbers, directions and more, but the cost can really add up when buying them pre-made, so today I'm going to share how you can make a LOT of them for less.
Designed by: Robyn
Time: 10 min-24+ hrs for chalk paint drying time
Level: Moderate Handiness
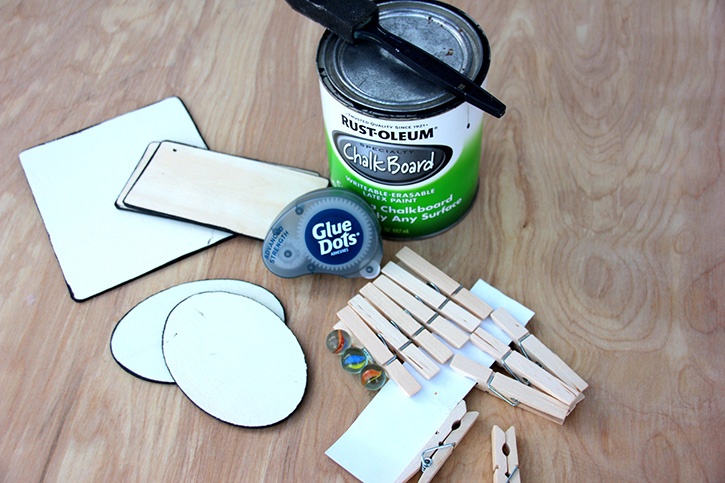
Here's what you need:
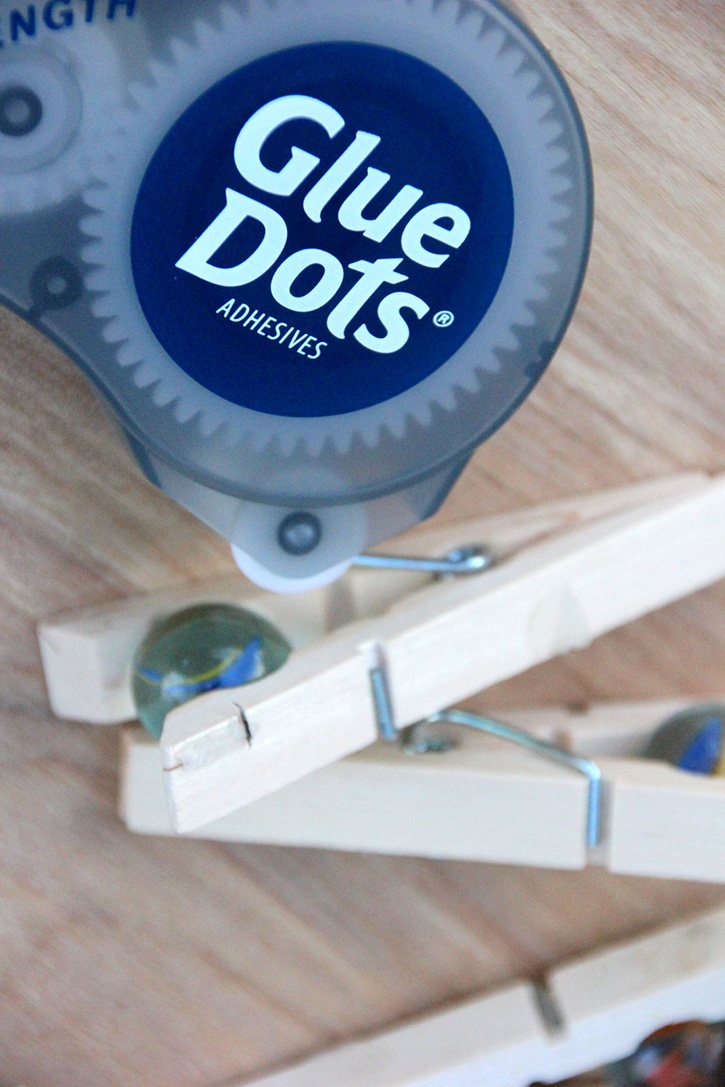
- Advanced Strength Dots™
- Paintbrush
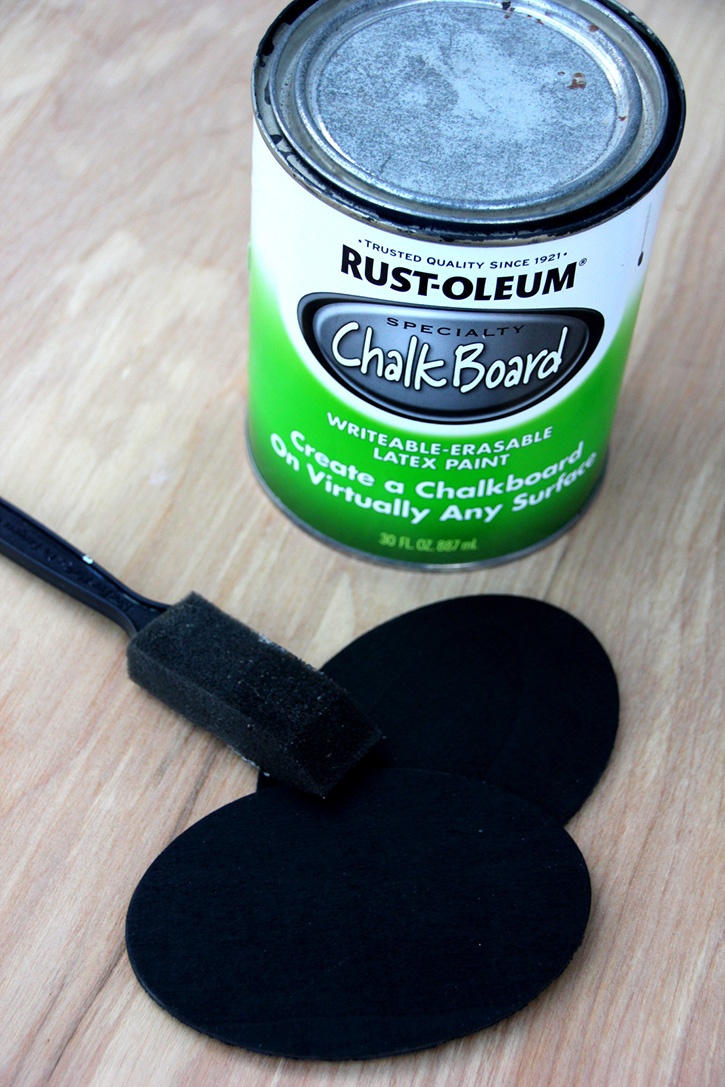
- Wood plaques (your choice of size and shape)
- Chalkboard paint
- Clothes pins
- Marbles
Here's what you do:
Take your wooden plaques and paint them with your chalkboard paint. Add a second coat if necessary and let dry for the allotted time on the paint instructions. (Most of these will dry to the touch rather quickly, but you have to wait several hours before you are supposed to write on them.)
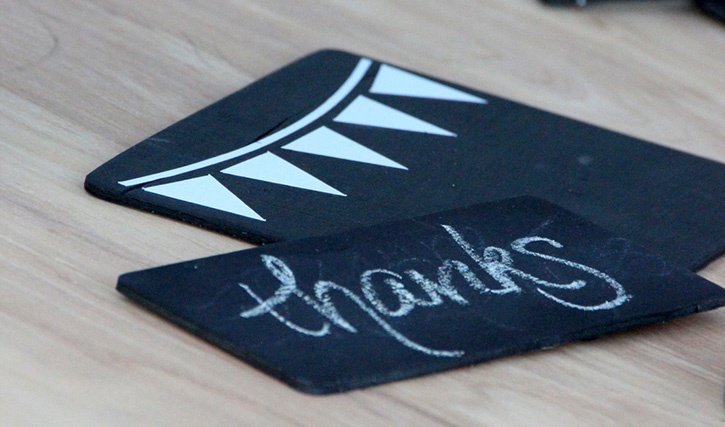
Use your vinyl cutting machine to cut out some decorative vinyl to add some flair to your chalkboards. When they are dry, place your vinyl on the chalkboards. I love this extra artistic touch. 
Place a marble in a clothespin and use your Advanced Strength Dots to keep it in place.
Using the Advance Strength Dots, adhere the clothespin to the back of the plaques, creating an easel backing that will make the plaques stand up. 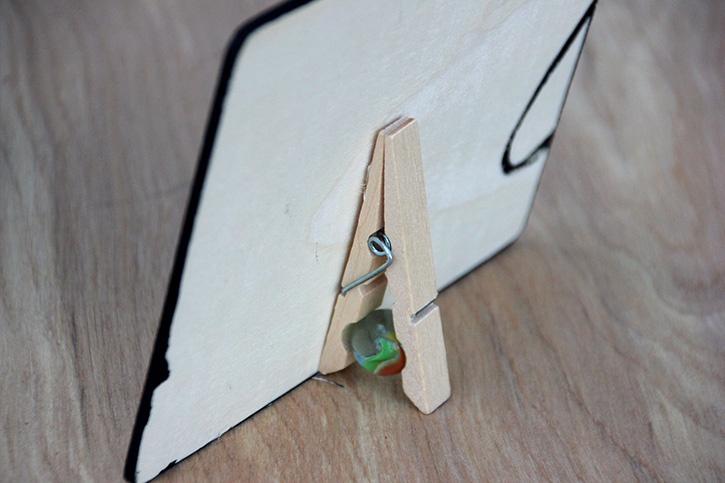
Write your messages on the chalkboards with chalk and they are ready to go!
These were soooo easy to make and they look great! The possibilities for different uses at your DIY wedding are endless! Happy DIYing!
~ Robyn
.jpg)

Hi! I’m Robyn and blog over at Create it. Go! I live in beautiful Northwest Arkansas and love being outside. I’m a mom to five fun, crazy kiddos that I love, ranging in age from 16 down to 4. And I’m a wife to a man that I love laughing wtih! I love to create. I love papercrafting, working with wood, upcycles, repuposes, and DIY’s, crafting anything in general, trying out new recipes, sewing, photography, you name it! I also like to pick up a good book and ignore those dishes and laundry that never seem to go away. haha My life is never boring and can almost always use some re-balancing and simplifying. It’s not perfect, but I love it!


