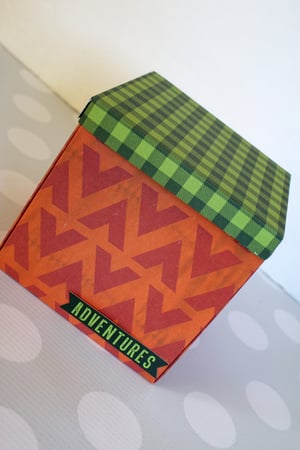
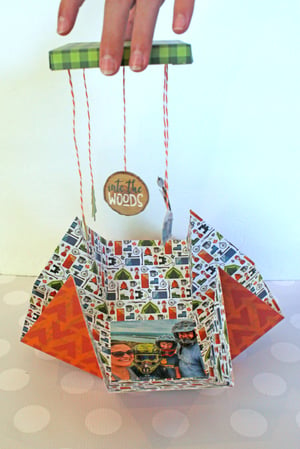
This 4” x 4” gift box fits gift cards, special notes, and small gifts. Besides housing a small gift, this special take on an explosion box holds a few fun, personalized surprises inside. Explosion boxes are so named, because they are held together by their lid and “explode” open when the lid is removed.
MADE BY: SAMANTHA TAYLOR | TIME: 30-45 MINUTES
LEVEL: INTERMEDIATE | 4” Cube

Supplies:
- Craft Glue Dots®
- 2 – 12” sheets of Patterned Paper
- Coordinating Stickers or Die Cuts
- Paper Scorer
- Scissors
- Baker’s Twine
- 4” x 4” Photo
Directions:
- Start with the piece of patterned paper you want to use for the box itself. Score at 4” and 8”. Rotate 90 degrees and score at 4” and 8”.
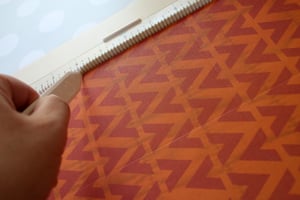
- Score each corner square diagonally from the top corner to the first score line (corner to corner).
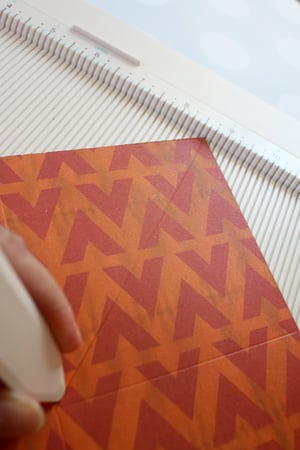
- Use Craft Glue Dots® to attach a 4” x 4” photo to the center of the scored paper. Set aside.
.jpg?width=300&height=200&name=Explosion%20Gift%20Box-005%20(Lindsey@popdotmarketing.com).jpg)
- Cut a 5” x 5” square of paper from the piece of patterned paper that you want to use for the lid of the box. Score at ½” and 4 ½”. Rotate 90 degrees and score at ½” and 4 ½”.
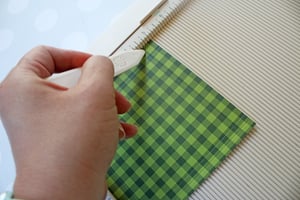
- Fold along your score lines. Use the score lines as a guide to cut a flap on each side of the lid. Fold the small flap under and secure it to the side of the box lid using Craft Glue Dots®.
- Cut 5 pieces of baker’s twine. I cut 6” – 7” pieces of twine, but you can choose a length that you like best.
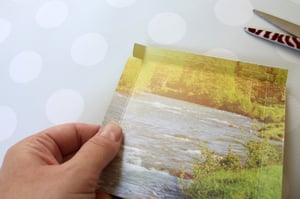
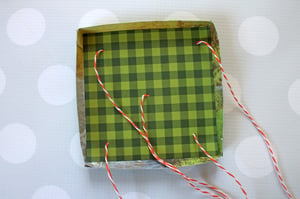
- Cut a 4” x 4” square of paper from the same piece of patterned paper as the box lid.
- Poke 5 small holes through the piece of paper you just cut and thread 1 piece of twine through each hole. Pull about 1” of twine through to the wrong side of the paper and leave the rest of the twine on the right side.
.jpg?width=300&height=452&name=Explosion%20Gift%20Box-009%20(Lindsey@popdotmarketing.com).jpg)
- Use Craft Glue Dots® to hold the twine in place on the wrong side of the paper. Add a few additional Craft Glue Dots® to the wrong side of the paper and attach it to the inside of the box lid.
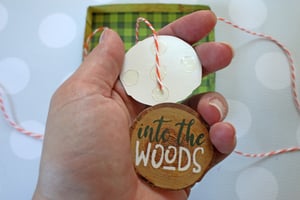
- Use Craft Glue Dots® to attach matching stickers or die cuts to the long ends of the baker’s twine hanging down from the box lid.
- Fold up the sides of your box, place your gift in the box, and place the lid on the box.
You can change out the paper to make an explosion gift box for any occasion. You can also use Ultra Thin Glue Dots® in place of Craft Glue Dots® in this project.


My name is Samantha Taylor and I have a passion for combining crafting and creativity to beautify life. I live in a small town in rural Iowa with my husband and 2 boys (all 3 of whom you’ll see featured in my projects). I’m a paper crafting fanatic who also loves photography. I enjoy making lay outs, cards, mini albums and home decor items, party decorations, and crafting with my kids. My favorite thing about crafting is getting to connect with so many people all over the world who also love creating pretty things and preserving memories. You can find more from me at www.taylorstamped.blogspot.com. I am so excited to share with you my love for the many uses of Glue Dots®!


