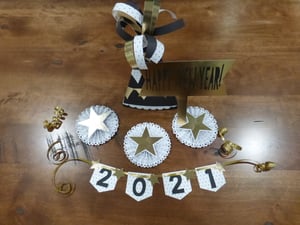
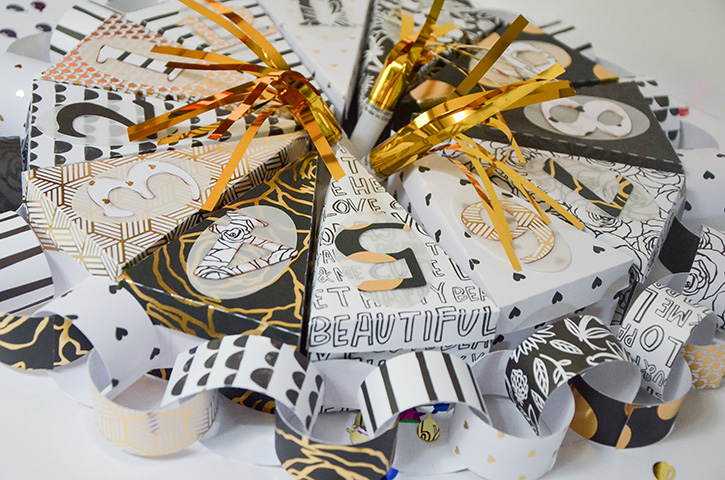
The new year is almost here! Get ready for the festivities the night-before with this table top décor—the colors can be switched up to match your party, and all the elements come together fairly quick with a few different Glue Dots® and some cute die cuts. Cheers!
MADE BY: AMANDA TIBBITTS | TIME: 2 HRS
LEVEL: INTERMEDIATE/ADVANCED | SIZE: ALL KINDS!
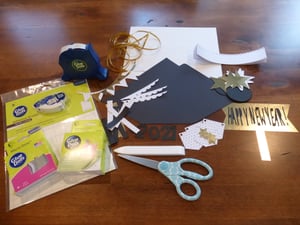
Supplies:
- Glue Dots® Pop-Up Dots
- Glue Dots® Micro Dots
- Glue Dots® Permanent GlueTape
- Glue Dots® Mini Dots
- Glue Dots® Adhesive Sheets for die cutting
- Bone Folder
- Scissors
- Curling Ribbon
- Die Cuts:
- 3D Party Hat cut at 11.5” wide
- Banners cut at 8.25”, 7.75” and 5.00” wide
- 3 Scallops cut at 4.75” wide
- 5 Streamer Strips cut at 4” tall and .5” wide
- 4 Streamer Strips cut at 3” tall and .5” wide
- Happy New Year Post cut at 7.5” wide
- Letters cut at 5.5” wide with Glue Dots® Adhesive Sheets added to cardstock prior to cutting.
- 2021 Banner Pieces cut at 2” wide
- Numbers cut at 1” wide with Glue Dots® Adhesive Sheets added to cardstock prior to cutting.
- 5 Stars cut at 1.00” wide
- 6 Rosettes cut at 8” wide and 1.5” tall
- 3 Rosette Circle cut at 2.5” wide with Glue Dots® Adhesive Sheets added to cardstock prior to cutting.
- 3 Rosette Stars cut at 3” wide
Directions:
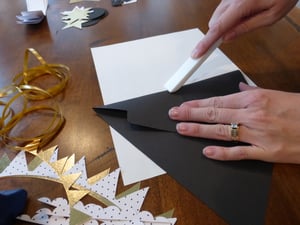
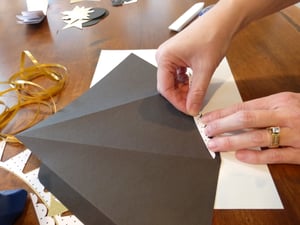
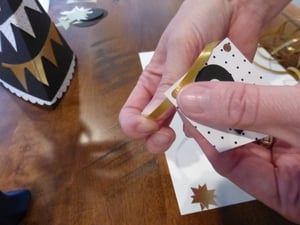
- For the Party Hat, fold along the score lines.
- Before adding Glue Dots® GlueTape to the tab, add the scallop pieces along the bottom edge with the Glue Dots® GlueTape.
- Along with some Glue Dots® Mini Dots and the GlueTape, glue the banner pieces to the hat. Lightly bend the edges along the folds of the hat.
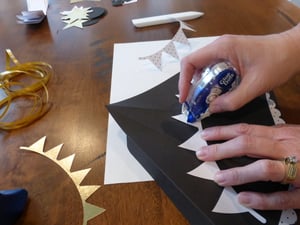
- Use Glue Dots® Micro Dots to adhere the edges of the banner pieces to the hat. Once your banners and scallops are added to the hat, run some Glue Dots® GlueTape across the tab and glue the hat together, lining up as best as you can so it will stand up straight.

- With the streamer strips for the party hat, using your thumb and forefinger, curl the strips to get a curled ribbon look.
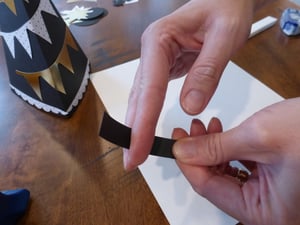
- Curl one piece at a time and add to the top of the party hat, with a Glue Dots® Mini Dot. Doing them one at a time will help you get a full look and the curls will be in the right direction.
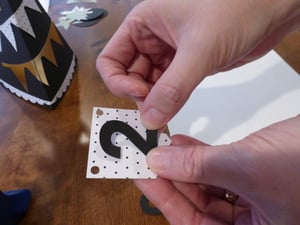
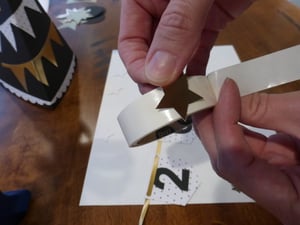
- Remove the liner from the 2021 for the small banner. Center each number on each of the 4 banner pieces.
- With the curling ribbon, run it through the holes on each banner piece. Thread as much as you’d like, and cut the excess. If you have any extra ribbon from trimming it off the banner, cut it in smaller pieces and curl it for some added fun to your display!
- Add the stars with a Glue Dot® Mini Dot in between each banner piece.
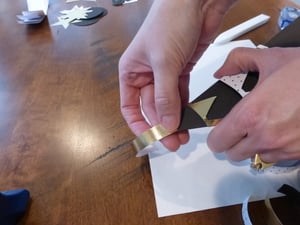
- For the Rosettes, each of them needs two strips to look full. Stick one of the edges to the second piece. Starting at one side, fold the strip accordion style. Press with the bone folder here-and-there as you’re folding to get a solid crease.
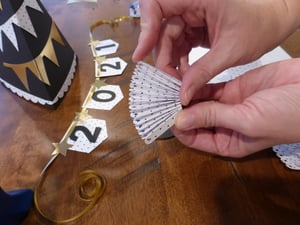
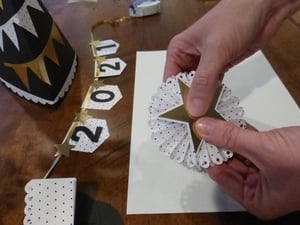
- Once the rosette is folded, add some Glue Dots® Mini Dots to one edge and glue the ends together to make a circle. Remove the Glue Dots® Adhesive Sheets’s backing on the circles and with the glue facing up, open the rosette circle to fit around it, with the scallop top face down.
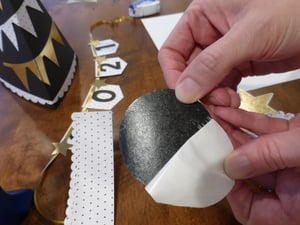
- Press the whole rosette inward and guide it over the Adhesive Sheets. Press down, while shaping your rosette as desired, leaving a smallish hole in the middle.

- With Glue Dots® GlueTape, glue the larger stars to the shadow layer.
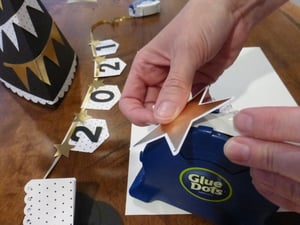
- Add a stack of 2 or 3 Glue Dots® Pop-Up Dots in the middle of the star and add to the small hole in the rosette. Push the rosette into the Glue Dots® and once added, turn it upside down and rest something heavy on it to help the glue really stick to the rosette and star.
- Remove the Glue Dots® Adhesive Sheets liner on the Happy New Year Letters and add them to the post. Arrange all of your décor around the party hat and lean the Happy New Year post on the side of the party hat, and rest the bottom in between a rosette fold to help it stand. You can add a few Glue Dots® Mini Dots to whichever side of the post to glue it to the hat if you’d like.
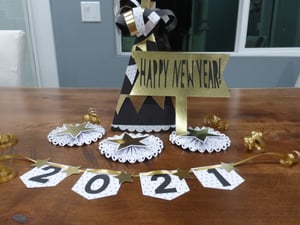
- Now that all your cute elements are done, it’s time to celebrate! Happy New Year!


I began crafting in 1996 and simply fell in love with making my own cards. Long live snail mail! Crafting isn’t just a hobby for me, but a way of life… Teacher gifts, posters, scrapbooks, wood crafts? Yes, please! I have been married to my cute husband for 16 years and he definitely inspires me to try new things and enjoy the little things. As a stay home Mom, my time is spent raising my two girls, and raising the bar for my gift giving!


