I admit it, I struggle with Valentine's Day. It's just not my favorite, this year, I was determined to create some Valentine's Day cards! Glue Dots® made this a reality, and an easy one at that. I'm sharing with you how I created this card step-by-step with you. ❤
Made by: Shannon Morgan
Time: 30-45 mins
Skill: Beginner to Advanced Beginner
Size: Card measures 4.25” W X 6” H (plus heart doily overlap)
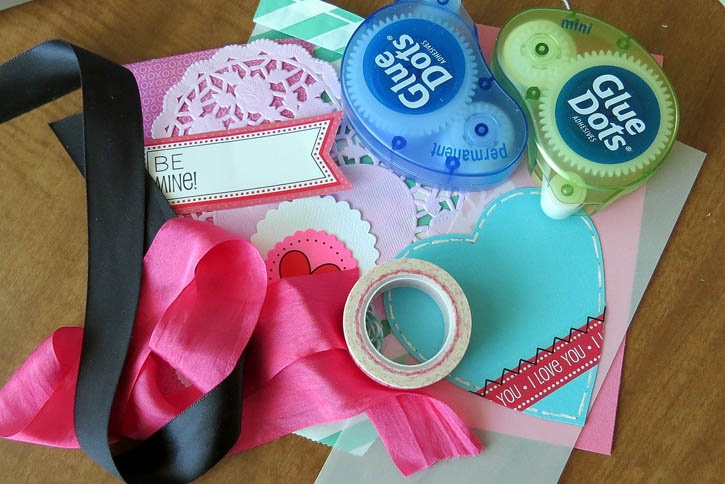
Here's what you need:
- Permanent Glue Dots®
- Mini Glue Dots®
- DCWV Textured Cardstock Jewel Tones (pink)
- DCWV Textured Cardstock Jewel Tones (aqua)
- DCWV Year Round 8.5”X11” Stack
- Vellum
- SRM Stickers Pink Heart Doily
- SRM Stickers Patterned Bag
- SRM Stickers Labels By the Dozen/Valentine
- SRM Stickers by the Dozen/Valentine
- SRM Stickers We’ve Got Your Border/Valentine
- SRM Stickers Punched Pieces
- SRM Stickers Gel Reminisce Pen/White
- Twine
- Pink Ribbon from stash
Here's what you do:
You'll want to gather up some Valentine-y supplies, a card base (either store bought or hand cut) and of course your Glue Dots.
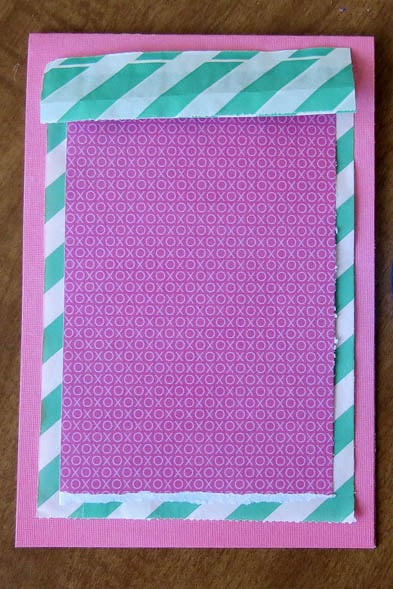
You're going to use your Permanent Glue Dots® to adhere the patterned bag piece to the card base. You can then adhere the "xo" patterned paper layer to the patterned bag. This card is now ready to go and add more layers and finishing touches.
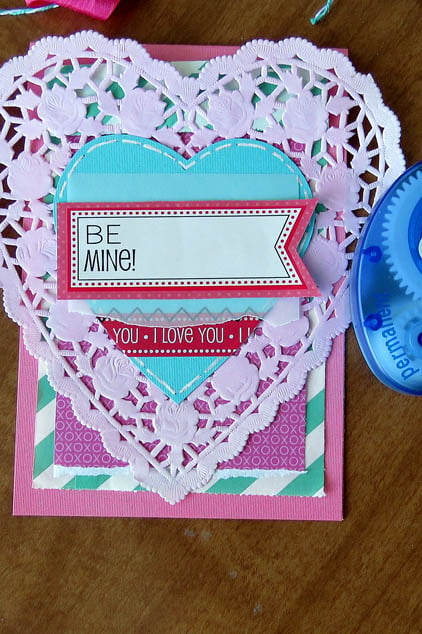
The next layer you'll want to add is the heart doily. I again used Permanent Glue Dots as shown in the photo below.
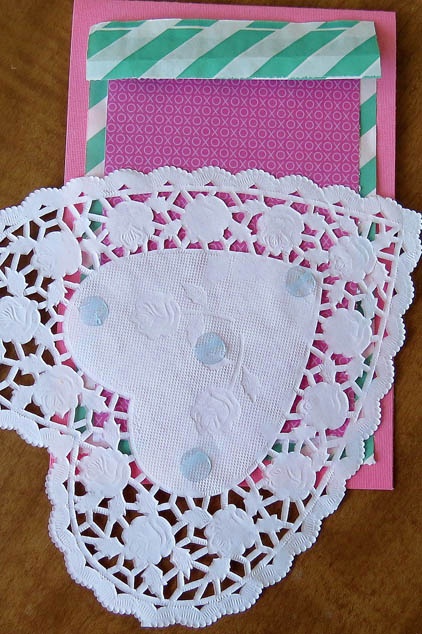
Adhere the cardstock heart into the center of the doily.
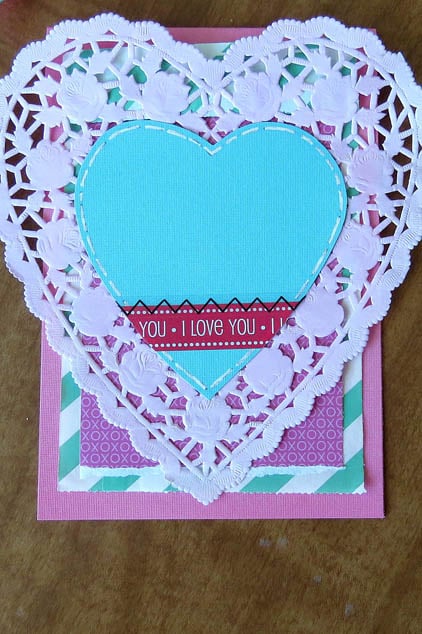
Locate your label. Place the vellum beneath it and eyeball making it stick up about a 1/2 inch above the label. Tear a strip of vellum to slightly overlap the bottom of your label. Of course use your Glue Dots® to adhere the vellum layer to the aqua heart leaving the border revealed below.
Add your punched paper piece. Adhere to the left of the label.
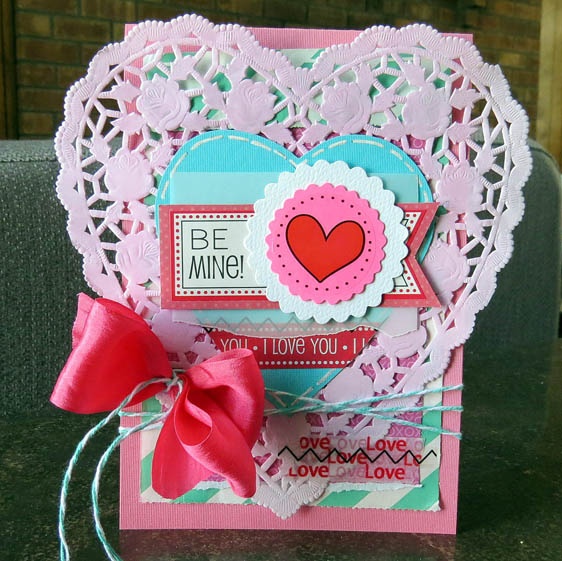
Wrap twine a few times around the bottom of the card and knot tightly. Take pink ribbon and create loops and place in the middle of the knot. Tie the loops tight. Fluff the bow you have created and add a Mini Glue Dots® to the back of the bow, adhering it securely to the card.
Here is a look at the finished card, thank you for letting me share with you today!
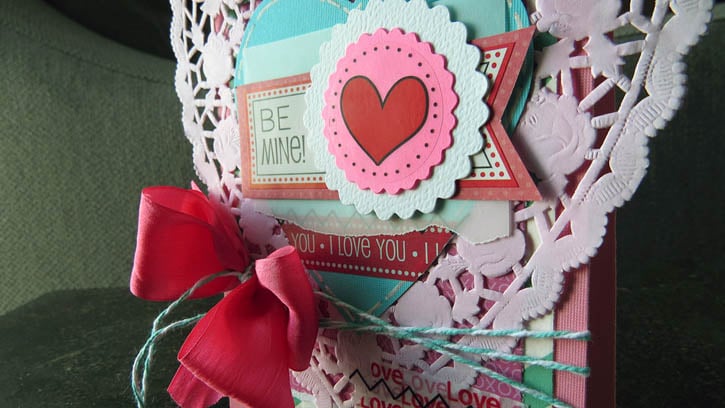
Want a look at the layers? Here’s a side shot!
Thanks for letting me share with you today! Spread some love today!