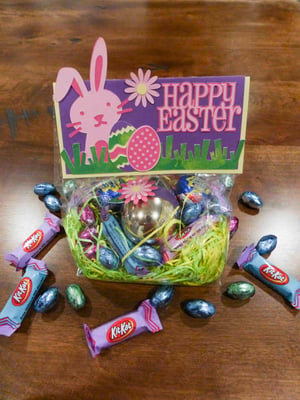
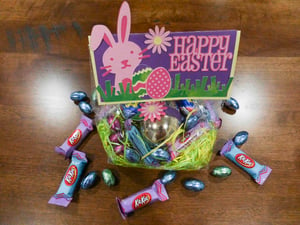
This sweet little bag topper is fairly easy to put together with some classic candy, some cute paper, and of course, your handy-dandy Glue Dots®!
MADE BY: AMANDA TIBBITTS | TIME: 30 MINUTES
LEVEL: INTERMEDIATE | SIZE: 6” WIDE BY 3” FOLDED
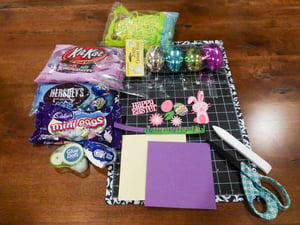
Supplies:
- Glue Dots® Mini Dots
- Glue Dots® Permanent GlueTape Dispenser
- Scissors
- Bone folder
- Stapler (not pictured)
- Cellophane bag sized 6” wide by 13 ¾” length
- Plastic eggs
- Misc. Easter treats
- Easter grass
Die Cuts:
- Bag topper at 6” and the front layer at 5.75” tall
- Bunny at 4” tall
- 2 small flower s at 1”
- Flower at 1.5”
- Belly band for plastic egg at 1.5” tall by 8” wide
- Leaf at 1”
- Small polka dot egg at 1.5” tall
- Small chevron egg at 1.375” tall
- Grass at 6” wide by 1.15” tall
- Happy Easter at 2.62” wide
Directions:
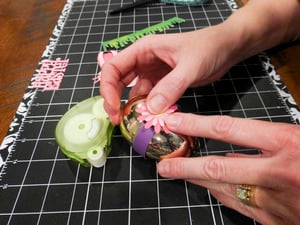
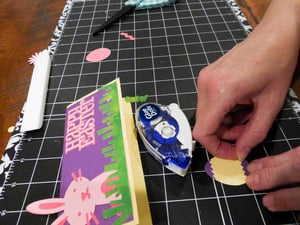
- To make the belly band for your plastic egg, smooth the 1” strip through your fingers to help it bend. Fill the egg with the chocolates and use one Mini Glue Dot® to stick the first end of the belly band to the egg. Follow around to the front and use another Mini Dot to secure it. With one of the small flowers and the larger flower, use a Mini Glue Dot® to adhere them together. Stick them on the belly band. Then add a Mini Glue Dot® to the leaf and fold the bottom over itself to add a hint of dimension. Use another Mini Dot to add the leaf behind the flower.
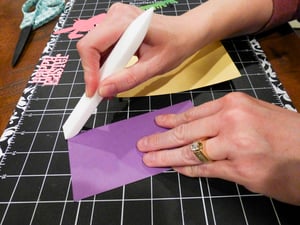
- With the Glue Dots® Permanent GlueTape Dispenser, stick both layers of the topper together.

- Use the bone folder to crease it in half.
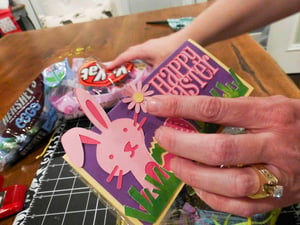
- Then use the GlueTape Dispenser to stick the bunny on the grass, the eggs, and the Happy Easter sentiment.
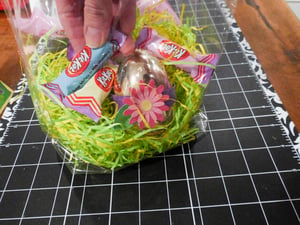
- Fill your cellphone bag with Easter grass and begin adding your treats. Set the plastic egg in the middle and add treats around it.
- Once your bag is done, fold the top down and staple the topper to the bag. With another Mini Glue Dot® add the other little flower over the staple.
You now have a cute treat for someone special—or just for yourself. Enjoy!

I began crafting in 1996 and simply fell in love with making my own cards. Long live snail mail! Crafting isn’t just a hobby for me, but a way of life… Teacher gifts, posters, scrapbooks, wood crafts? Yes, please! I have been married to my cute husband for 16 years and he definitely inspires me to try new things and enjoy the little things. As a stay home Mom, my time is spent raising my two girls, and raising the bar for my gift giving!


