Believe in Magic Halloween Scrapbook Layout
Posted on Oct 22, 2015 6:18:02 AM by The Team at GDIDid you know that Designer Grace documents her children's Halloween costumes with a new scrapbook layout each year? Here's how she does it.
Designed by: Grace Tolman
Time: 30-45 minutes
Level: Intermediate
Size: 12" x 12"
Using Glue Dots® new Stitch Glue Squares adhesive helped me document my children’s Halloween costume with ease and style. I pulled out the color scheme of the page from my children’s costume as to not make all of my Halloween pages (through the years) look similar to one another.
Here's what you need:
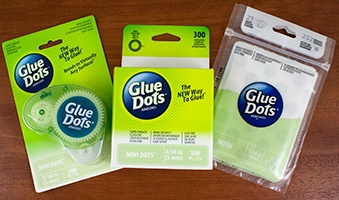
- Mini Glue Dots®
- Stitch Glue Squares®
- Pattern Papers
- Kraft Banners DIY Project Stack- Die Cuts with a View
- Pink Twine
- Enamel Dots

- Black Pen
- 1 1/2”Circle punch
- Flower punch
- Mist - Inky Black, Mister Huey, Studio Calico
- Paper Trimmer
- Scissors
- Ruler

- Toothpick
Here's what you do:
- Cut out the grey wood grain paper to measure 11 ½" x 11 ½". Adhere to the black paper background, centering it on the page using Stitch Glue Squares.

- Cut out the black and white striped paper to 10 ¾" x 6”. Distress the edges using the sharp edge of a pair of scissors. Adhere to the center of the layout using Stitch Glue Squares.
- Cut out a piece of pink striped paper measuring 12" x 3 ½". Layer it over the black and white paper and adhere with Stitch Glue Squares, Glue Dots®.
- Cut out some paper blocks from the Jet Black stack. Use two to layer under the 3" x 4"photos, showing a sliver of them on the sides of the photos. Adhere them to the cent er of the page using more adhesive Stitch Glue Squares.
- Trim the quote “Believe in the magic of your dreams”, layer it over another 3" x 4" paper and adhere to the center of the page.
- Tuck the paper with the word strip “today” on the top of the horizontal 3" x 4" photo. Adhere with Stitch Glue Squares.
- Cut out the banners from the DIY project stack. Punch out the circle elements from the same stack. Adhere the banner tops to the pink twine using more Stitch Glue Squares.
- Add Stitch Glue Squaresto the back of the banners and adhere to the top of the page. Secure the ends of the banner behind the page using decorative washi tape.
- Tie bows on both ends of the banner.
- Punch out flower shapes from scraps. Adhere two flowers together using Mini Glue Dots. Add beige enamel dots to the centers of the flowers and hearts on the banner using Mini Glue Dots.
- Adhere the piece of journaling paper (black with white hearts) on the bottom of the page using Stitch Glue Squares.
- Cut papers from scrap with widths of ½" to 1”. Add Stitch Glue Squares on the back and stick a toothpick in the center, fold. Cut the ends into notches to create banner accents. Tie the two toothpicks together with twine and adhere to the bottom of the page using Stitch Glue Squares.
- Add the two circle accents using Stitch Glue Squares. Sprinkle the page with ink splatters using the black mist.
~Grace
Any format of Mini Glue Dots can be used:
Glue Dots products can be purchased at:

The Team at Glue Dots consists of three highly creative individuals who find new ways and uses for Glue Dots products for every day life. We hope you like what we create. :-)

