When it comes to family gatherings, do you make place settings? For larger groups it's almost necessary, but for smaller, more intimate groups it can be a nice personal touch to the occasion. Whether you're having a family gathering or a friends-giving this fall, place settings make a nice addition to your table. Take a look at these pumpkin place cards that Designer Grace made and leave a comment! We love hearing your feedback about our projects.
Designed by: Grace Tolman
Time: Approximately 15 minutes
Level: Beginner
Size: 4 2/3” x 3” x 3”
I created a 3D paper pumpkin that can stand on its own; perfect for your next Thanksgiving dinner. It’s so easy to make that you can whip this up the night before your shindig. Make sure to read my additional notes to see the many ways you can make this project your own.
Here's what you need:
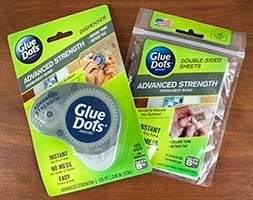
- Glue Dots® Advanced Strength

- Glue Dots® Stitch Glue Squares
- Pattern papers
- Letter stickers
- Twine
- Leaf template
- Black pen
- 1/2" Circle punch
- 3 1/2" Circle cutter
- Paper Trimmer
- Scissors

- Ruler
- Bone Folder
Here's what you do:
- Cut out five 3 ½” circles from pattern paper. Fold in half and secure the crease with a bone folder.
- Adhere Stitch Glue Squares to one side of the folded circle and attach to another folded circle. Repeat process until you have attached all five circles to each other.
- Roll a 2 x 4 ½” piece of pattern paper around a pen to create the cylinder shape. Take out the pen, attached Stitch Glue Squares to one of the long sides of the paper roll and roll it again, securing the other end with Stitch Glue Squares. Stick the paper roll in the center of the 3D pumpkin.
- Punch out a ½” circle from the same pattern paper; adhere to the bottom of the paper roll using Advanced Strength adhesive. *This will help stabilize the pumpkin, making it stand on its own.

- Add a pen line around the inside of the front of the pumpkin and add the letter stickers to spell out the name(s) of your guests.
- Trace or die cut a leaf shape from pattern paper. Add pen lines on the inside edge of the leaf, punch a tiny hole on the stem of the leaf and thread through green twine. Wrap the twine around the top portion of the paper roll and tie into a bow.

- Repeat the process for however many place settings you will need.
Additional notes:
- You can stamp the leaves or the letters for the names if you want a variation of this project.
- You can also ink and/or distress the edges of the circles before adhering them together for a more rustic looking pumpkin.
- Wrapping a green pipe cleaner around the top of the paper roll and then threading the leaf through one end of the pipe cleaner can also be a different way of adding the leaf to your pumpkin.
~Grace
Either format of Advanced Strength can be used for this project:
Glue Dots Products can be purchased at:

The Team at Glue Dots consists of three highly creative individuals who find new ways and uses for Glue Dots products for every day life. We hope you like what we create. :-)

