When celebrating Teacher Appreciation Day, it's easy to thank the teachers, teacher assistants, reading and speech therapists, etc. But what about the bus driver? Do you thank the person who's in charge of getting your children to school safely? Designer Dawn has a quick little Bus Driver appreciation gift that you and your kids can make in a few minutes.
Designed by: Dawn Mercedes Barrett
Time: 15 minutes
Level: Beginner
Size: 5 inches x 9 inches
After a 9 months of safely transporting our students to school, let's remember to show appreciation to those men and women behind the wheel of the big yellow school buses! This project is a great way to involve your kids in saying thank you!
Here's what you need: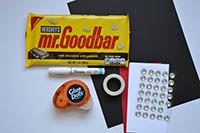
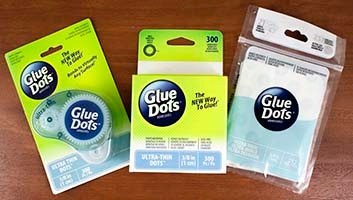
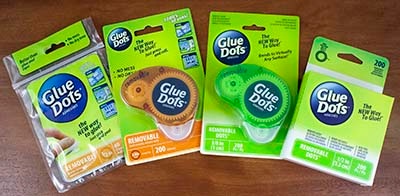
- Removable Glue Dots®
- Ultra-Thin Glue Dots®
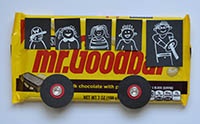
- Giant Hershey's Mr. Goodbar
- Cardstock: Black, white, red
- White Sharpie paint marker
- Decorative Washi Tape (Street Sign Washi from the Eyelet Outlet)
- Decorative Bling (12mm jewel Bling from Eyelet Outlet)
- Ruler
- Fiskars Paper Trimmer
- Spellbinders Nestabilities: Circles, or other circle hole punches (size: 3/4" and 1 3/4")
Here's what you do:
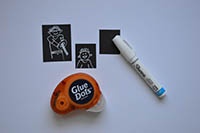
- Using Nestabilities Circle dies from Spellbinders, cut out two 1.75" circles from black cardstock. Cut out out two 3/4 inch circles from red card stock. Using the Fiskars paper trimmer, cut out one black rectangle (2.25 x 1.75 inches) and four smaller rectangles (1.25 x 1.5 inches). Cut a large rectangle (6 x 3.5 inches) out of red card stock and a smaller rectangle (5.75 x 3.25 inches) out of white card stock .
- Using the white paint Sharpie Marker, have your student draw a picture of their bus driver in the larger rectangle. In the smaller rectangles, have them draw portraits of themselves and other friends on the bus. Be sure to have these rectangles in portrait orientation. Tip: Be sure to shake up the paint marker. You may want to do a test sample on a scrap piece of black paper. To get good coverage of the ink, draw slowly. Allow the ink to dry for a minute before handling the picture.
- Use Ultra-Thin Glue Dots to create the wheels on the bus as shown in the picture. Layer the red and jewel bling on top of the black circle. Use Removable Glue Dots to add the "windows" and "wheels" on the front of the Hershey's Mr. Goodbar.
- Create a note card for the back of the candy bar. Use washi tape to create a decorative border to the bottom of the white cardstock. Use Ultra-Thin Glue Dots to layer the white card stock on top of the red.
- Have your student write a thank you note to the bus driver. Then, use Removable Glue Dots to attach the thank you note card to the back of the candy bar.
Brighten your bus driver's day with this sweet appreciation gift and a sweet thank you note from your young student. Spread gratitude...and reap a lot of smiles!!
~Dawn
Use either format of Glue Dots products for this project:
Glue Dots products are available at:
![]()


The Team at Glue Dots consists of three highly creative individuals who find new ways and uses for Glue Dots products for every day life. We hope you like what we create. :-)


