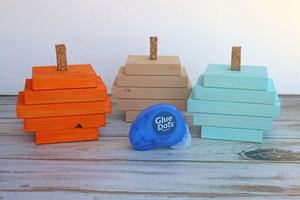
Nothing says fall like a few pumpkins. Which is why, today, we’re breaking out the saw and our Glue Dots® Permanent Glue Squares to create our own wooden ones! Have kids help with the painting and assembling of these pumpkins for a fun family project. Enjoy!
MADE BY: SAMANTHA TAYLOR | TIME: 30 MINS + DRY TIME
LEVEL: INTERMEDIATE | SIZE: 5” x 6"
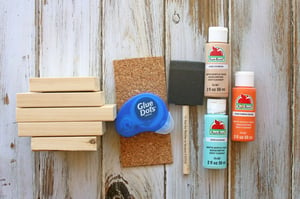
Supplies:
- Glue Dots® Permanent Glue Squares®
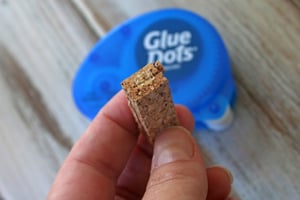
- Cork or Small Piece of Wood
- Scrap Wood (at least 1” thick)
- Sandpaper
- Paint Brush
- Paint
Directions:
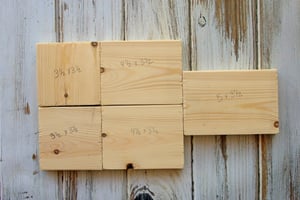
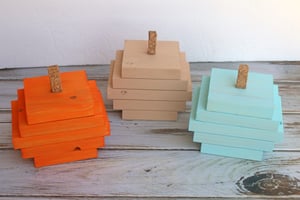
- Cut wood. For each pumpkin you will need 5 pieces of wood. 2 small pieces, 2 medium pieces, 1 large piece. I cut my wood pieces as follows: 2 – 3 ½” x 3 ½”, 2 – 4 ½” x 3 ½”, 1 – 5” x 3 ½”. Sand edges (optional).
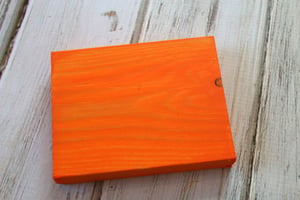
- Paint wood. For a more rustic look, use a thin layer of pain or stain to allow the wood grain to show through. If using scrap wood that doesn’t have a nice wood grain, use thicker layers of paint.
- Using your Glue Dots® Permanent Glue Squares, connect the wood pieces to one another and stack to create a pumpkin-like shape.
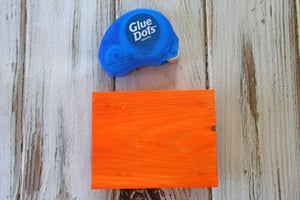
- Then, use another Glue Dots® Permanent Glue Squares to attach a small piece of cork or wood to the top of the pumpkin to create a stem.
- Customize these pumpkins by using whatever paint or stain color matches your fall style! You can also change up the sizes of your wood to create larger and smaller pumpkins. And if you’re more into apples than pumpkins for fall, simply paint the wood in shades of green and red for wood apples instead!

My name is Samantha Taylor and I have a passion for combining crafting and creativity to beautify life. I live in a small town in rural Iowa with my husband and 2 boys (all 3 of whom you’ll see featured in my projects). I’m a paper crafting fanatic who also loves photography. I enjoy making lay outs, cards, mini albums and home decor items, party decorations, and crafting with my kids. My favorite thing about crafting is getting to connect with so many people all over the world who also love creating pretty things and preserving memories. You can find more from me at www.taylorstamped.blogspot.com. I am so excited to share with you my love for the many uses of Glue Dots®!


