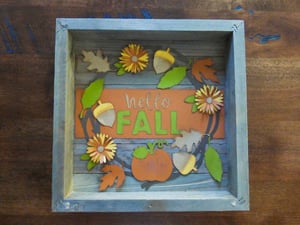
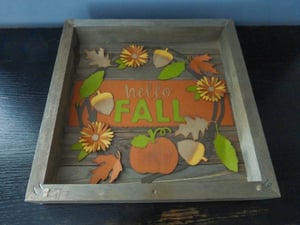
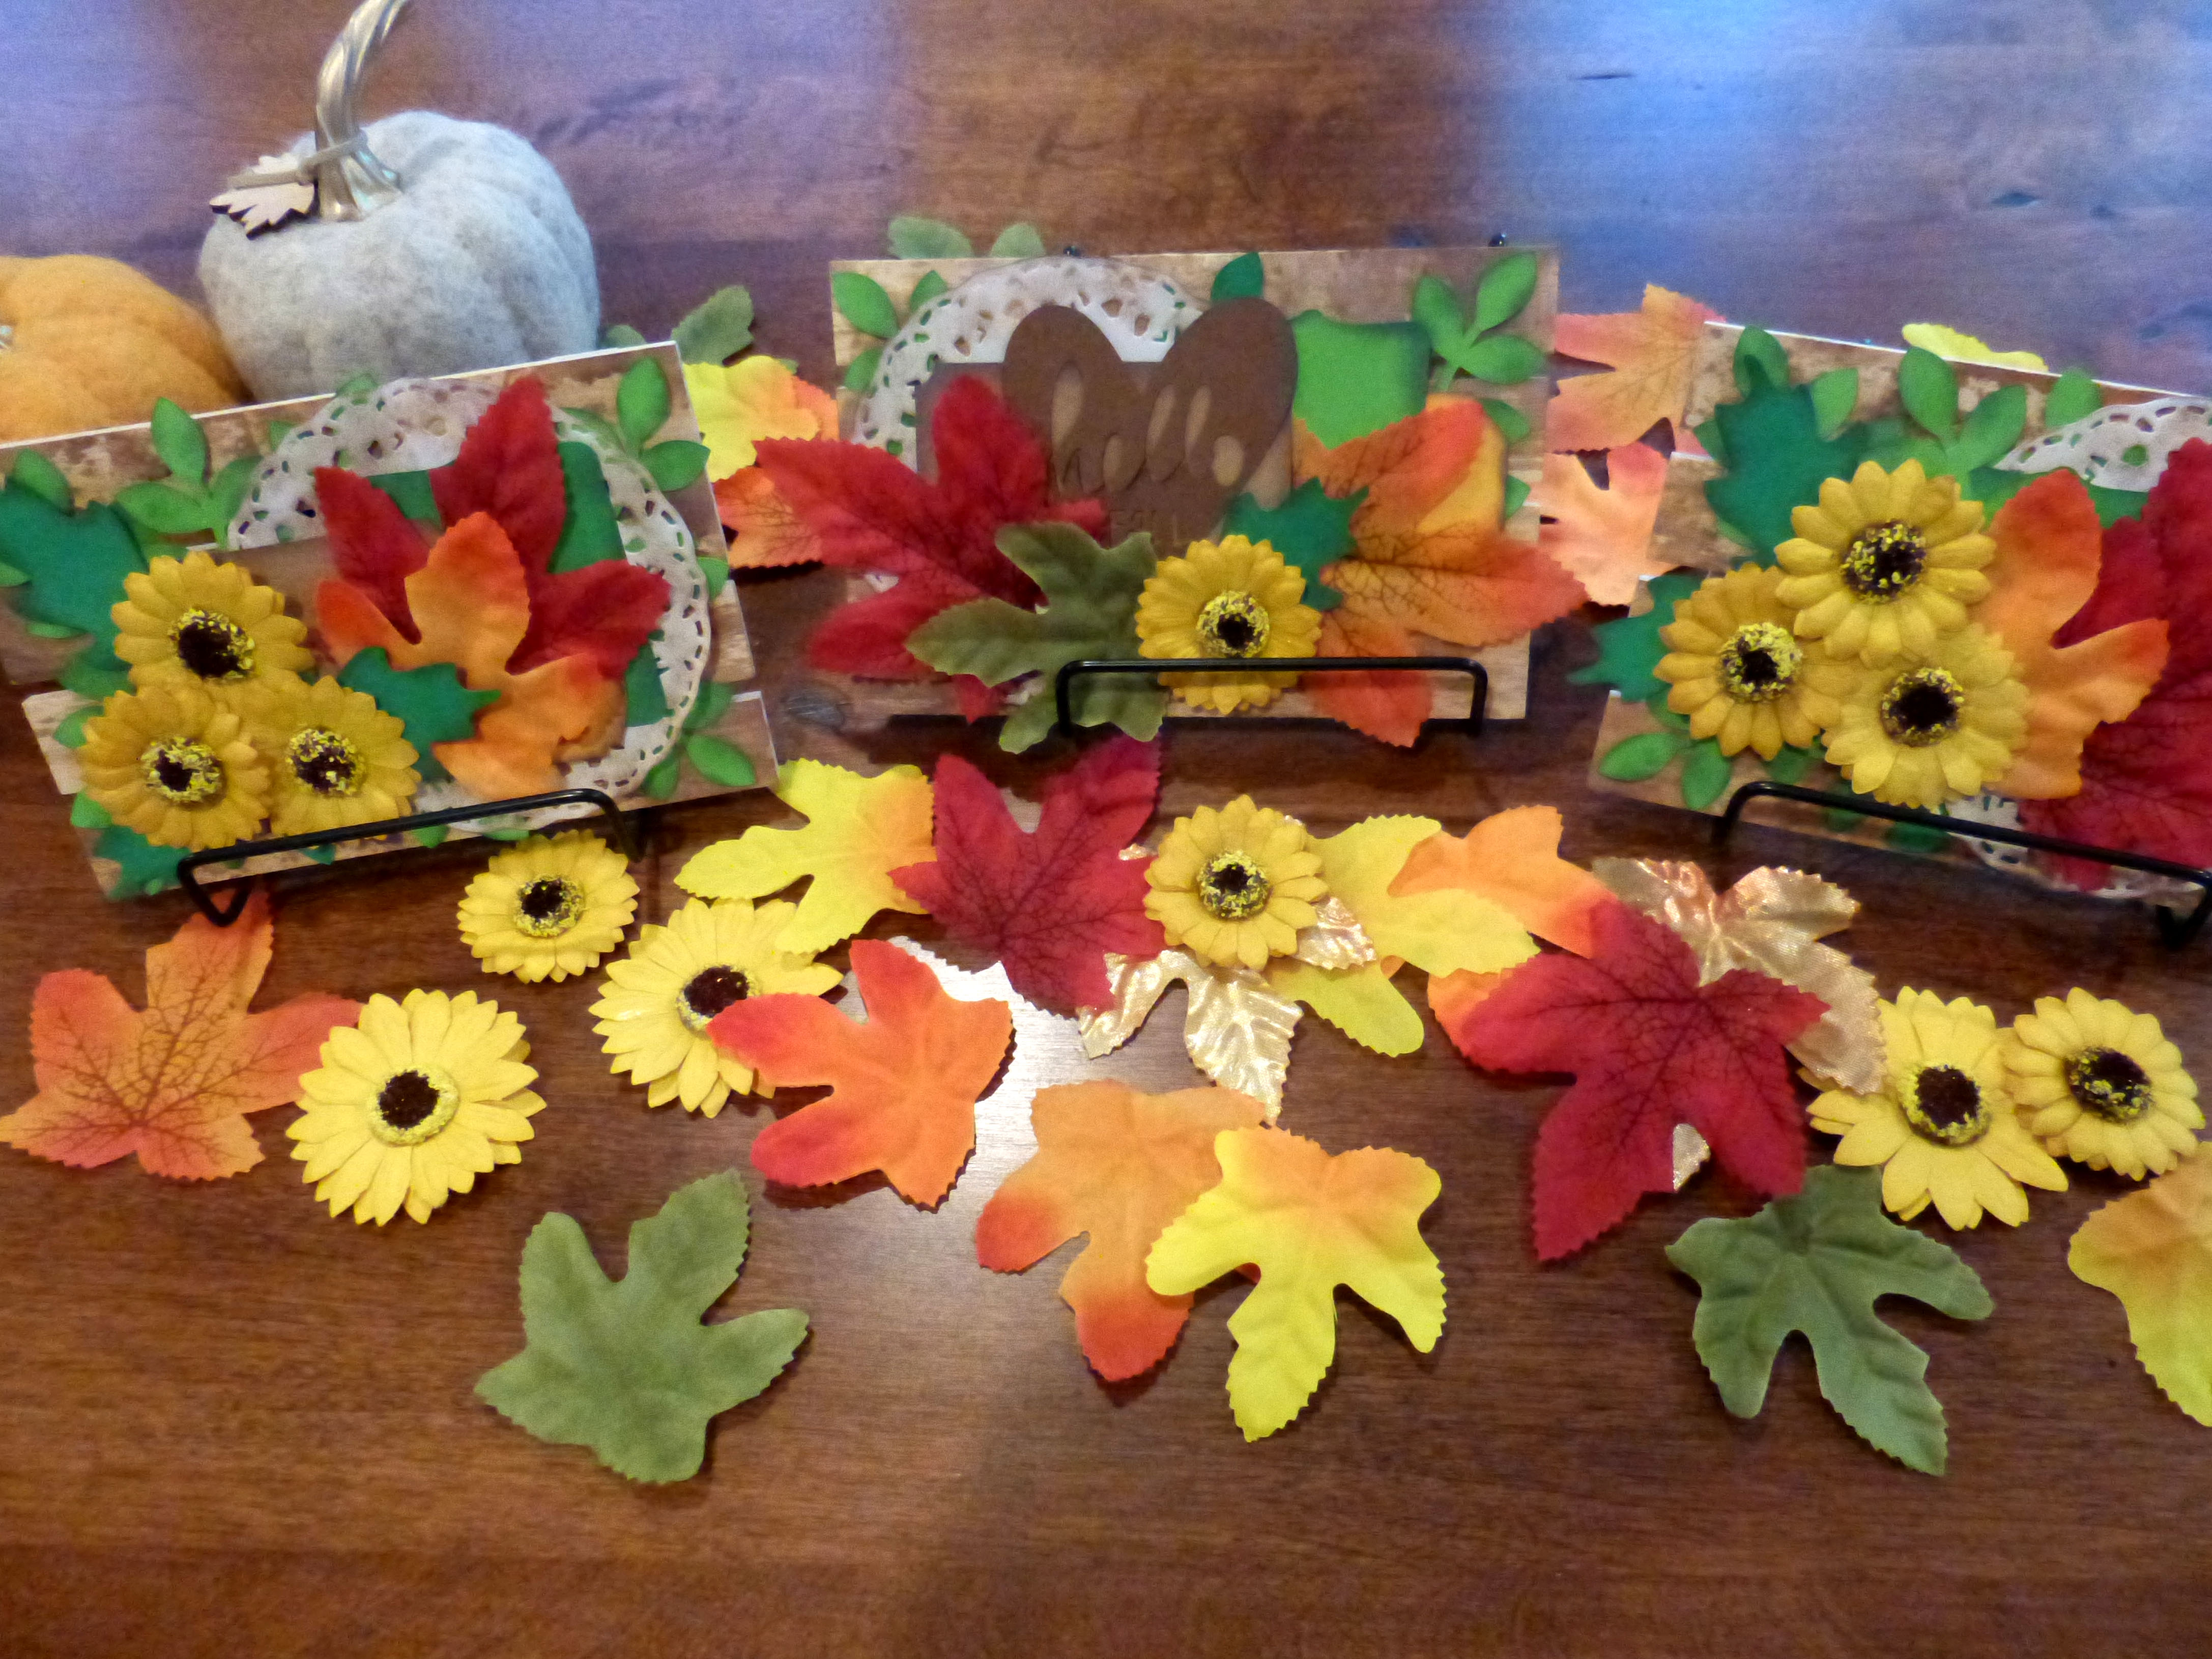
Fall is just around the corner and we absolutely love the cooler air and vibrant colors. And what better way to welcome the season than with a festive ‘Hello, Fall’ Shadow Box!
MADE BY: AMANDA TIBBITTS | TIME: 45 MINUTES
LEVEL: INTERMEDIATE/ADVANCED | SIZE:12” x 12”
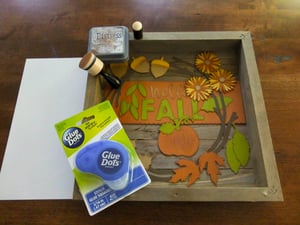
Supplies:
- Glue Dots® Permanent Glue Squares®
- Distress oxide ink in 'Vintage Photo
- Distress applicators
- Die Cuts:
- 1 Pumpkin at 2 ¾” Wide
- 3 Acorns at 1/5” Wide
- 2 Kraft Leaves at 2 ¾” Wide
- 2 Orange Leaves at 2 ¾” Wide
- 3 Green Leaves at 3 ¼” Wide
- 3 Layered Flowers at 1.5” Wide
- 6 Small Leaves at 1 ¼” Wide
- FALL at 1.65” Tall
- Hello at 1.25” Tall
- Background Scallop at 10.5” Wide
- Twig Wreath at 10” Wide
- 1 Pumpkin at 2 ¾” Wide
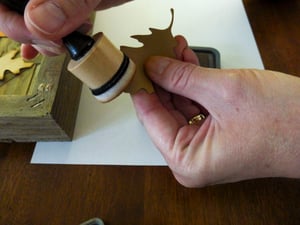
Directions:
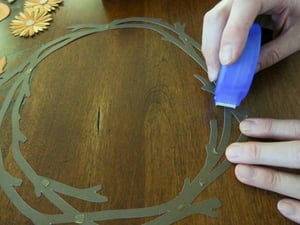
- Use the distress applicator to go around all edges on the die cuts. This will add a finished look and help them stand out inside the shadow box.
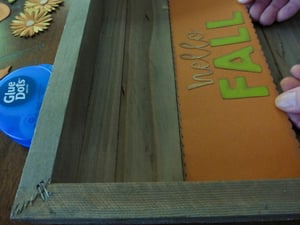
- With your Glue Dots® Permanent Glue Squares®, stick the background scallop piece (with the 'Hello, Fall' sentiment glued on) to the center of the shadow box.
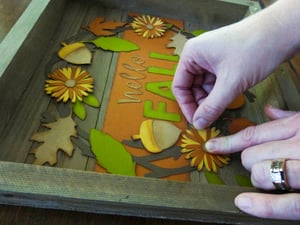
- Use a few more Glue Dots® Permanent Glue Squares® in a few key places along the twig wreath and add that to the shadow box.
- Add the remainder of the die cuts around the twig wreath and figure out where you want each piece placed. It helps to take a picture with your phone once you have them where you want to refer back to.
- Use a few Glue Dots® Permanent Glue Squares® on each die cut and put it along the twig wreath. Once everything is down, fluff up the edges a little of each flower and leaf to help them get a little dimension.
- Enjoy! This shadow box is quick to put together and will go nicely go with all your fall décor!

I began crafting in 1996 and simply fell in love with making my own cards. Long live snail mail! Crafting isn’t just a hobby for me, but a way of life… Teacher gifts, posters, scrapbooks, wood crafts? Yes, please! I have been married to my cute husband for 16 years and he definitely inspires me to try new things and enjoy the little things. As a stay home Mom, my time is spent raising my two girls, and raising the bar for my gift giving!


