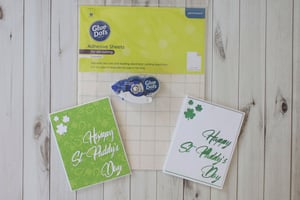
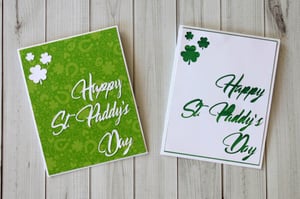
Double your luck this St. Patrick’s Day by crafting two adorably festive die cut cards out of just one Glue Dots® Permanent Adhesive Sheet! All it takes is a little cardstock, some patterned paper, and a few of your favorite Glue Dots® products. Good luck!
MADE BY: SAMANTHA TAYLOR | TIME: 30 MINS
LEVEL: INTERMEDIATE | SIZE: 4 ¼” x 5 ½”
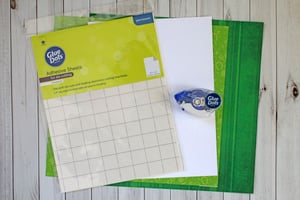
Supplies:
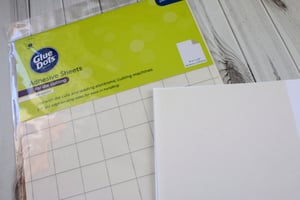
- Glue Dots® Permanent Adhesive Sheets for Die Cutting
- Glue Dots® Permanent Glue Tape
- Green patterned paper
- White card stock
- Electronic die cutting machine
- Scissors
Directions:
- Cut a piece of white card stock in half to create 2 – 4 ¼” x 11” card bases. Fold in half to create 2 – 4 ½” x 5 ½” cards.

- Cut green patterned paper to 4” x 5 ¼”. Apply to card base with Glue Dots® Permanent Glue Tape.
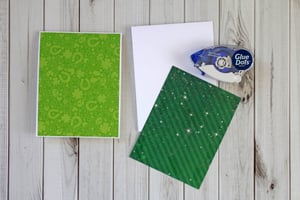
- Take a second sheet of white card stock. Apply a Glue Dots® Permanent Adhesive Sheet to the back side of the card stock.
- Use your die cutting machine to cut your greeting (In this case “Happy St. Paddy’s Day). Make sure to load your paper adhesive side down.
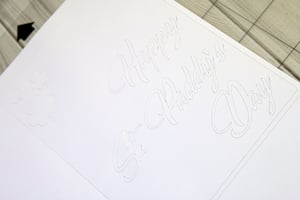
- Peel the liner off the back of 4 of the white card stock when you are done cutting. Do this slowly, so as to preserve both the positive and negative images.
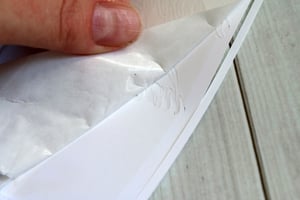
- Place all of the positive images on one card front and press down to firmly adhere. Place all of the negative images on the second card front and press down firmly to adhere. Then, write a charming note and send to your favorite little leprechauns!
While Glue Dots® Permanent Adhesive Sheets for Die Cutting make adhering thinly scripted cuts really easy, sometimes weeding them out from the base without damaging them can be challenging. If you’re a bit new to paper crafting and die cutting, we encourage you to start with a font that's a bit wider and blockier than the one shown above. This is a fun technique to play around with—you’ll be surprised at how many manual dies and different electronic die cutting shapes and fonts this works with!

My name is Samantha Taylor and I have a passion for combining crafting and creativity to beautify life. I live in a small town in rural Iowa with my husband and 2 boys (all 3 of whom you’ll see featured in my projects). I’m a paper crafting fanatic who also loves photography. I enjoy making lay outs, cards, mini albums and home decor items, party decorations, and crafting with my kids. My favorite thing about crafting is getting to connect with so many people all over the world who also love creating pretty things and preserving memories. You can find more from me at www.taylorstamped.blogspot.com. I am so excited to share with you my love for the many uses of Glue Dots®!


