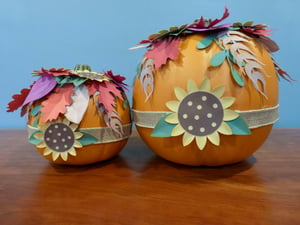
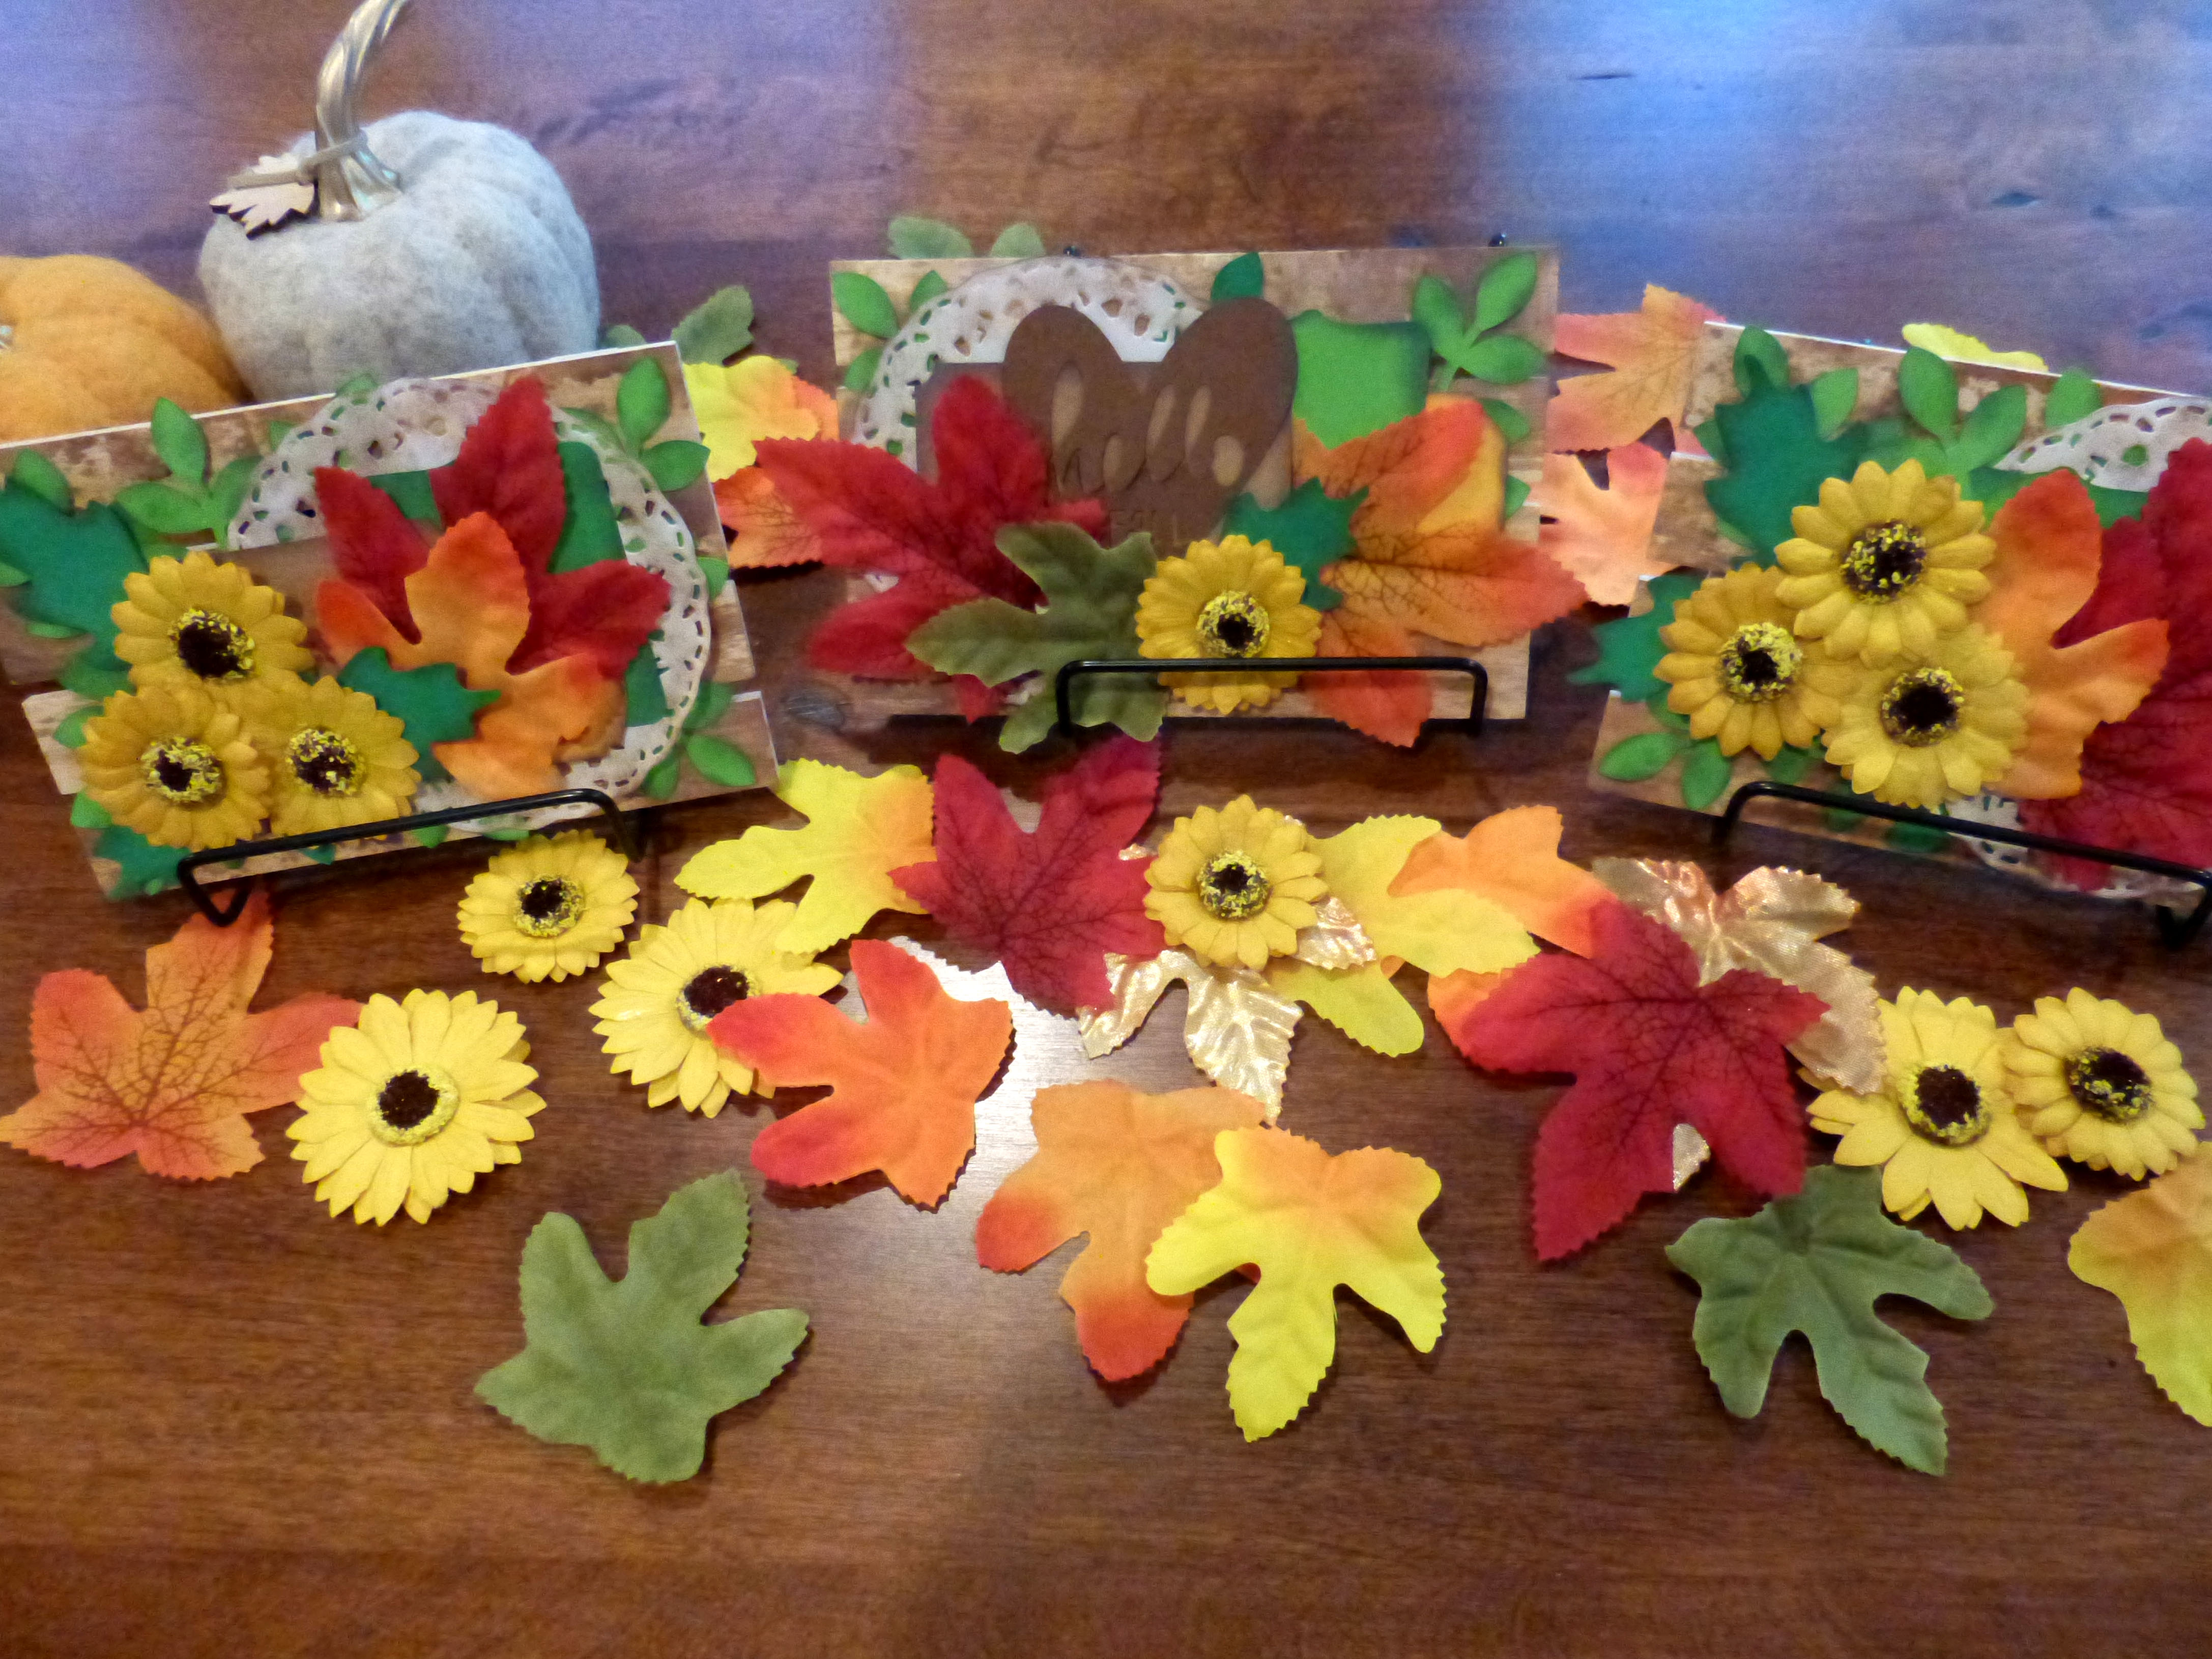
Fall is officially here, and you know what that means: table-top pumpkins! These cuties can sit on the table for Halloween, Thanksgiving, or on a shelf with your other fall décor! Plus, they come together really quick with a few fall-inspired die-cuts and your handy-dandy Glue Dots® Permanent Glue Squares. Have fun!
MADE BY: AMANDA TIBBITTS | TIME: 60 MINUTES
LEVEL: INTERMEDIATE/ADVANCED | SIZE: 9” x 9” | 6.5” x 6.5”
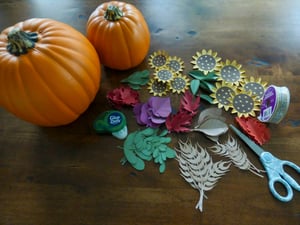
Supplies:
- Glue Dots® Permanent Glue Squares®
- Scissors
- Die Cuts:
- 9” Pumpkin
- 6.5” Pumpkin
- Fall Leaves cut at 2.5” wide (at least 7 or 7 for each pumpkin)
- Wheat Stems cut at 5.5” wide and 4.75” wide (3 for each pumpkin)
- Greenery Stems cut at 4.5” tall and 3.5” tall (3 of 4 for each pumpkin)
- 5 Sunflowers cut at 4” wide
- 5 Sunflowers cut at 3” wide
- 3 yards of burlap ribbon
- Several colors of distress inks if you want to add some to your die cuts
- 9” Pumpkin
Directions:
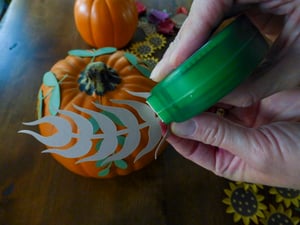
- Begin adding a few Glue Dots® Glue Squares to the back of the greenery and wheat stem die-cuts.
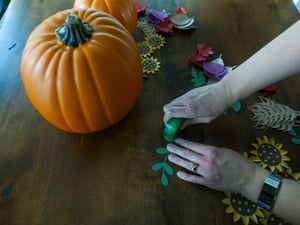
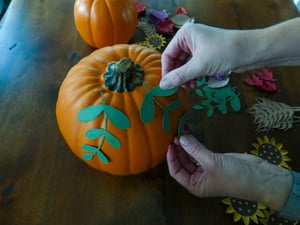
- Stick them on top of the pumpkin, making your way around with each die-cut.
- Add Glue Dots® Glue Squares to the sunflowers and glue them to the top of the pumpkin, leaving one sunflower for the ribbon. Fluff the edges to make them a bit more dimensional.
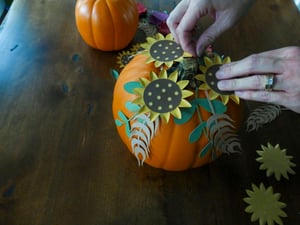
- Continue adding the die cuts around the pumpkin, overlapping the greenery and wheat.
- Run a line of Glue Dots® Glue Squares along the middle of the pumpkin. Cut some burlap ribbon and fix it to the glue squares. Once the ribbon is in place, add the remainder sunflower to the ribbon end.
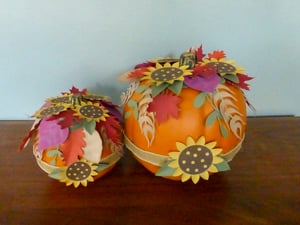
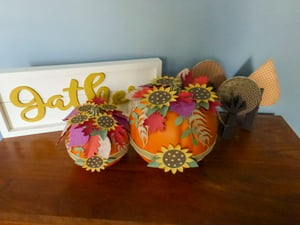
- Follow the same steps for the other pumpkin and then you’ll have a cute set of pumpkins for your table. Happy Fall!

I began crafting in 1996 and simply fell in love with making my own cards. Long live snail mail! Crafting isn’t just a hobby for me, but a way of life… Teacher gifts, posters, scrapbooks, wood crafts? Yes, please! I have been married to my cute husband for 16 years and he definitely inspires me to try new things and enjoy the little things. As a stay home Mom, my time is spent raising my two girls, and raising the bar for my gift giving!


