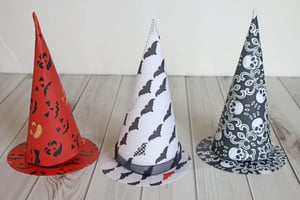
Handing treats out at Halloween is extra fun with these Witch Hat Treat Cones. They are easy enough to make assembly line style for a whole class of kids, and special enough to make just one or two to share with family.
MADE BY: SAMANTHA TAYLOR | TIME: 30 MINUTES
LEVEL: INTERMEDIATE | SIZE: 6” x 3 ½”
Supplies:
- Glue Dots® Glue Squares
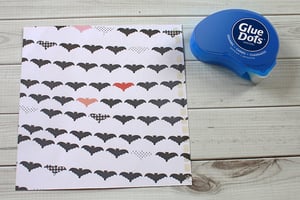
- Patterned Paper cut to 6” x 6”
- Patterned Paper cut to 3 ½” x 3 ½”
- A way to cut a 3 ¼” x 3 ¼” circle (die cutting machine, template, or stencil)
- Scissors
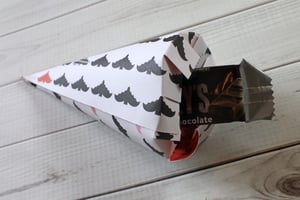
- Candy
- Ribbon (optional)
Directions:
- Cut a 3 ¼” circle. Set aside.

- Take a 6” square piece of paper. Right side facing up, put Glue Squares® all along the far right edge.
- Flip 6” paper to wrong side facing up and put Glue Squares® all along the top edge, being careful not to press the squares on the underside onto your work space.
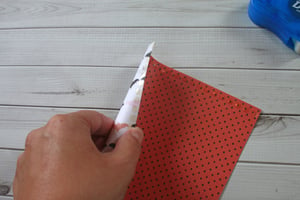
- Roll the paper into a cone so that the edges with the Glue Squares® on them overlap to form the seam.

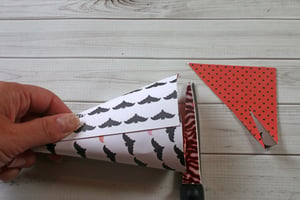
- Use a scissors to cut off the extra flap on the cone, making a flat bottom edge for your hat.
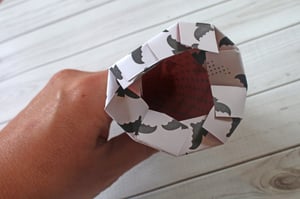
- Cut about a ½” flap along the bottom edge of the cone every ½” or so.
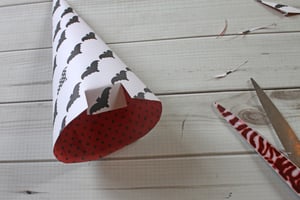
- Place Glue Squares® on the flaps, and fold them towards the center.
- Place candy in the cone and press your 3 ¼” circle to the flaps on the bottom of the cone to create the brim of your hat.
- Optional: Use Glue Squares® to add decorative ribbon to the brim of the hat.
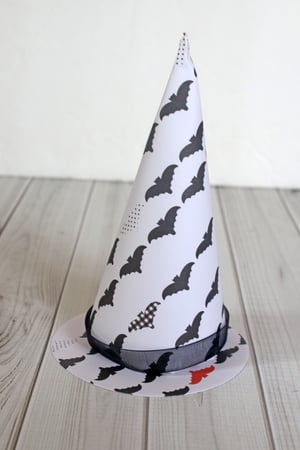
Notes: Glue Squares® give an exceptionally strong hold and work great on both paper and ribbon.
If you like to hand out non-candy treats at Halloween, you can also stuff these cones with shaped erasers, bouncy balls, or other small gifts.

My name is Samantha Taylor and I have a passion for combining crafting and creativity to beautify life. I live in a small town in rural Iowa with my husband and 2 boys (all 3 of whom you’ll see featured in my projects). I’m a paper crafting fanatic who also loves photography. I enjoy making lay outs, cards, mini albums and home decor items, party decorations, and crafting with my kids. My favorite thing about crafting is getting to connect with so many people all over the world who also love creating pretty things and preserving memories. You can find more from me at www.taylorstamped.blogspot.com. I am so excited to share with you my love for the many uses of Glue Dots®!


