This banner is the perfect addition to any Halloween décor! Use any word to match your room and it will be something to talk about!
Made by: Amanda Tibbitts
Time: 1.5+ hours
Level: Intermediate
Size: Depends on word chosen
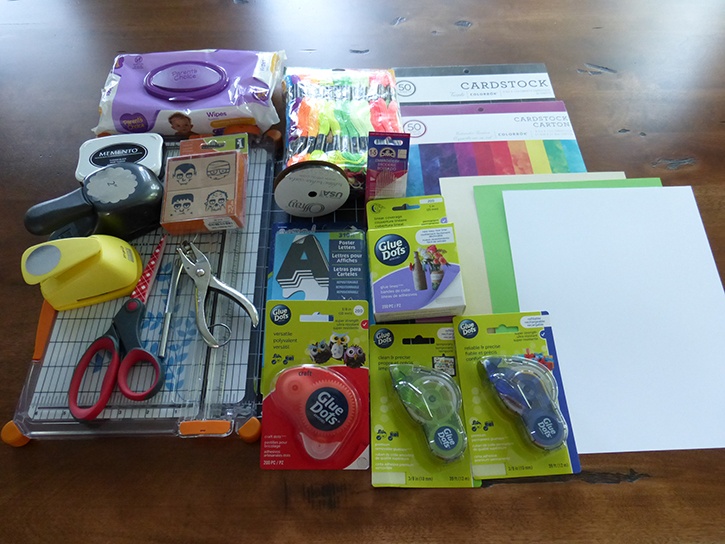
Here's what you need:
- Glue Dots® Premium Permanent GlueTape™
- Glue Dots® Premium Removable GlueTape™
- Glue Dots® Craft Dots™
- Optional: Glue Dots® Glue Lines™
- Colorbook Cardstock in Watercolor Rainbow
- Colorbook Cardstock in Tuxedo
- One sheet each of white, lime green and light tan cardstocks
- Value Jumbo Pack of Embroidery Floss and needles
- Offray Ribbon in skinny black
- Art Skills! Poster Letters, prepositional
- Memento Ink in Tuxedo Black
- Inkadinkadoo Little Monsters Stamp Set
- Baby Wipes or Stamp Cleaner
- Craft Mat
- 1/8" Hole Punch
- 1 ½" Circle Punch
- 2" Scallop Circle Punch
- Paper Trimmer
- Paper Piercer
- Scissors
Here's what you do:
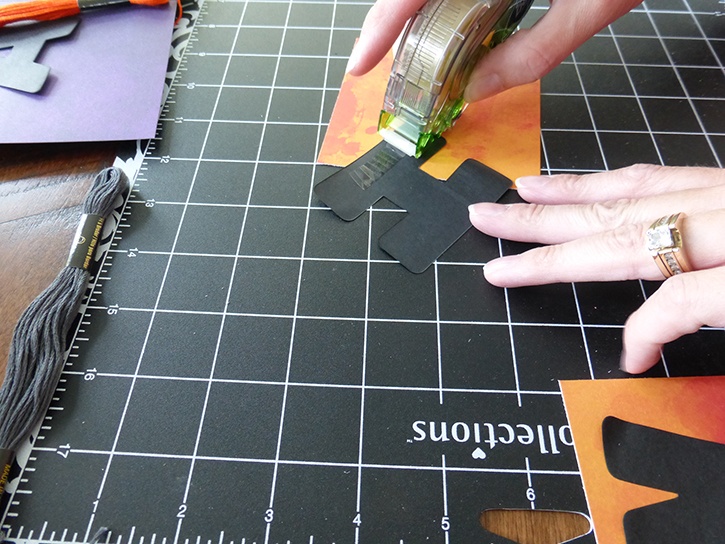
Once you’ve decided on your word for your banner, pick papers from the Watercolor Rainbow stack that you like. From the Poster Letters, find the appropriate ones to spell you word. Trim your papers to a little bigger than the letters, use Premium Removable GlueTape on the back of the letters and place them on the watercolor paper.
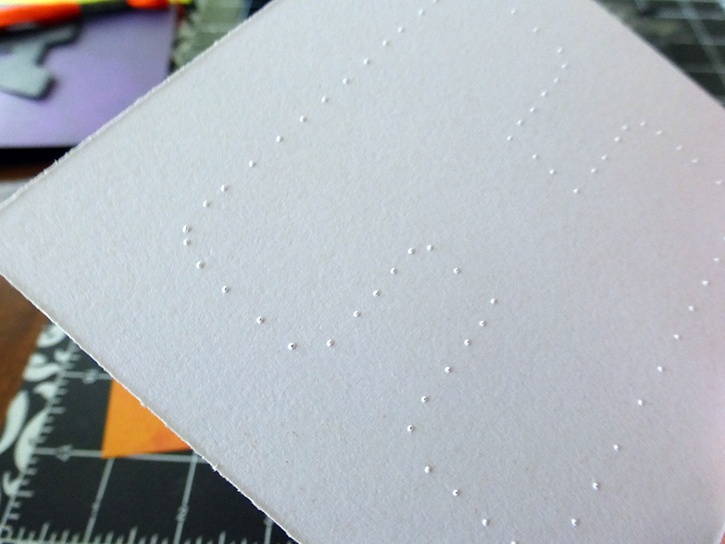
On your craft mat, use the paper piercer to follow the edges of the letters to poke holes to stitch with the embroidery floss.
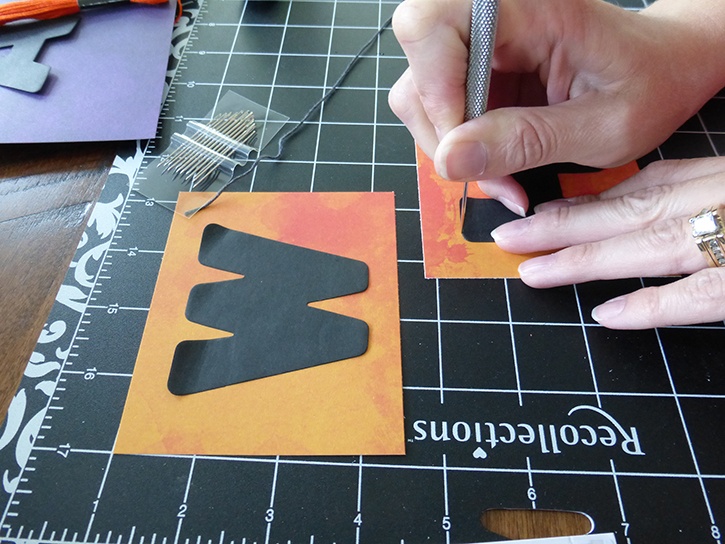
After you’ve poked the holes, pick some floss that you like with your watercolor paper. Grab an embroidery needle, not too big, and begin backstitching your letters. Once you’ve gone all around the letter, place Craft Dots on the back and stick the ends of the floss into the glue.
Once the letters are stitched, cut them out, leaving an edge on them. With the tuxedo black cardstock, trim down as many sheets you need to 5" x 4" to match your word. From the scraps of watercolor paper you have from trimming them, cut some random ½" paper strips to glue to the bottom of the 5" x 4" black papers.
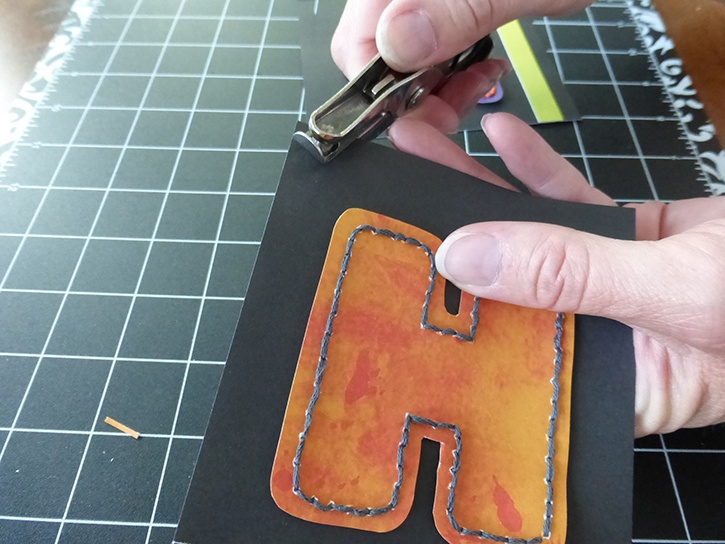
Using Premium Permanent GlueTape adhere the ½” strips and the letters you’ve stitched. Run the adhesive just inside the back stitching and stick them to the black cardstock. With the stitching, it will give a bit of dimension, and the Super Strength tape will hold them perfectly!
Stamp your Little Monsters, punch them out with the 1 ½" circle punch, and using some of the scraps from the watercolor paper cut some scalloped circles with the 2" punch. Glue these together with Glue Lines or Premium Permanent GlueTape.
With the 1/8” hole punch, punch holes in each corner of your black banner pieces. With the black ribbon, weave it through the front side of each hole and tie it off on each end.
Now that your banner has ribbon running through it, add one craft dot to the space between the cardstocks and put a little monster on it. Add these to each area in between the panels, and now, you can hang your banner for all to see!
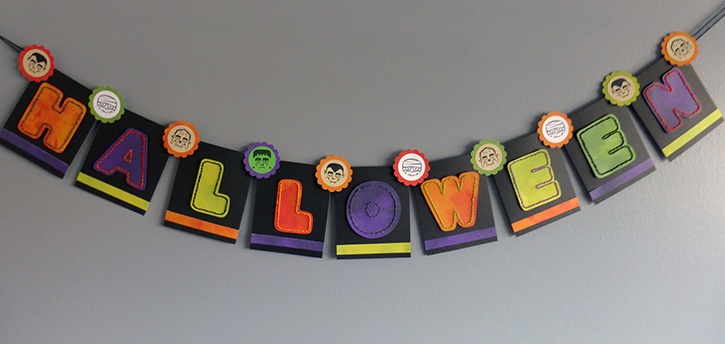
This is an easy to store banner that can be used again and again. The backstitching really adds a nice touch, and thanks to Walmart, you can make a bunch of holiday banners!
~Amanda

I began crafting in 1996 and simply fell in love with making my own cards. Long live snail mail! Crafting isn’t just a hobby for me, but a way of life… Teacher gifts, posters, scrapbooks, wood crafts? Yes, please! I have been married to my cute husband for 16 years and he definitely inspires me to try new things and enjoy the little things. As a stay home Mom, my time is spent raising my two girls, and raising the bar for my gift giving!


