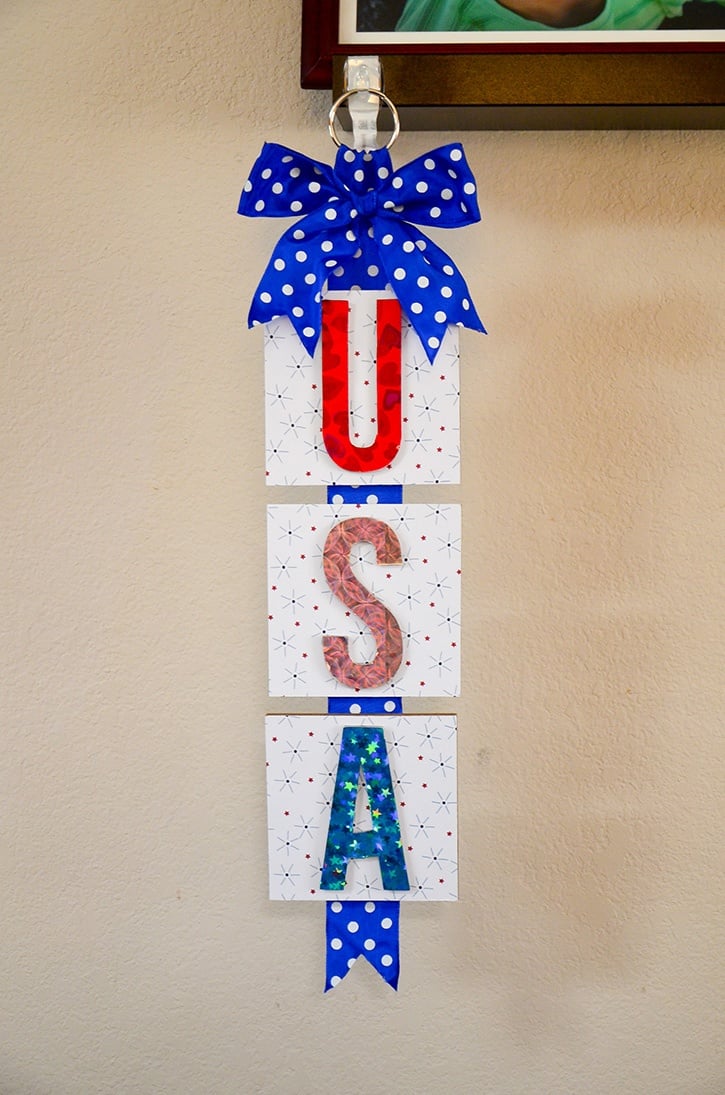
Banners are normally horizontal in design but when I thought about creating this particular project, I decided that doing the tiles vertically would fit better. Plus this project was finished in less than an hour, thanks to Glue Dots®.
Made by: Grace Tolman
Time: Approximately 30 minutes
Level: Beginner
Size: 18 ½” x 4”
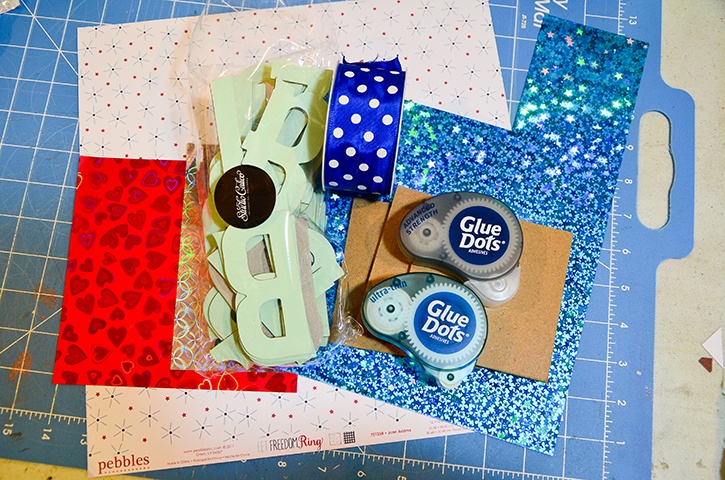
Here's what you need:
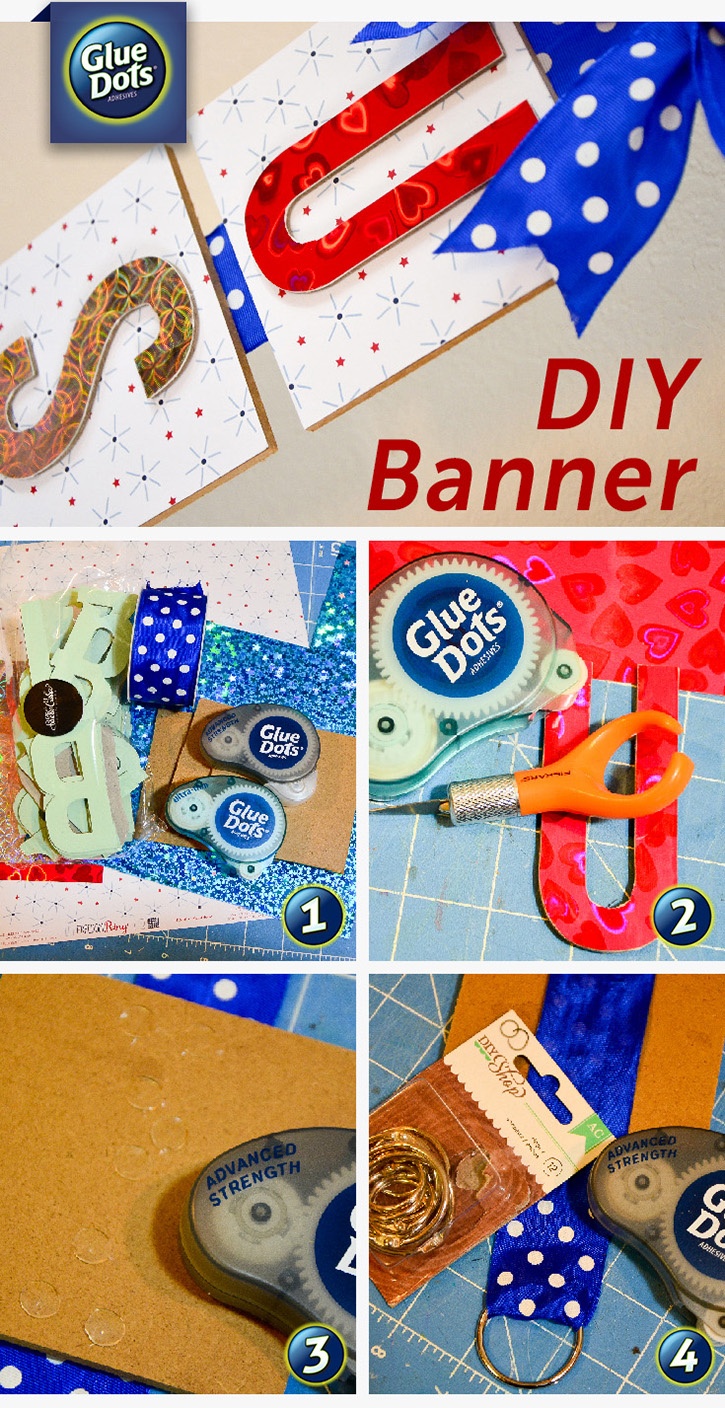
- Glue Dots® Advanced Strength Dispenser
- Glue Dots® Ultra-Thin Dots™
- Tile
- Pattern papers- Let Freedom Ring, Pebbles
- Chipboard letters- Studio Calico
- Glitter paper- Grafix Arts
- Ribbon
- Key Ring
- Craft Knife
- Scissors
Here's what you do:
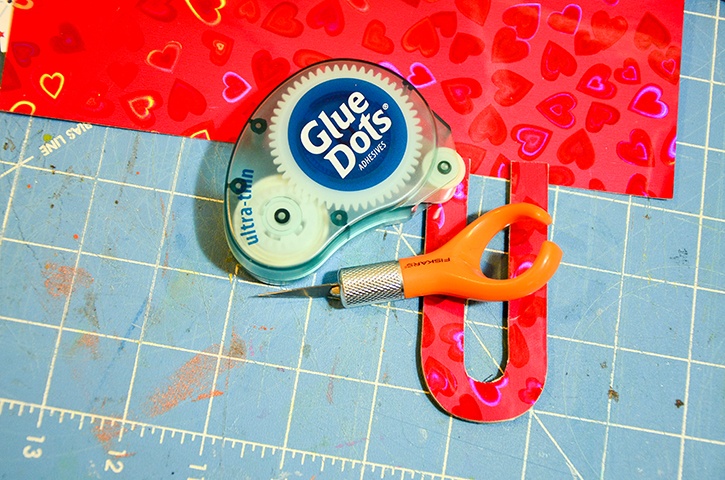
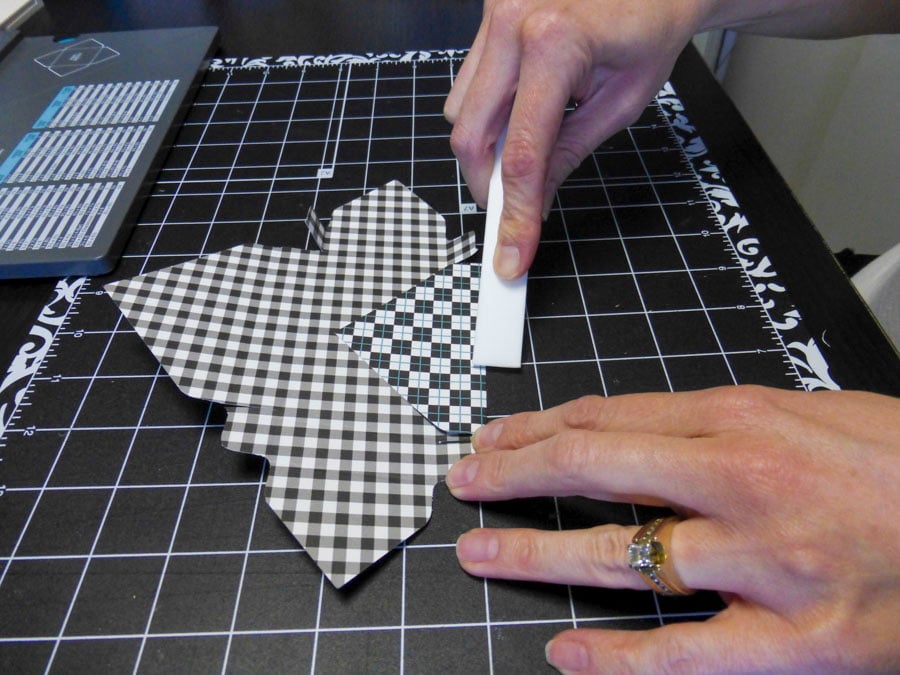
Measure your tiles and cut some pattern papers to match those measurements. Mine was an exact 4” square. Adhere these papers onto the tile using Glue Dots Advanced Strength adhesive. You can use a file to sand down the edges for a finished look.

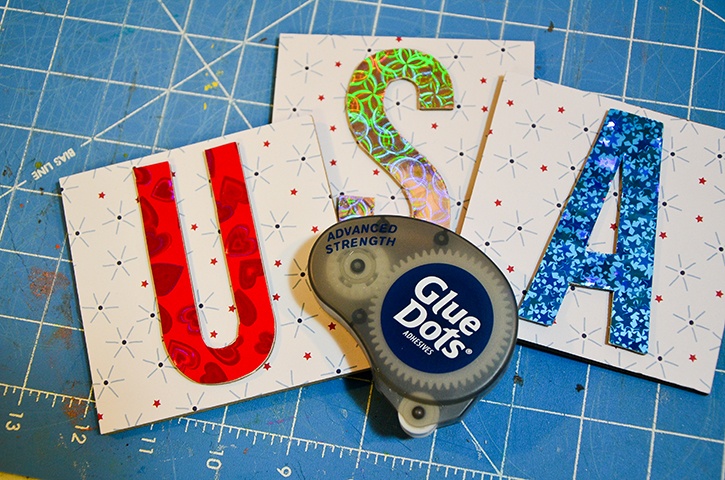
Using Ultra-Thin Dots, adhere the chipboard tiles onto the glittered paper. Trim off excess using a craft knife. File the edges for a finished look as well.
Adhere the chipboard letters onto the centers of the tiles using Advanced Strength Glue Dots.
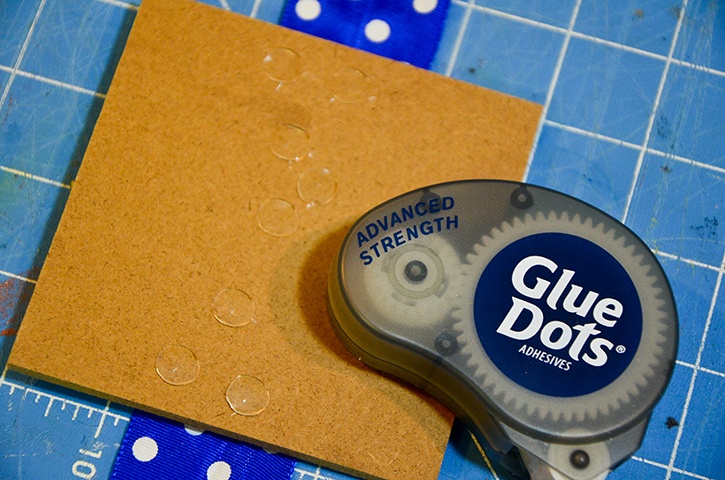
Cut a piece of ribbon that is about 24” long. Use Advanced Strength Dots to adhere the tiles onto the ribbon, making sure each tile is centered on the ribbon.
Fold over the top of the ribbon and slip a key ring through before closing the fold with Advanced Strength adhesive.
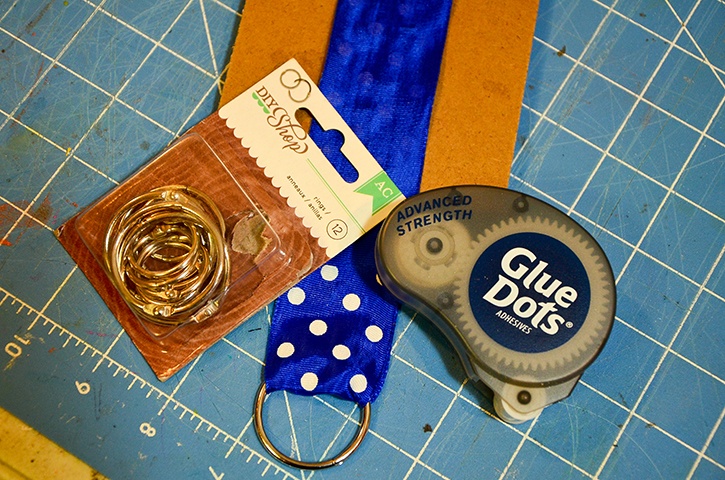
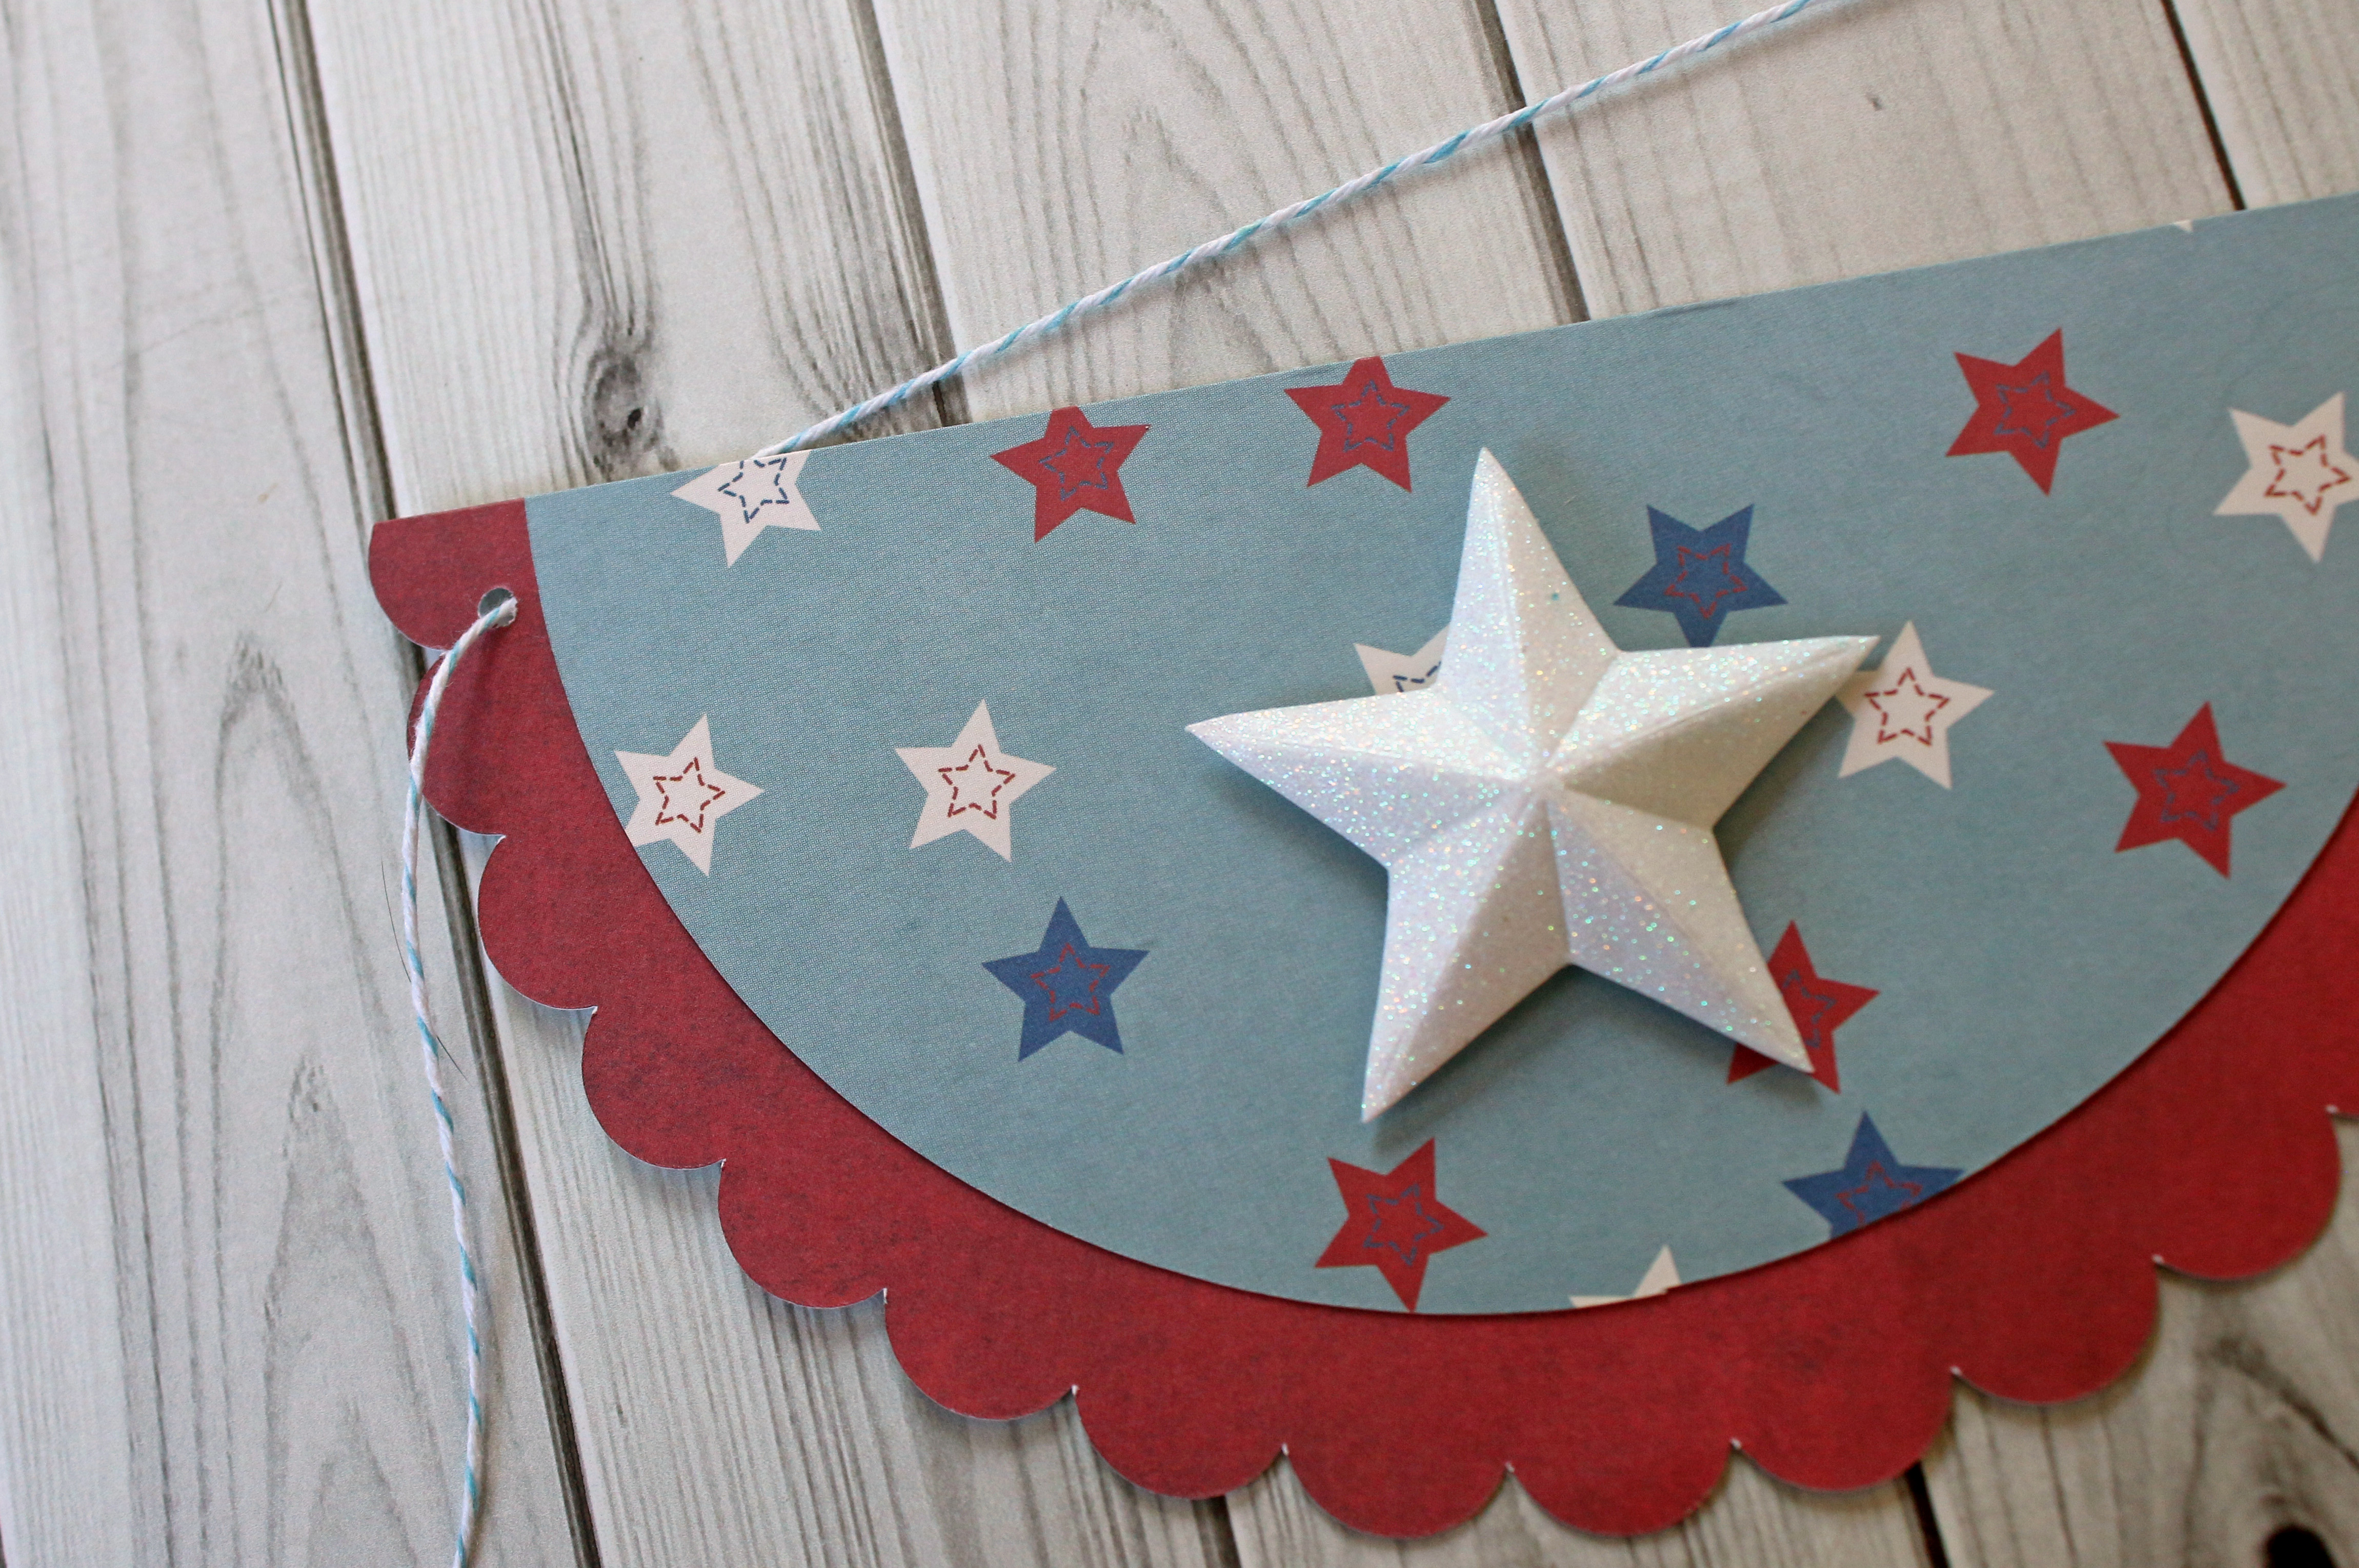
Create a bow using more ribbon and adhere to the top of the banner with Advanced Strength Glue Dots. Cut a notch on the bottom edge of the ribbon.
~Grace


I’m a mom to a 10 year old boy and an 8 year old girl. Therefore my life is usually filled with learning, new discovery, bribery and driving to and from all of our activities. I have a loving and very supportive husband of 11 years. When the kids have gone to bed at night, my time is spent crafting while catching up on my favorite shows and movies. I also enjoy reading, window shopping, knitting and perusing blogs for inspirations. Three years ago we moved to Colorado from California and we are enjoying our new environment. I feel very inspired with my new home, my new scrapbook space and the mountain views. Although I’ve been doing some type of scrapbooking since grade school, I only started to scrapbook seriously after my son was born. When he was born I knew I would be staying at home with him but coming from a fast paced sales job I was afraid I would ran out of things to do during the day. Little did I know that with newborns you won’t have any time to do anything else. Anyways, after going through a basic scrapbooking class I was hooked and haven’t stopped scrapping since.


