If your neighborhood tradition is to "BOO" a neighbor, this project will add a bit of sparkle to your basket. The non-edible nature of this project is great to share with those who have a food allergy or decline sweets. It is also a great way to shed a little light and some fun on a creepy Halloween Eve when trick-or-treaters wear the bracelets. Making a large broom filled with the glow sticks is a fun way to treat an entire family. Making individual brooms will light up a classroom of kids!
Made by: Dawn Mercedes Barrett
Time: 30 minutes
Level: Beginner
Size: variable
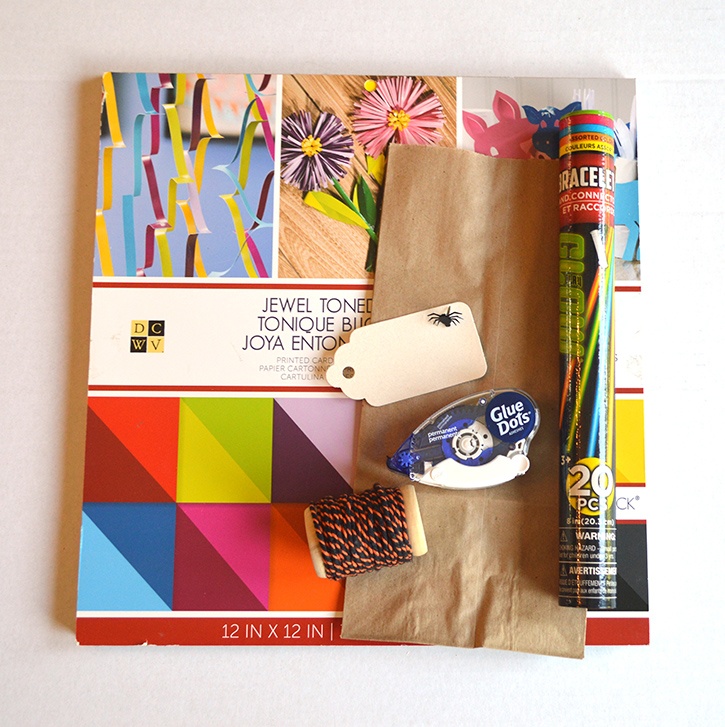
Here's what you need:
- Glue Dots® Craft Dots™
- Glue Dots® Permanent GlueTape™
- Glue Dots® Glue Lines®
- Glue Dots® Removable Dots™
- Black card stock (I used DCWV Jewel Toned Textured card stock Stack)
- Natural color card stock
- Purple dye ink
- Brown paper lunch bags
- Orange/black bakers twine
- Halloween embellishments as desired (I used Spider Brad by Eyelet Outlet in this project)
- Tube of glow stick bracelets (Dollar Tree)
- eClips by Sizzix or other electronic die cutting machine
- SVG file of tag
- Fiskars Paper Trimmer
- Ruler
- Tape measure for fabric
- scissors
- pencil
- Halloween Stamps (I used Creepy Halloween by The Project Bin)
Here's what you do to make the large broom:
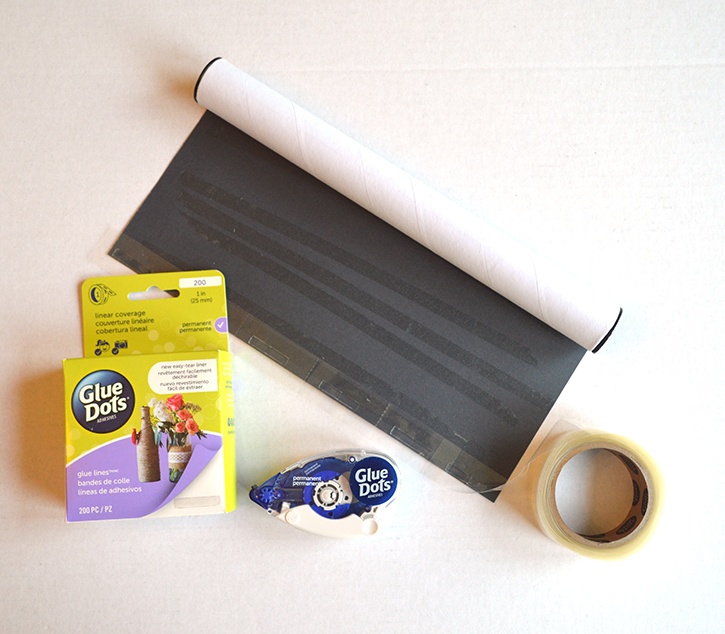
Peel off the plastic label of the canister. Use your Fiskars Paper Trimmer to cut the textured card stock to 5 x 10.5 inches. Tip: Measure your canister for an exact measurement. Use a fabric tape measure to measure the circumference.
Apply Permanent GlueTape to the center of the black card stock. Add a line of Glue Lines to the long edge. This will encourage that the paper sticks to the cardboard tube.
Use your Fiskars Paper Trimmer to and cut two brown paper lunch bags down to 7 inches. Keep a 2 inch margin of uncut paper at the top long edge, use your scissors or paper trimmer to slice the bag every ¼ inch. Repeat this on the 2nd piece. Use Craft Dots to wrap the brown fringe around the bottom of the tube.
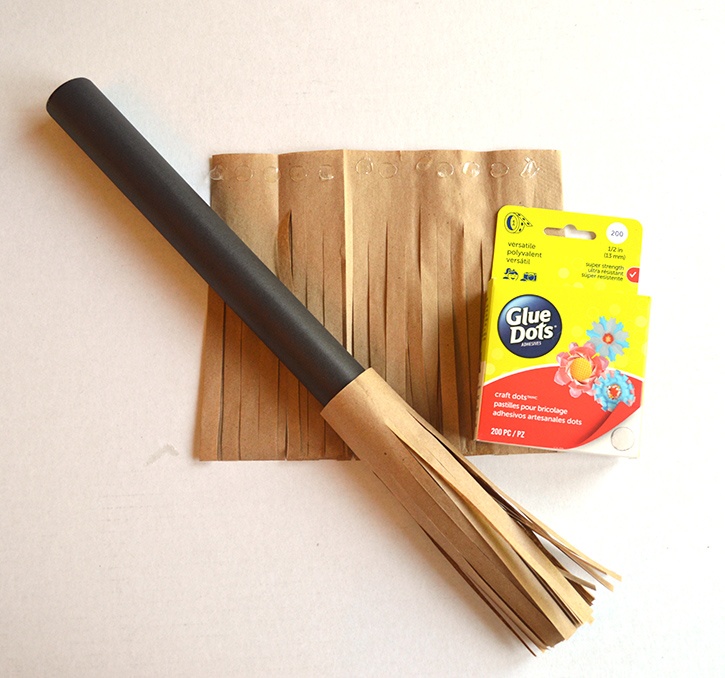
Lay one Glue Line along the center of the uncut margin. Wrap Halloween colored bakers twine around the Glue Line to finish off the broom. Fluff and lighting crimp the fringe end of the broom with your hands.
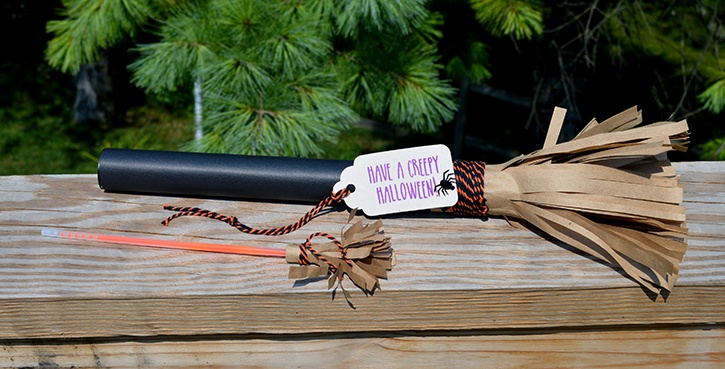
Cut a tag out of neutral card stock using your electronic die cutting machine and decorate it as you like with a Halloween Greeting or other embellishments. Add a bit more twine to finish off the tag. Stick it onto the broom handle with Removable Dots.
Tip: Burnish the Glue Lines to be sure they adhere to the paper. You may want to roll your paper before adding the GlueTape and Lines to help it “cover” the cardboard tube.
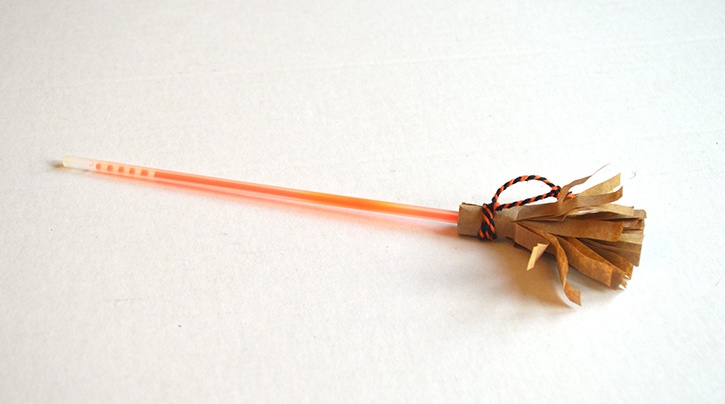
Here's what you do to make small, individual brooms:
Cut off 3 inches from a brown lunch bag. Use the same technique as above to create a fringe, leaving a 3/4 inch border at the top uncut.
Secure the paper fringe to the glow sick using Removable Dots. Wrap the fringed paper carefully around the glow stick and secure it with Craft Dots.
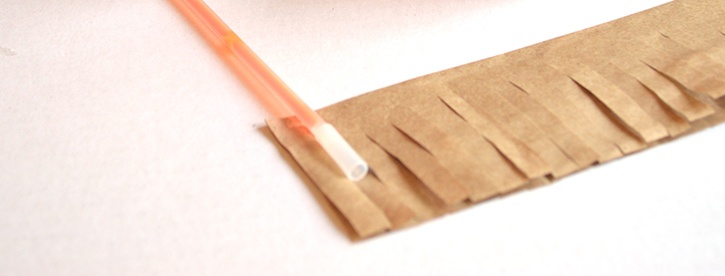
Use Halloween colored twine to finish off the broom.
~Dawn

Dawn Mercedes Barrett is a designer who enjoys juggling a number of activities. Whether it is creating a card or object for home decor, whipping up a batch of fresh cookies for kids that drift through the house, or learning to enjoy the rigors of strengthening her body through running, she is your go-to crafter for help, ideas, and encouragement. Who says you (or your style) have to grow old and moldy? Dawn’s up beat style and silly comments will keep you smiling and chuckling.


