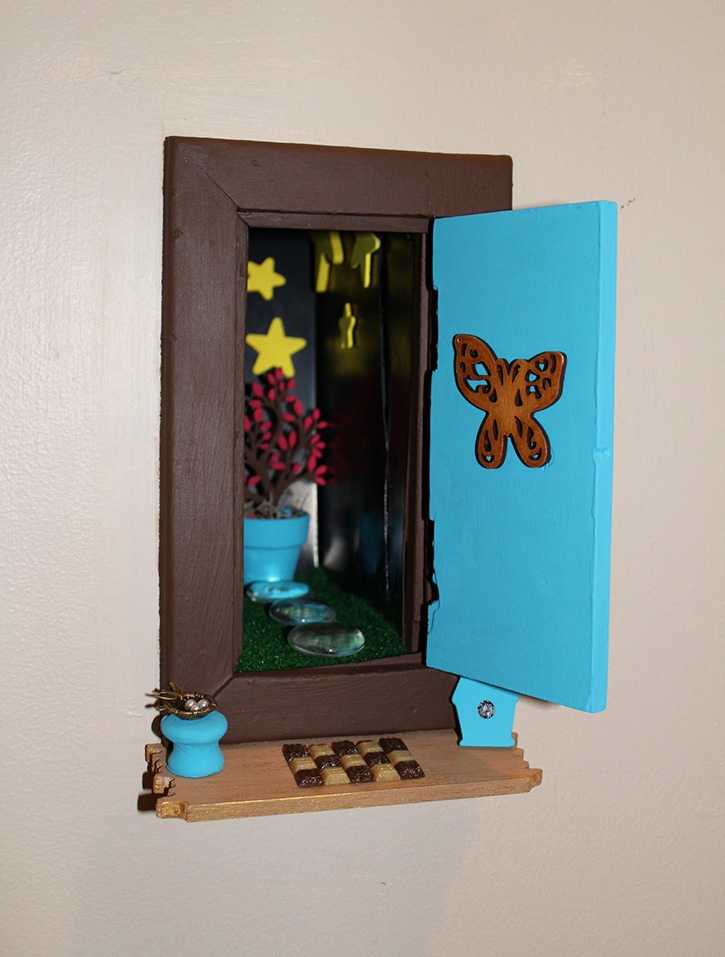
When an old mailbox slot is no longer needed, a fairy door magically appears! Use Glue Dots® Advanced Strength adhesives and customize your own fairy door with objects found around the home or in your craft supplies.
Made by: Danielle Hunter
Time: Approximately 2 hours (not including drying time)
Level: Beginner/Intermediate
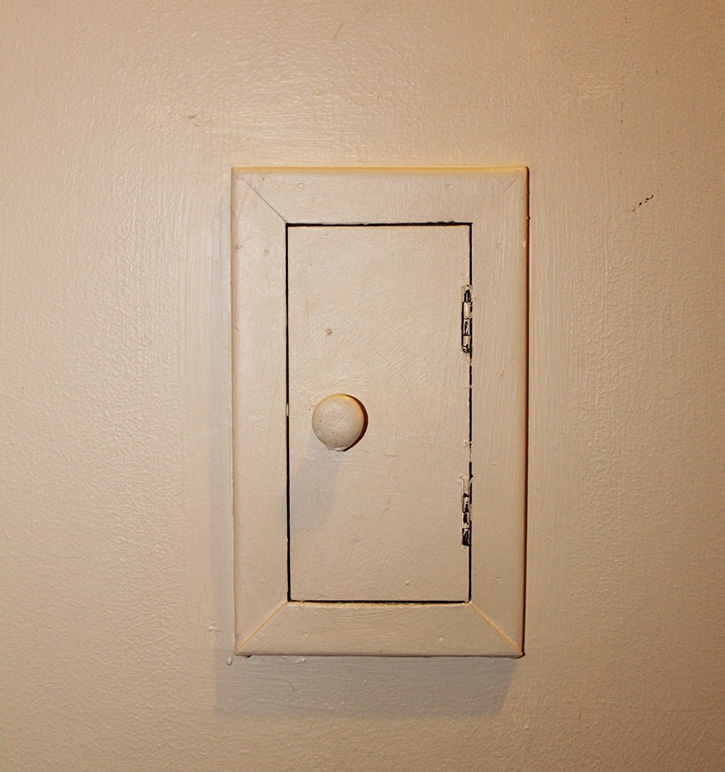
To give you an idea of the transformation, here's what our old mail slot looks like before the make-over. Remember to pick colors that fit your home's color palette when making over an obsolete part of your home.
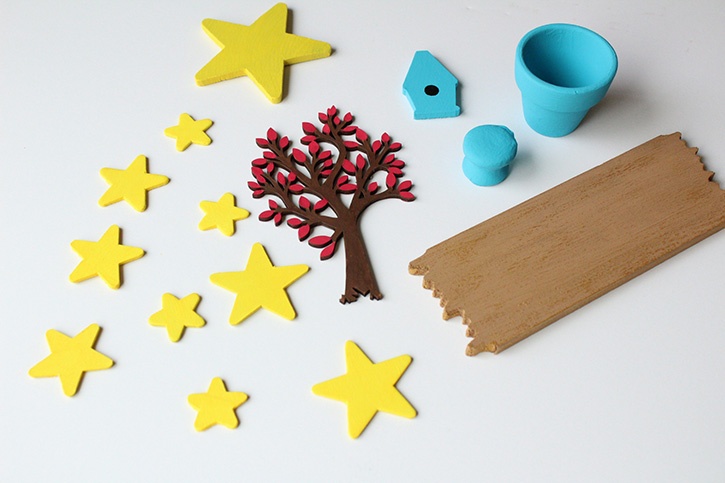
Here's what you need:
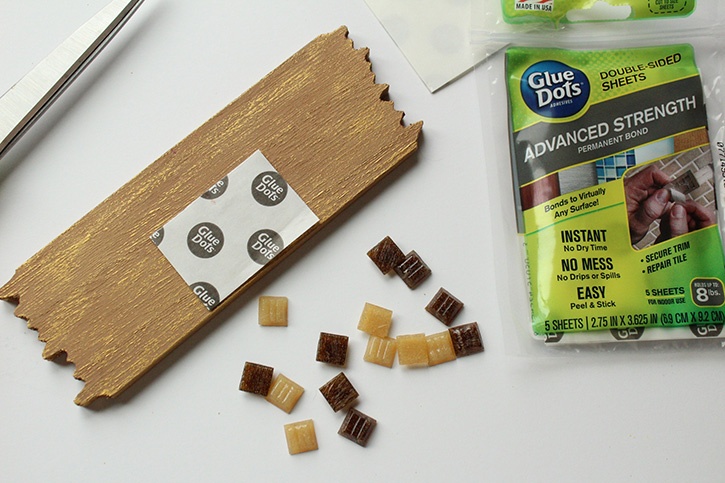
- Glue Dots® Advanced Strength Dot N Go®
- Glue Dots®Advanced Strength Double-Sided Sheets
- Glue Dots® Removable Dots™
- Mailbox door/slot
- Small glass tiles (3/4 x 3/4", 3/8 x 3/8")
- Miniature wood objects (plaque, furniture button, tree, bird house, stars, butterfly)
- Acrylic paint (turquoise, dark brown, light brown, red, gold, black, yellow glow-in-the-dark)
- Deco Art Metallic Lustre (gold rush)
- Marion Smith Junque & Gems (key, bird nest)
- Outdoor carpet sample (green grass)
- Miniature terracotta pot
- Spanish moss
- Clear glass decorative pebbles
- Scissors
- Paint brushes
- Magnets
Here's what you do:
Remove mailbox door knob and set aside. Clean mailbox inside and out. Allow to dry.
Apply 3/4" x 3/4" tiles to front of door using the Advanced Strength Glue Dots.
Paint inside of mailbox black, door turquoise and frame dark brown. Apply 2-3 coats and allow drying time in between coats.
Paint door hinges and furniture button (door knob) gold. Once dry, use Advanced Strength Glue Dots to secure knob onto door.
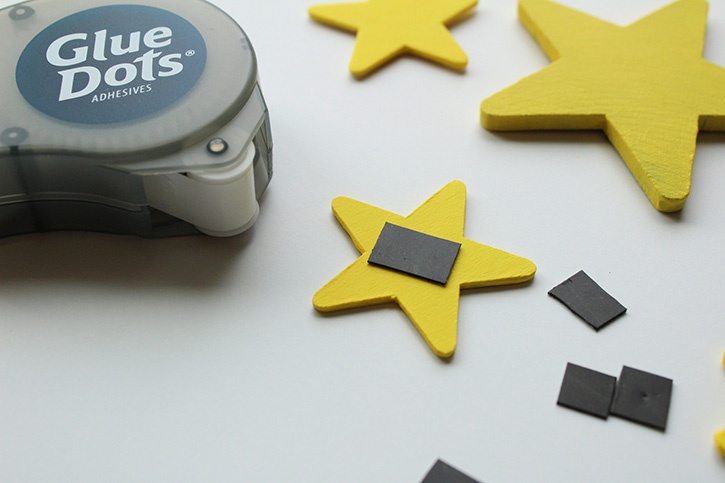
Apply glow-in-the-dark paint onto stars and allow to dry. Use the Advanced Strength Glue Dots and attach magnets to back of stars.
Use turquoise paint on the old mailbox door knob, bird house and terracotta pot. Paint a small black circle in center of bird house.
Paint wood tree using red and light brown paint.
Paint plaque (porch) light brown and once dry, apply a light coat of gold lustre.
Cut a sheet of Advanced Strength Glue Dots the size of door mat, secure to porch and apply 3/8" x 3/8" tiles.
Cut four thin strips of Advanced Strength Double-Sided Sheets, apply to back edges of porch and secure under fairy door.
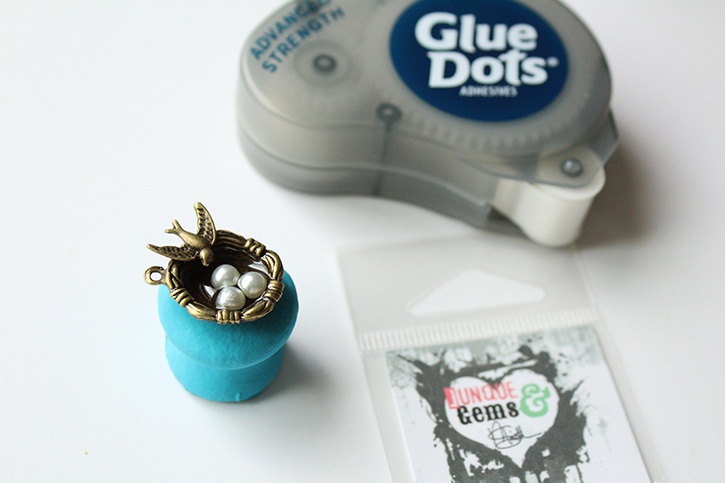
Use the Advanced Strength Glue Dots to attach bird nest to old door knob, butterfly to back of door, and tree inside terracotta pot. Add moss to pot.
Cut carpet sample to fit inside of mailbox and use Advanced Strength Double-Sided Sheets to secure in place.
Decorate and play with your new fairy door!
Tips: Project uses supplies on hand. See what you can find around the house that would be perfect for your fairies or save time and purchase pre-made accessories. Use Removable Glue Dots to hold objects in place when applying paint.
~Danielle

Danielle Hunter is a multitasking mom of two creative girls. She works in human resources for a non-profit organization and is a yoga teacher in training. She lives in Northeast Ohio and has been dedicated to crafting since childhood. Danielle completed her first scrapbook at the age of four, was a scrapbooker-for-hire for several years, and has shared her knowledge in a classroom setting. She enjoys turning trash to treasure, making crafts for kids, and creating artistic projects with bold colors and fun designs. Danielle joined the very first design team for Glue Dots in 2010. Her projects have been featured in Craft Ideas and CardMaker magazines, as well as websites such as Reader’s Digest, HGTV, and Crafting a Green World.


