Isabelle LaRue from Engineer Your Space is on our blog today to show you how to quickly give a mirror a new look with a $2 bag of rhinestones and Repositionable Glue Dots. The best part? The whole look cost under $20!
My home office is set up in a very dark corner of my apartment living room so to brighten it up, I went looking for a mirror to hang on the back wall to reflect some light. I didn't want to spend a lot of money and it turns out IKEA had exactly what I needed: the KOLJA mirror. It was the prefect size (24" x 24") and the price was right at only $10 but it was so plain, it was calling for an upgrade:
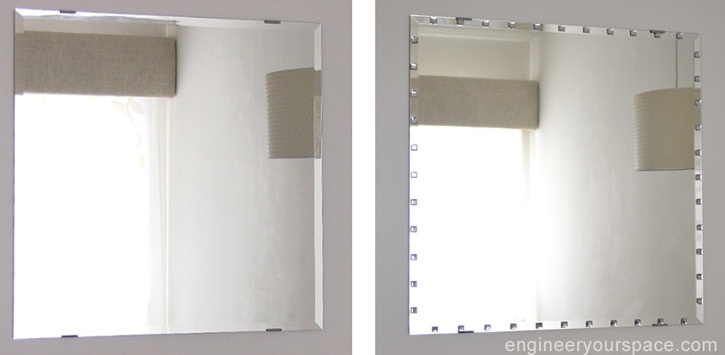
All it took was 30 mins, some square rhinestones ($2 on sale at Joann's), and Glue Dots® Repositionable Dispenser to give it some extra sparkle and style:
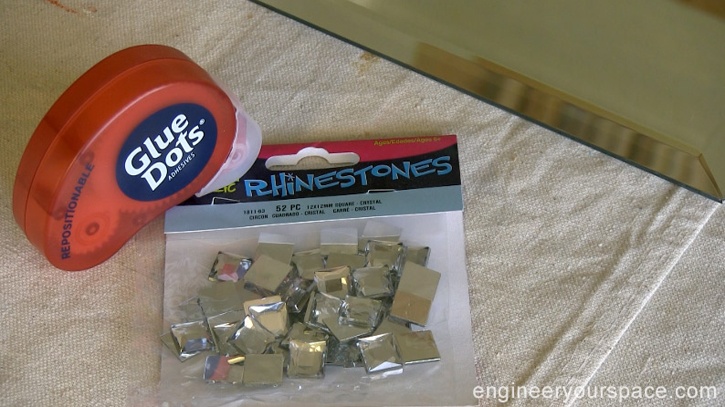
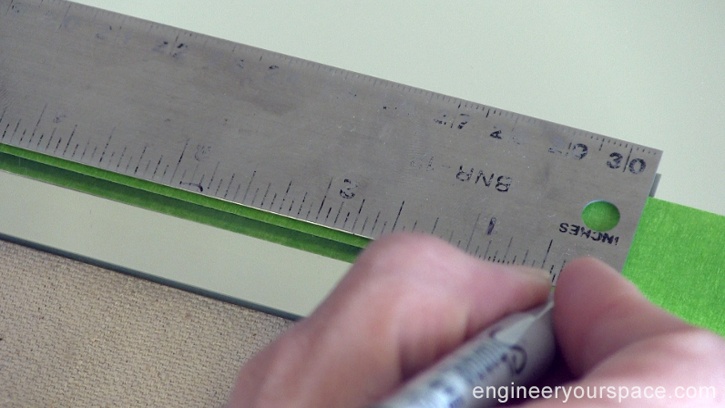
Step 1: Place some tape along on side of the mirror and mark the spacing for the rhinestones. I spaced mine 2" apart, starting 1 3/4" from the ends which meant I needed 11 rhinestones per side - one package (52 rhinestones per package) was enough for this project.
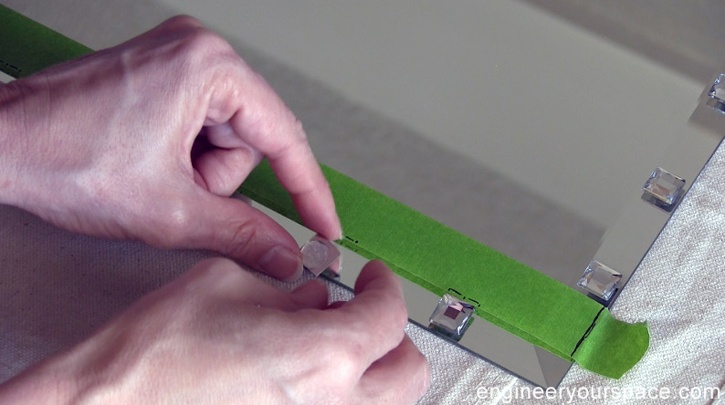
Step 2: Add a dot to the back of each rhinestone using the Repositionable Dispenser - it's a lot less messier than using glue and it's easy to re-position if necessary.
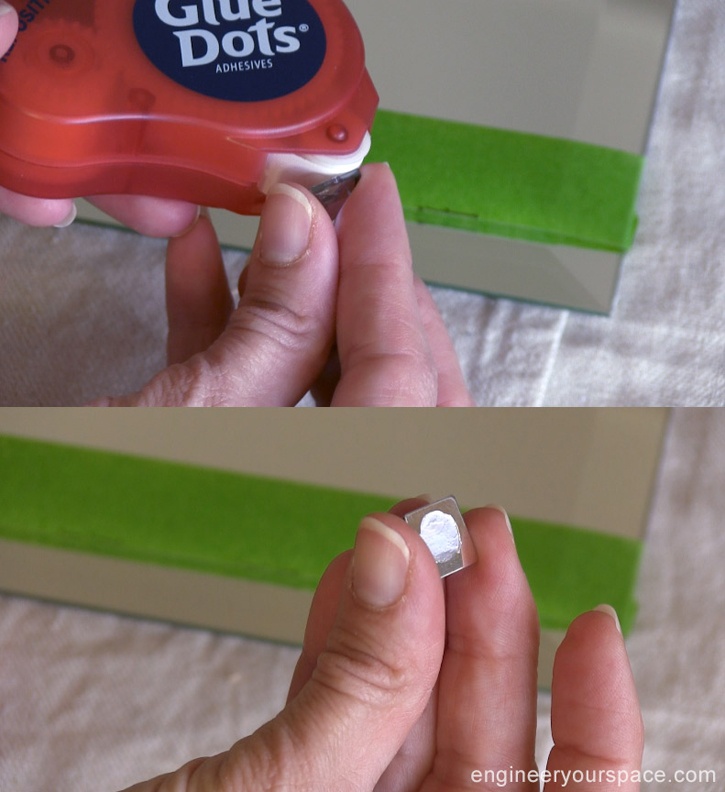
Step 3: Line up the rhinestones with the marks on the tape, and press firmly into place. After one side is done, remove the tape and repeat for the other 3 sides.
Step 4: Hang your mirror with the clips as per the IKEA instructions (the rhinestones won't interfere with the clips).
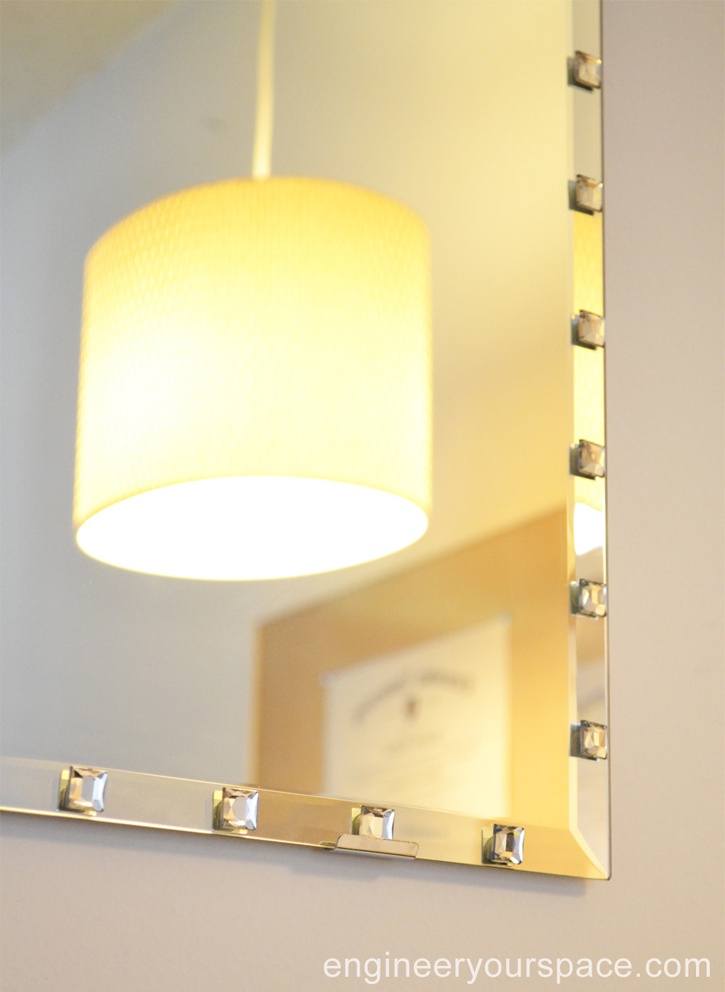
It was such a simple inexpensive upgrade to do and I love the new look it gave the mirror - lots more sparkle and personality than before!
~Isabelle
P.S. For a more permanent solution, use Glue Dots Advanced Strength Dispenser; however, be aware that this adhesive may stick aggressively to the embellishments and cause damage.
For more DIY inspiration, subscribe to the Engineer Your Space YouTube channel or click here to check out the Engineer Your Space blog.

Isabelle LaRue, is the creator, producer and host of “Engineer Your Space” (EYS), an award winning DIY home design show on YouTube. A building engineer turned DIY home design expert, she is affectionately referred to as “MacGyver and Martha Stewart’s love child” for her clever and elegant DIY home décor solutions. While her projects aim to solve common challenges faced by renters and small space dwellers, anyone looking to improve their home on a budget can put her ideas to good use. Bad lighting? Ugly floor? Can’t paint? Isabelle has you covered. She designs and builds all of her incredible budget-friendly creations in her apartment, on her own, using simple tools and common materials accessible to everyone. Stylish, functional and affordable, her designs have been featured on many websites including HGTV, Houzz, Apartment Therapy, and The Huffington Post to name a few. Don’t know the first thing about DIY? Isabelle walks her viewers through every step of the project in detail, sharing her “MacGyver” tips and tricks along the way. She has a knack for breaking down everything into manageable, easy to understand steps and makes everyone watching feel like they can do it too. Watch Isabelle in action and you too will be inspired to transform your “less than perfect” space into a place you’ll be proud to call home.


